Notebook 2 - Solar envelope
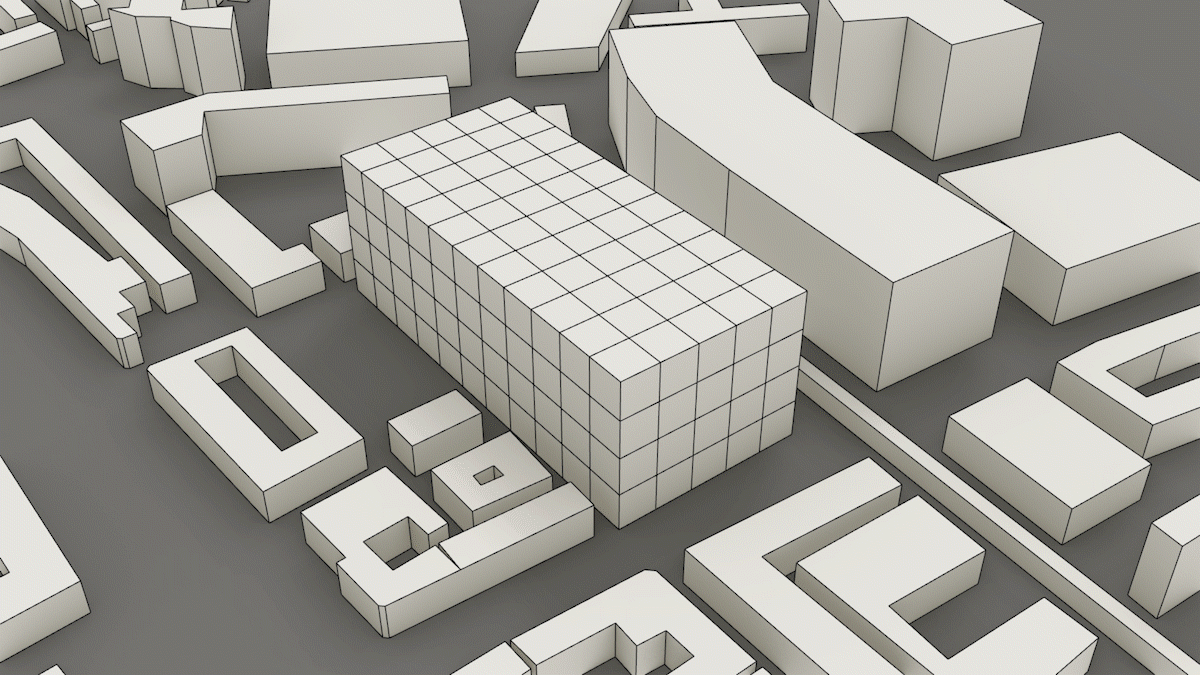
In the following script, the voxelized envelope, as created in Notebook 1, will be optimized in regards to its shadow footprint or solar envelope. In the first part of this script, the logic is set up to use ladybug and trimesh to shoot rays both from the different sun positions towards the voxels and inverse from voxels towards sun positions.
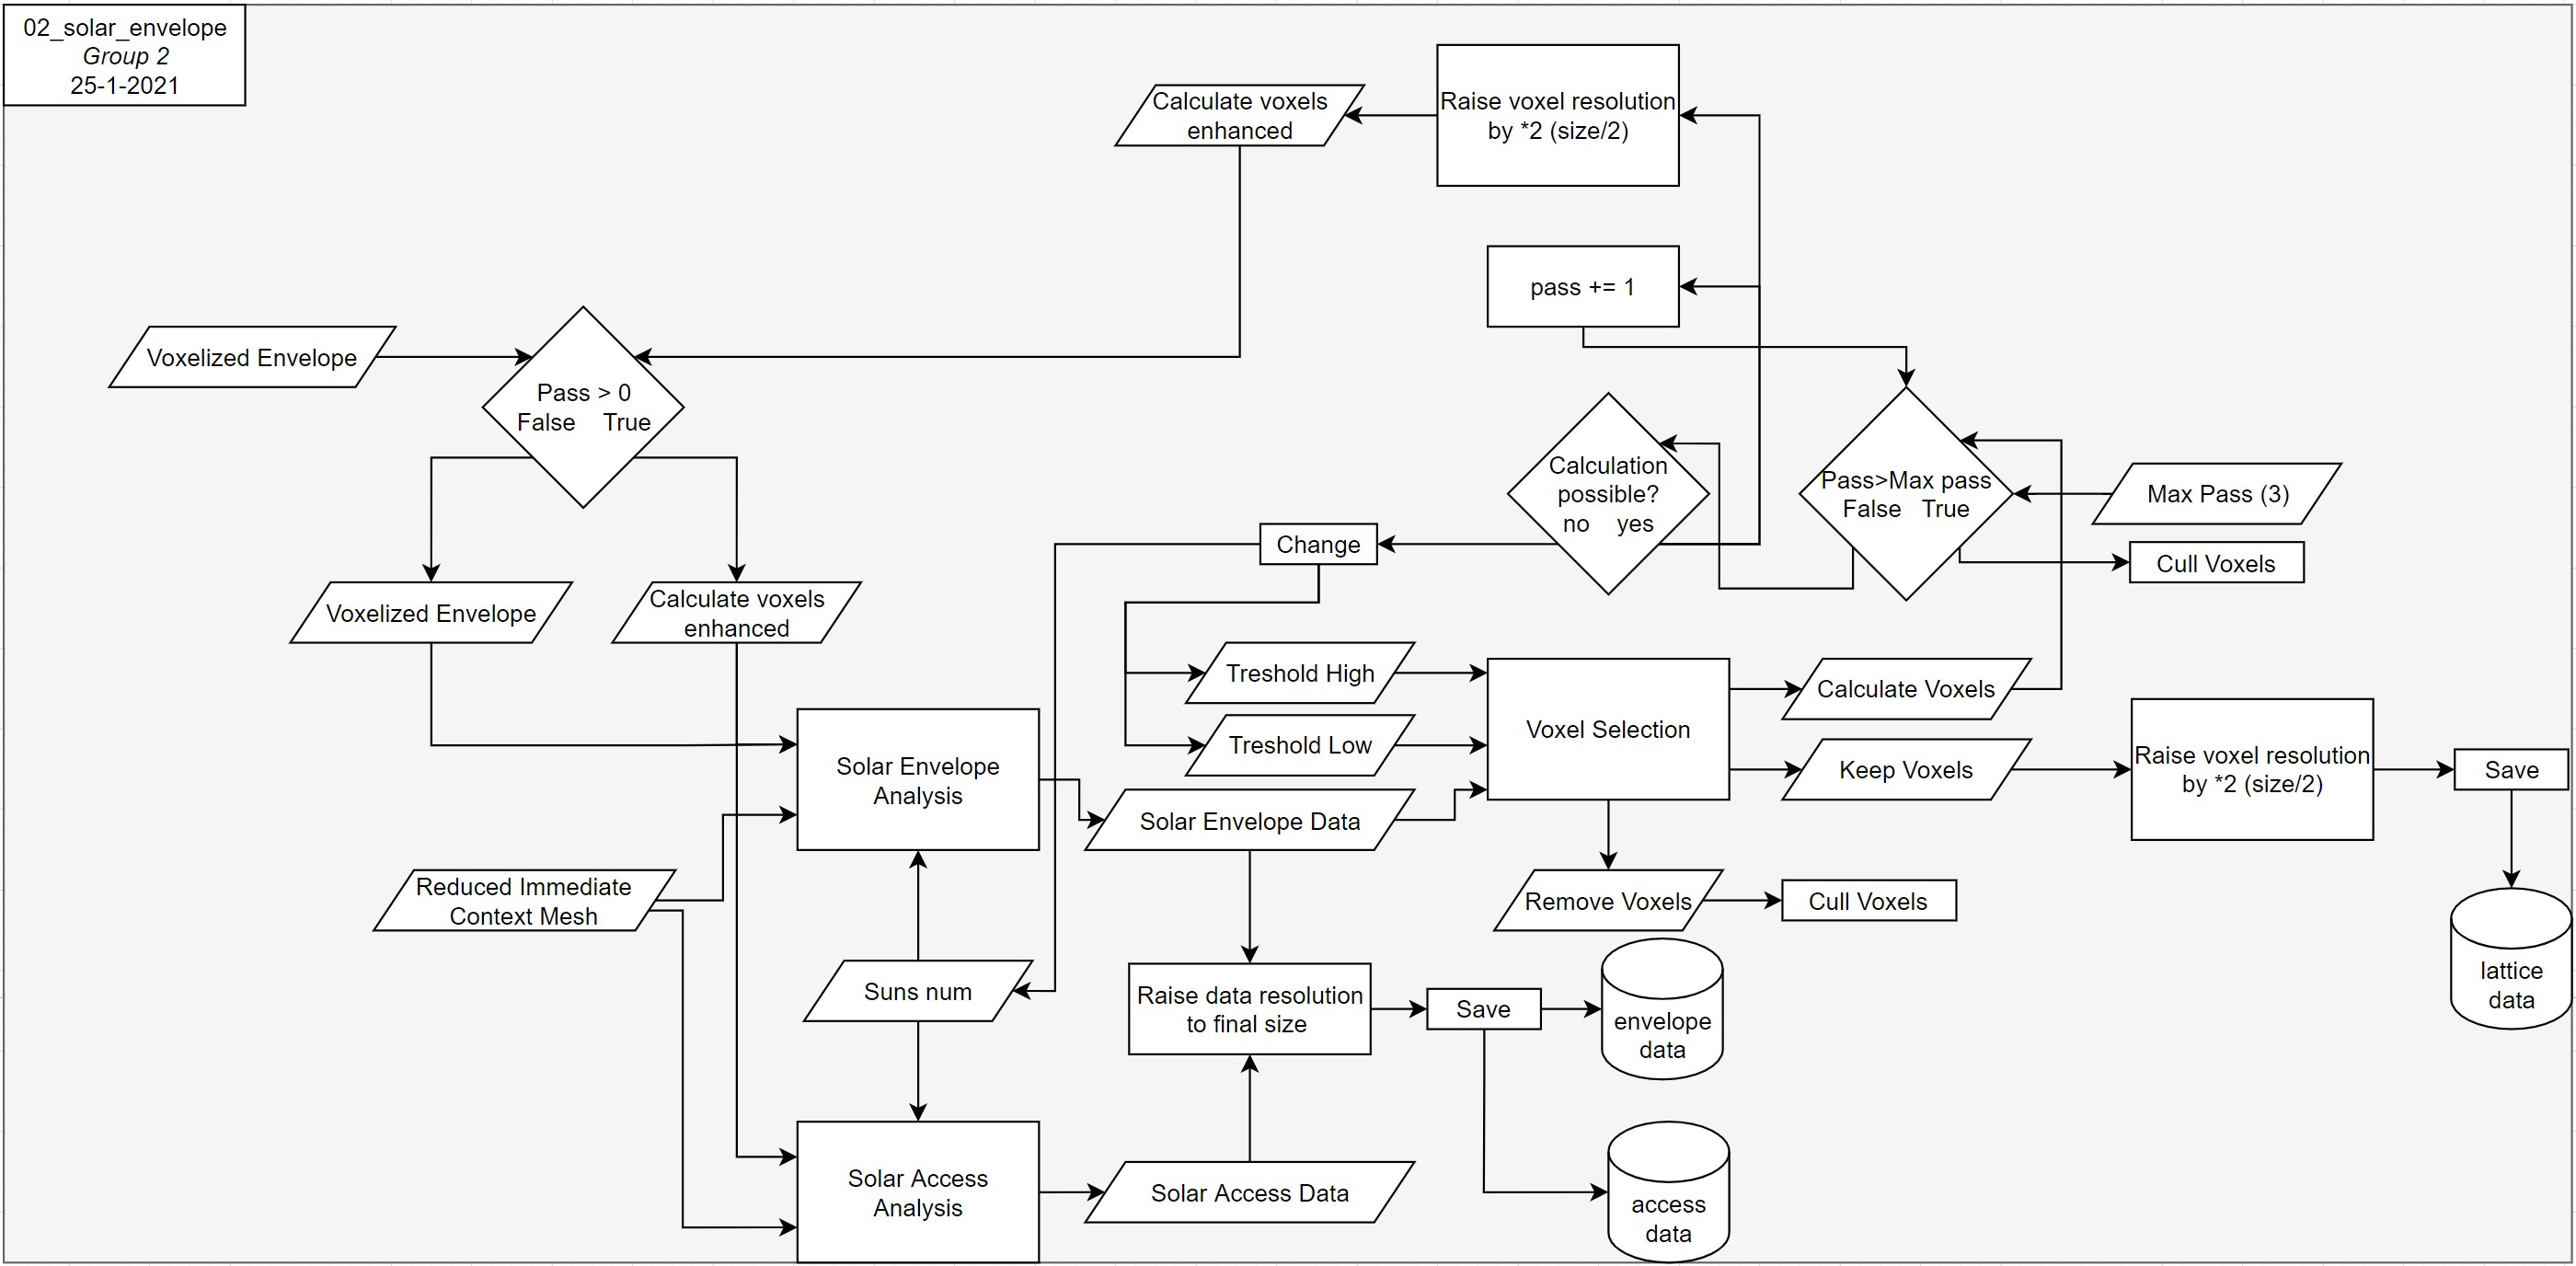
Flowchart
The flowchart as shown in Figure 25 is in the first (purple) section of the fundamental flowchart as shown in the Planning - products.
Additional diagrams
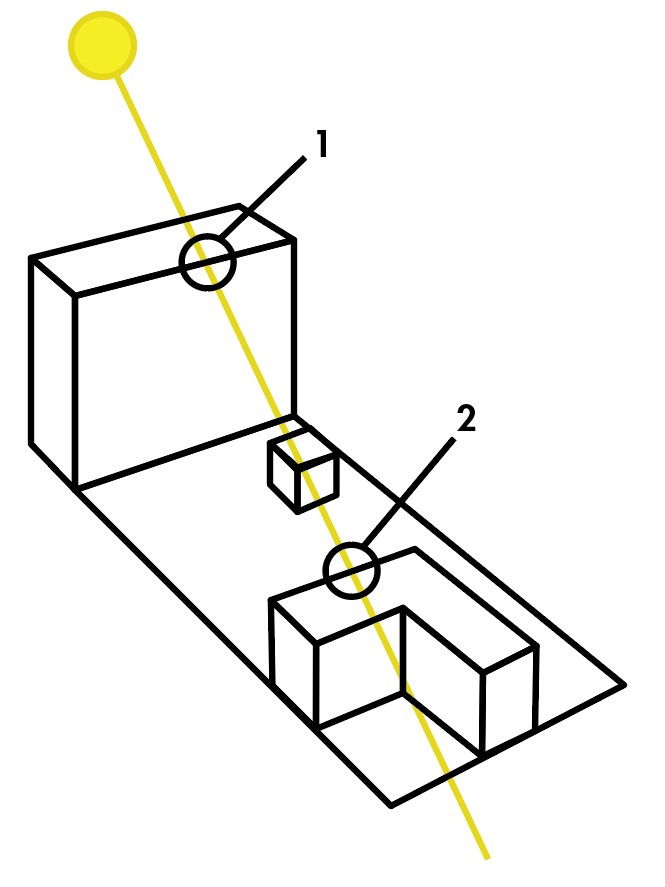
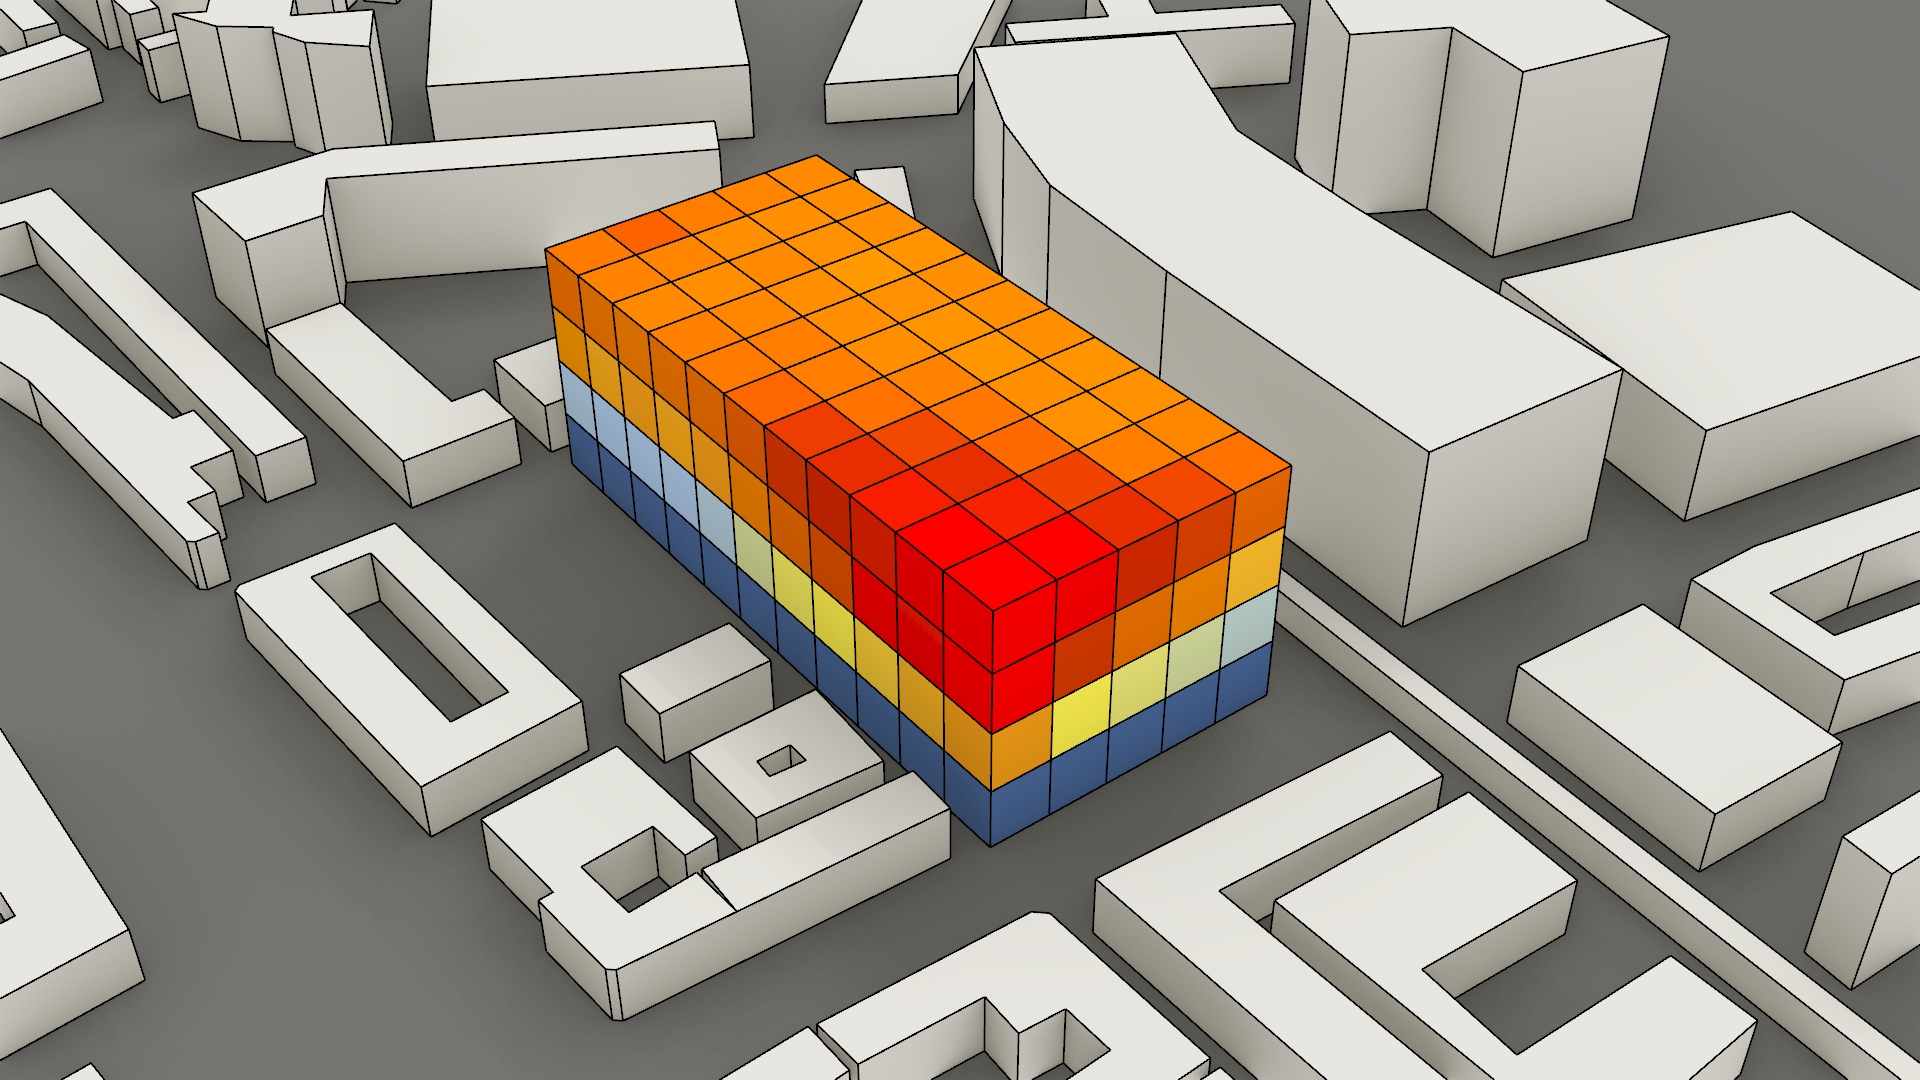
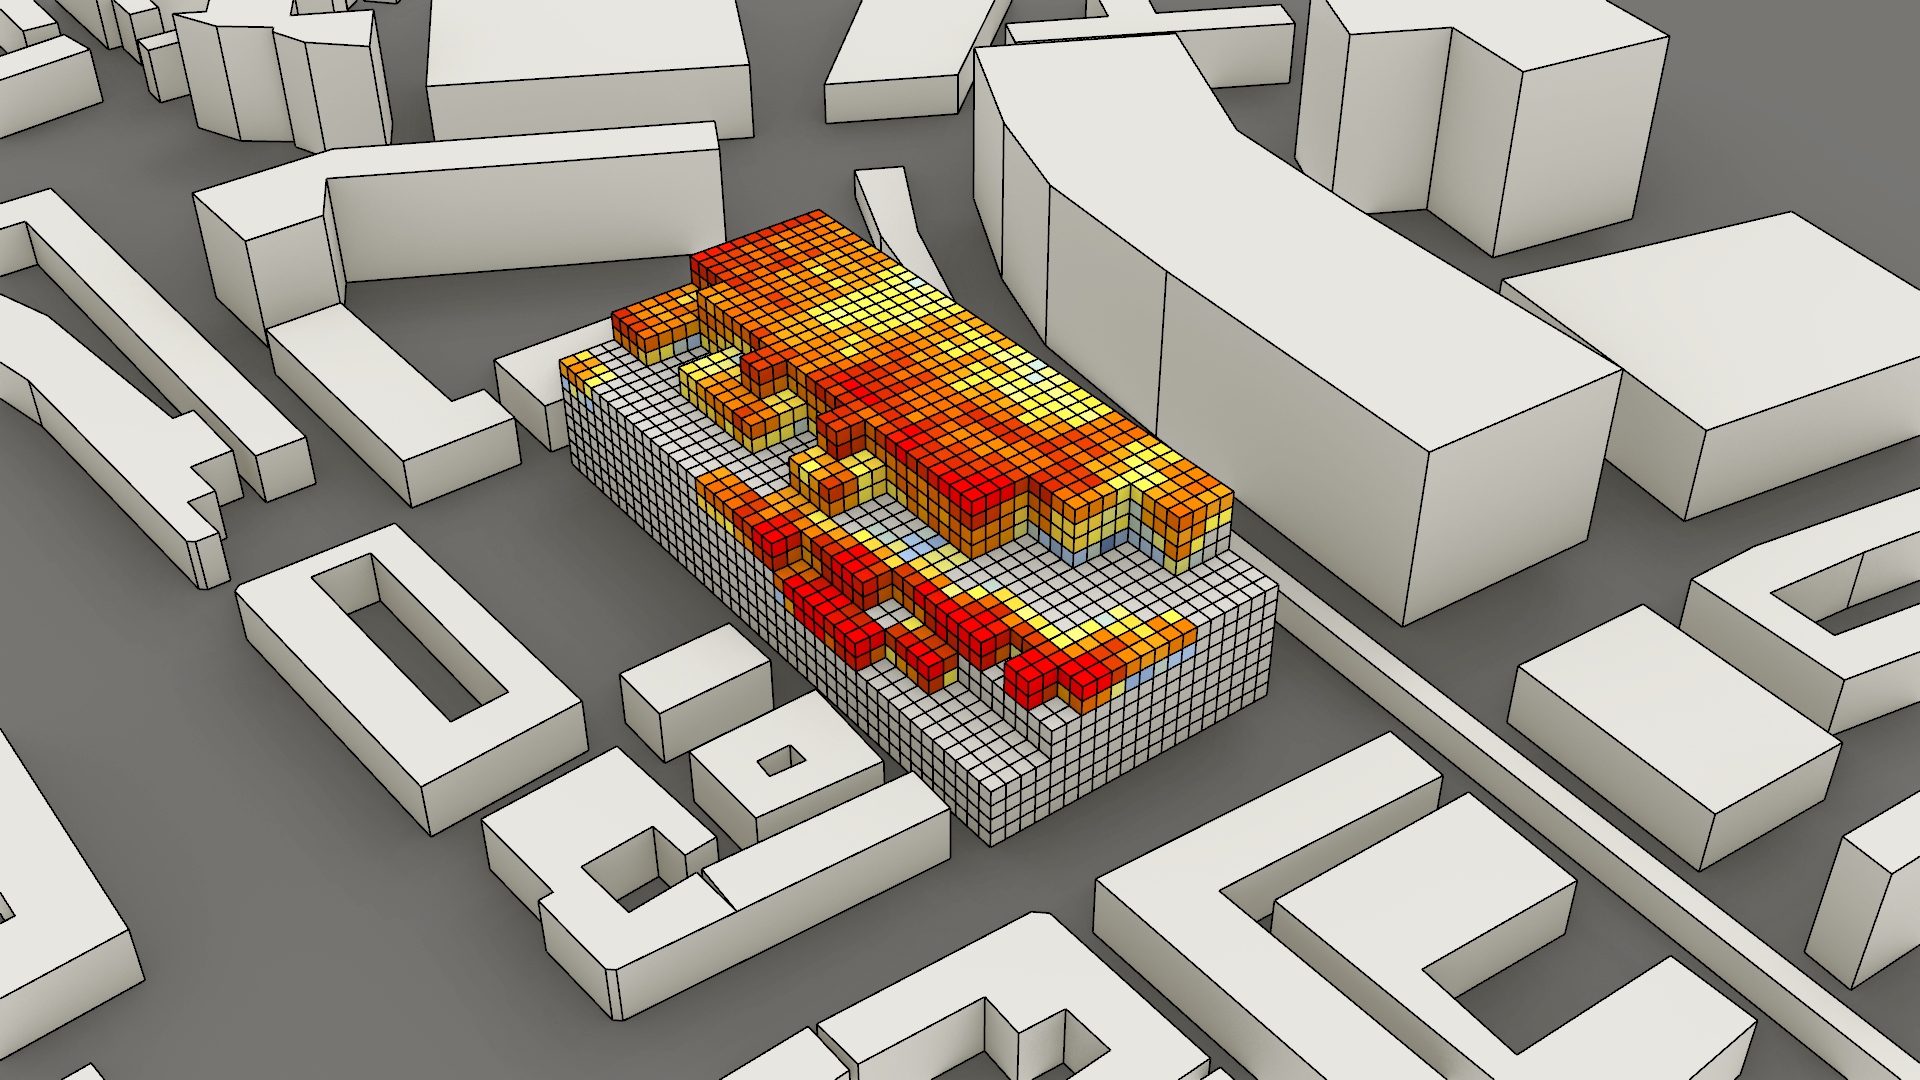
Firstly, a Solar access calculation is done with vectors from suns towards the voxels. If these rays intersect with the context mesh they are set to 0.
Secondly and more importantly, a solar envelope calculation is done by shooting rays from the voxels towards the sun. Then this list of rays is compared with the list from solar access. Figure 27 visualizes how the logic behind the solar envelope works. When an intersection is found at place 2, a shadow is cast on the context. It is important to establish whether this shadow was cast by the voxel or by the context. For this, we use the comparison with the solar access list. If an intersection is found at 1, the shadow is cast by the context. For a ray to count towards the solar envelope of a voxel, an intersection needs to be found at 2 and not at 1.
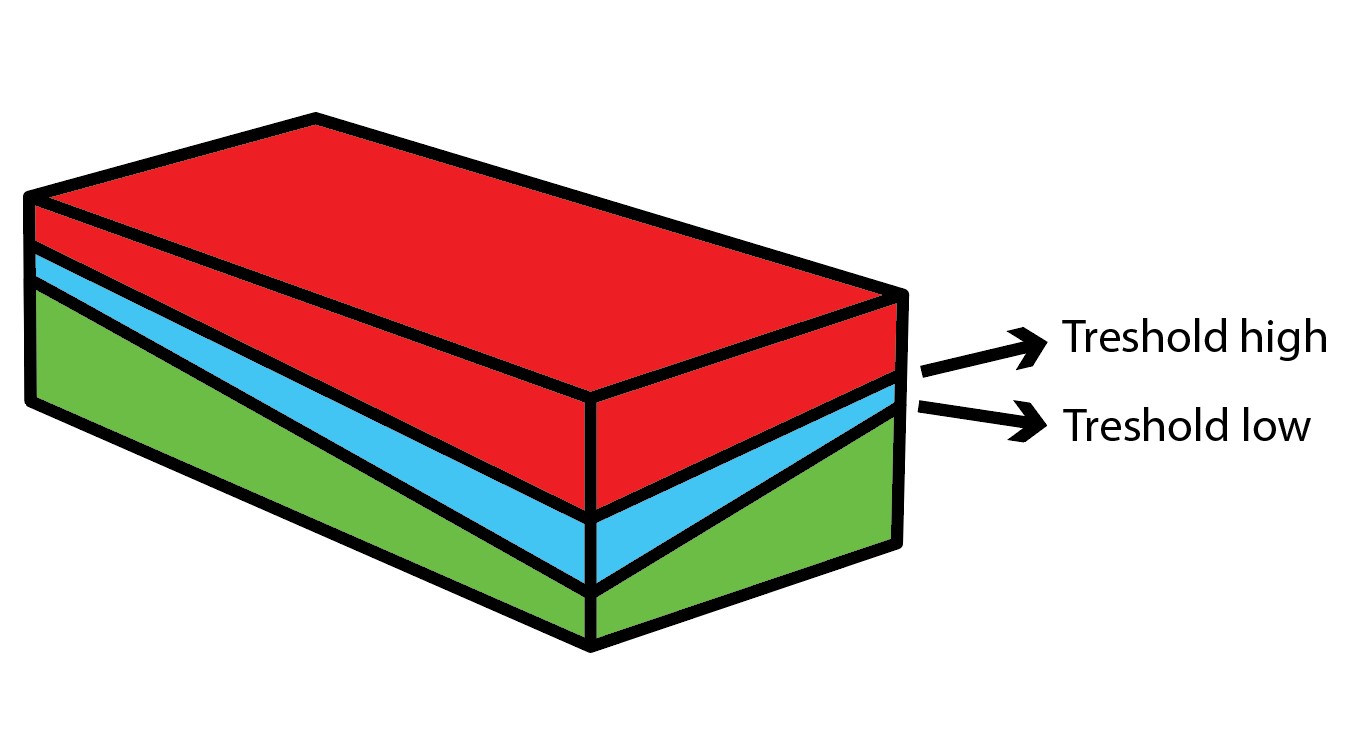
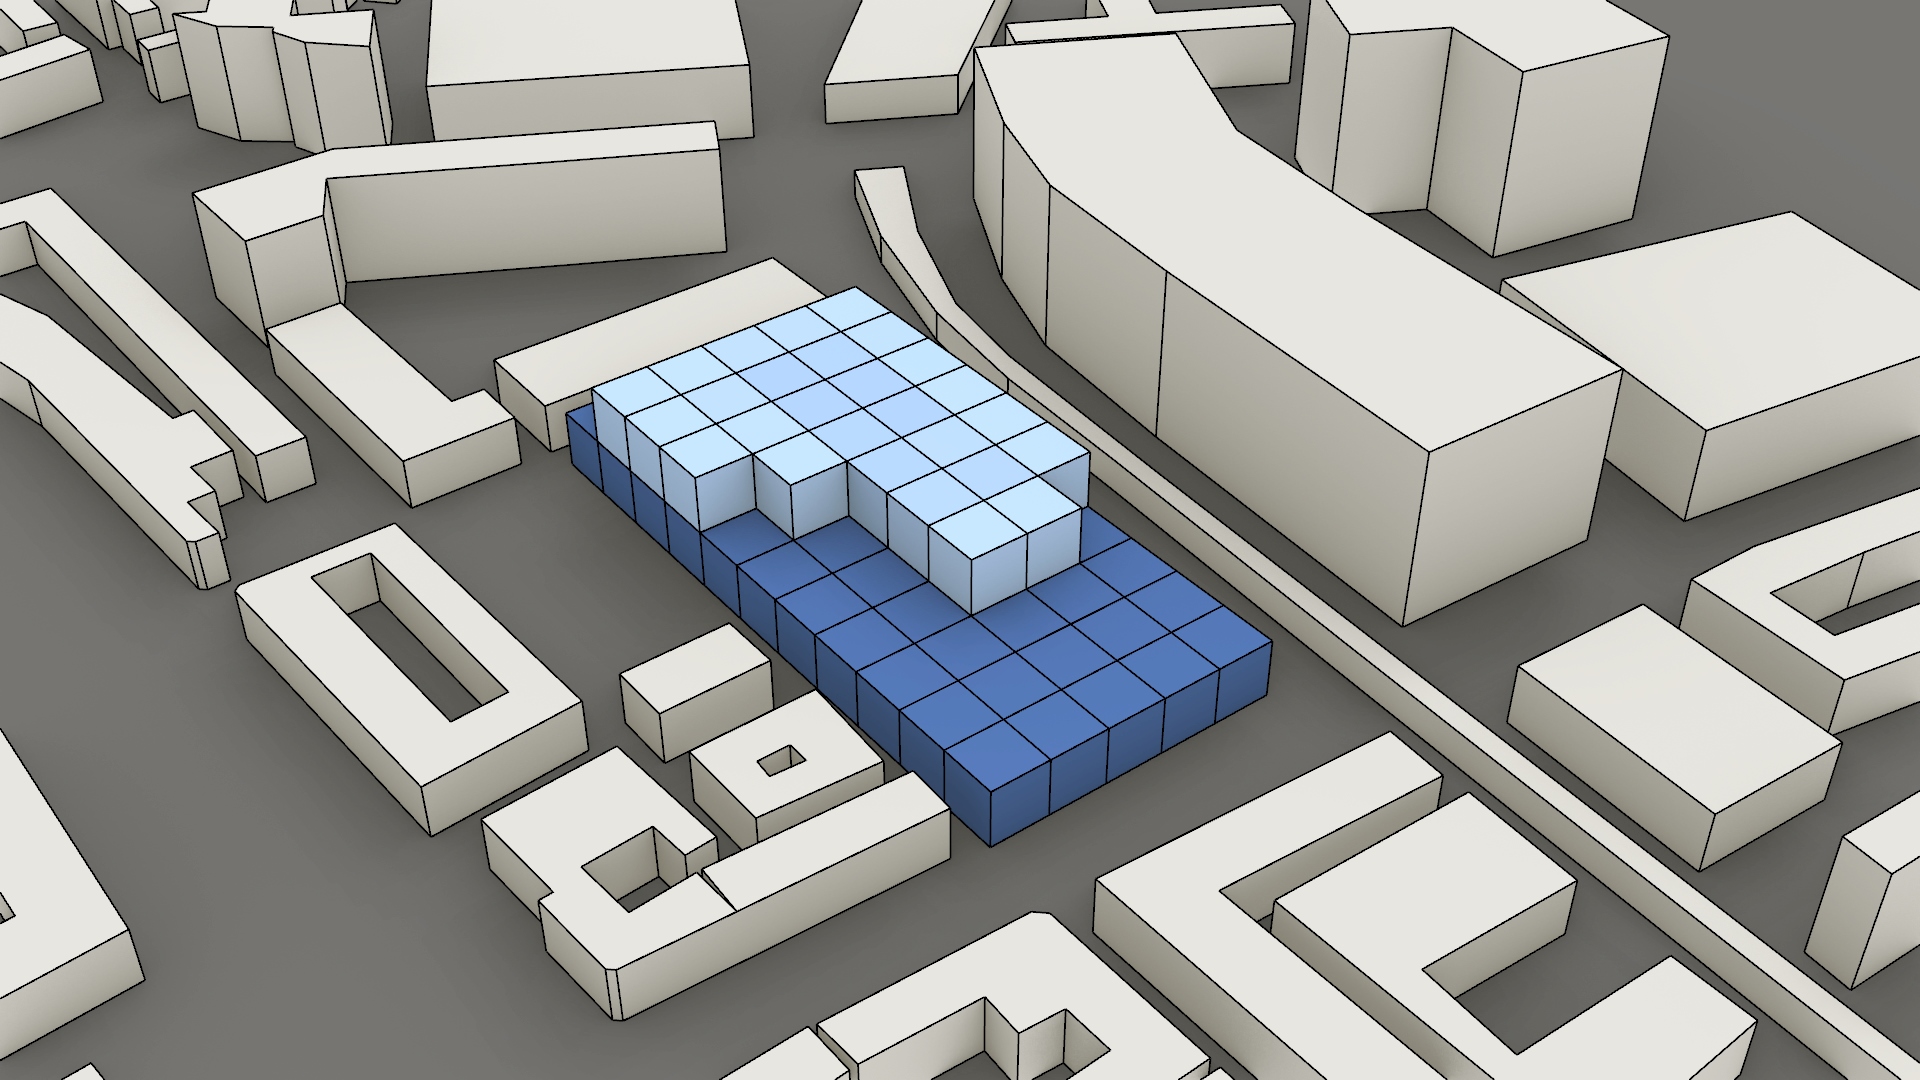
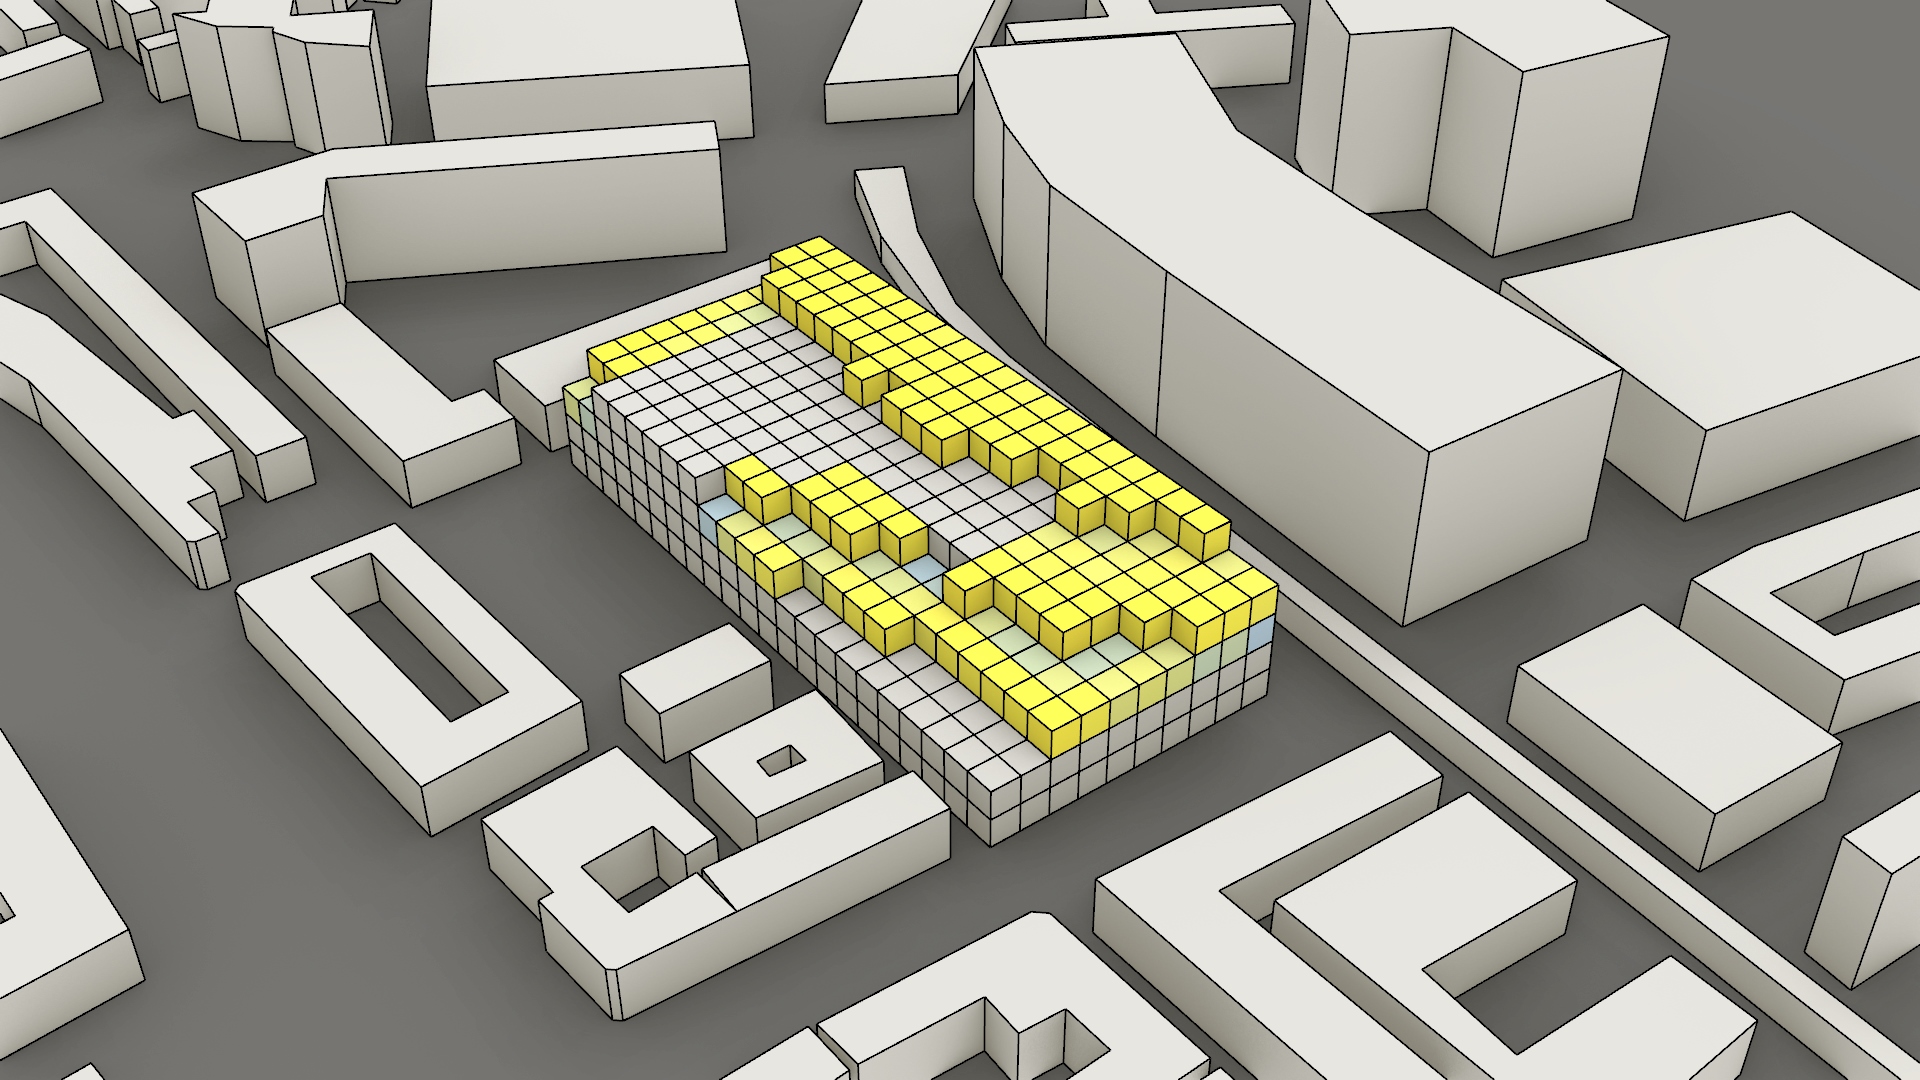
When the solar analysis is done, the list of voxels is split, using a low and high bound threshold value. A threefold of lattices are established in this step: Voxels to recalculate, voxels to keep and voxels to remove. As you can see in Figure 28, the red top part would be removed, the blue recalculated and the green kept.
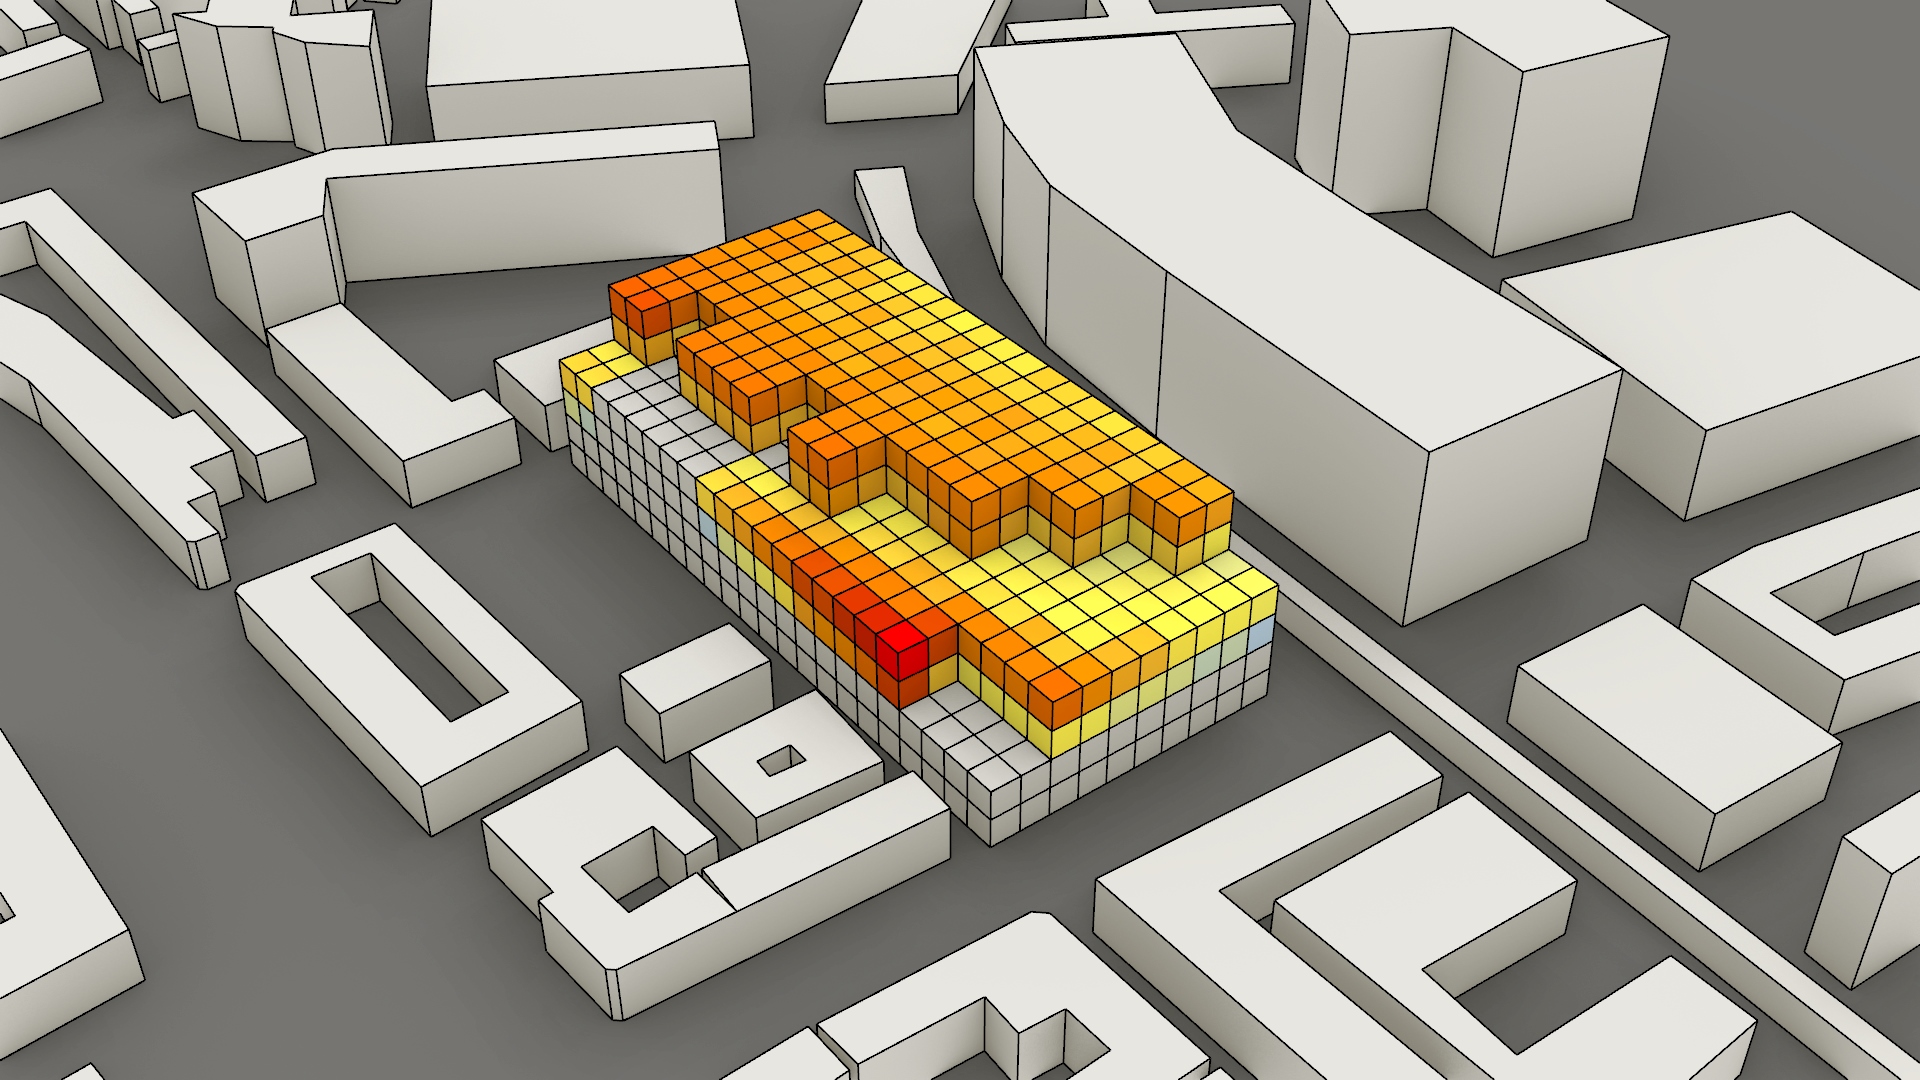
The resolution of these lattices are increased to a desired size. In our case one voxel is split into 8 smaller voxels, this is called an Octree system. This whole process can be seen as Pass 1. With the recalculation lattice, the process is repeated until, in our case, the voxel size is 3,6. A total of three passes were needed. Each pass is individually exported a CSV or pickled into a txt file.
Pseudo code
This is the Pseudo code for Notebook 2.
#Import envelope mesh and context mesh
envelope_mesh = envelope.stl
context_mesh = extended_context_reduced.stl

#Visualize meshes with pyvista

#Import lattice
On first pass lattice = lattice_14_4.csv
On subsequent passes lattice = lattice_continue.csv

#Visualize lattice with pyvista

#Define Sunpath
Choose day_multiple carefully, between 15 and 75
Compute the sun_vectors to shoot
Visualize suns with pyvista

#Compute intersections
Create two seperate lists for ray direction for envelope and access
Check the number of rays carefully, should definetly be under 120k and ideally under 100k

Compute the intersections for solar_acces
Compute the intersections for solar_envelope

#Aggregate Simulation results
Translate list of rays with 1 or 0 on hit or miss to a value per voxel.
For solar envelope check if shadow is not cast by context by comparing the acces and envelope lists

#Save solar information to an array
Iterate over each voxel and add its solar acces and envelope value

#Visualize solar acces and envelope with pyvista

#Save solar data to a csv
write solar access to 'solar_acces_(current voxel size).csv'
write solar envelope to 'solar_envelope_(current voxel size).csv'

#Initialize Variables
voxel sizes:
    current
    required
    final
Treshold values:
    low bound
    high bound
Shape:
    current lattice height
    current lattice length
    current lattice width

#Initialize Envelope CSV
import: current size solar Envelope
    read shape via lattice
    read data with csv.reader
CSV useable:
    Convert strings to int where possible
    Remove empty lists
    Arrange in Lattice shape

#Use Tresholds to split data
For each voxel
    if the envelope value is between the Tresholds
        Scale voxel to the required size and add to recalculate coords

    elif the envelope value is between 0 and high bound
        Scale voxel to the required size and add to keep coords

    elif the envelope value is greater than the high bound
        Scale voxels to the required size and add to remove coords

#Find the min and max of keep coords per x,y coordinate
For each x y in keep coords
    if voxel is in keep coords
        add z to temp_list
    find min and max in temp_list add with x y to min_max_list ([x,y,min_z,max_z])

#Establish seperate lists for x y and min max
For each list in min_max_list
    add x y to min_max_coords
    add min max to min_max_values

#Fill any voxel between the max and min
For each list in min_max_list
    For each z value between min and max
        add coordinates to calculate_coords

#Use a list of all voxels under the high bound to find which to keep
establish full_coords as combination of recalculate coords and keep coords

for each voxel in full_coords
    if x y is in min_max_values
        find the index of x y in min_max_values
        use index to find min max

        if z is greater than the min value
            add this index to a pop_list

establish final_coords as full_coords with both pop_list and remove coords removed

Scale the final_coords voxels to the final size


#Use the largest size voxel csv as basis for translation
Import the CSV
    read data with csv.reader
CSV useable:
    Convert strings to int where possible
    Remove empty lists
    Place top lines into top_csv
    Place rest of the lines into rest_csv

#Translate the current solar data to the final resolution
using np.kron upscale the solar acces and envelope
pickle solar envelope to 'solar_envelope_pass_(num).txt'
pickle solar access to 'solar_access_pass_(num).txt'

#Use final_coords to create a list of final size voxels to print after this pass
For each top_csv lines
    set both the shape and size correct

Scale the rest_csv voxels into the final size
Set each boolean to false

For each voxel in final_coords
    if the voxel is also in rest_csv
        set the boolean to True

Establish final_result as the combination of top_csv and rest_csv

#Repeat this process for the voxels in calculate_coords
For each top_csv lines
    set both the shape and size correct

Scale the rest_csv voxels into the final size
Set each boolean to false

For each voxel in final_coords
    if the voxel is also in rest_csv
        set the boolean to True

Establish calculate_result as the combination of top_csv and rest_csv

Write final_result to 'lattice_print_pass_(num).txt' with proper enters
Write calculate_result to 'lattice_continue.txt' with proper enters
Visualisations of the result
GIF
Voxelcloud
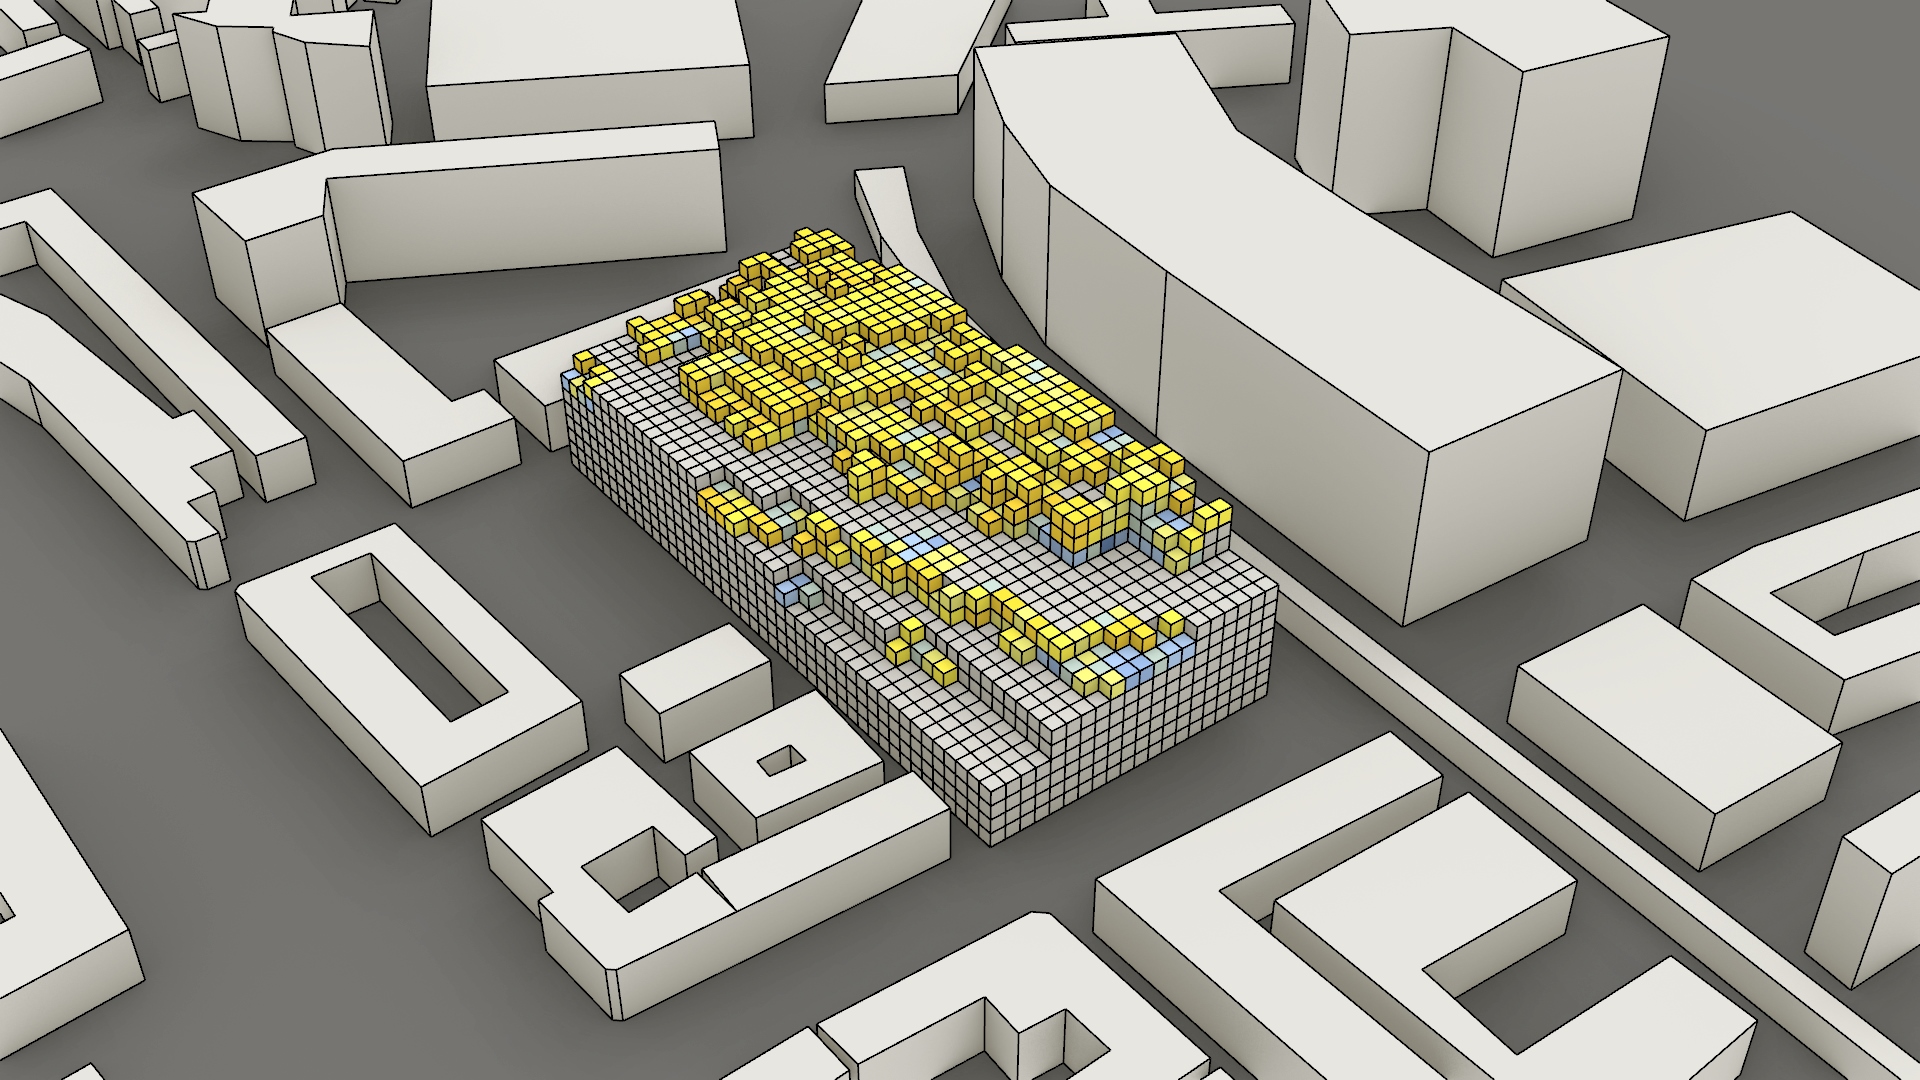
1) This is the first solar envelope done on a voxel size of 14,4.
2) The visible voxels are kept.
3) The smaller voxels added back to the model are recalculated at size 7,2.
4) These voxels are kept.
5) Again the voxel size is reduced and the visualised part is recalculated.
6) The end result.