Results
Spatial Computing full video
As a summary, we made a video with all the changes of the notebook.
Floorplans
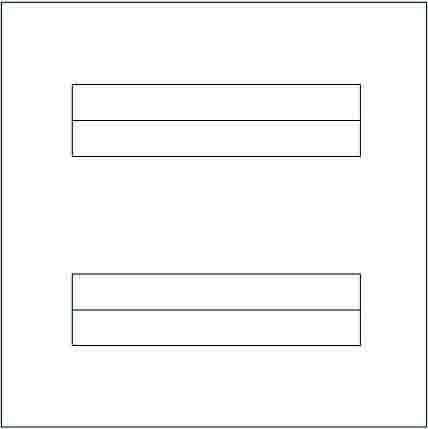
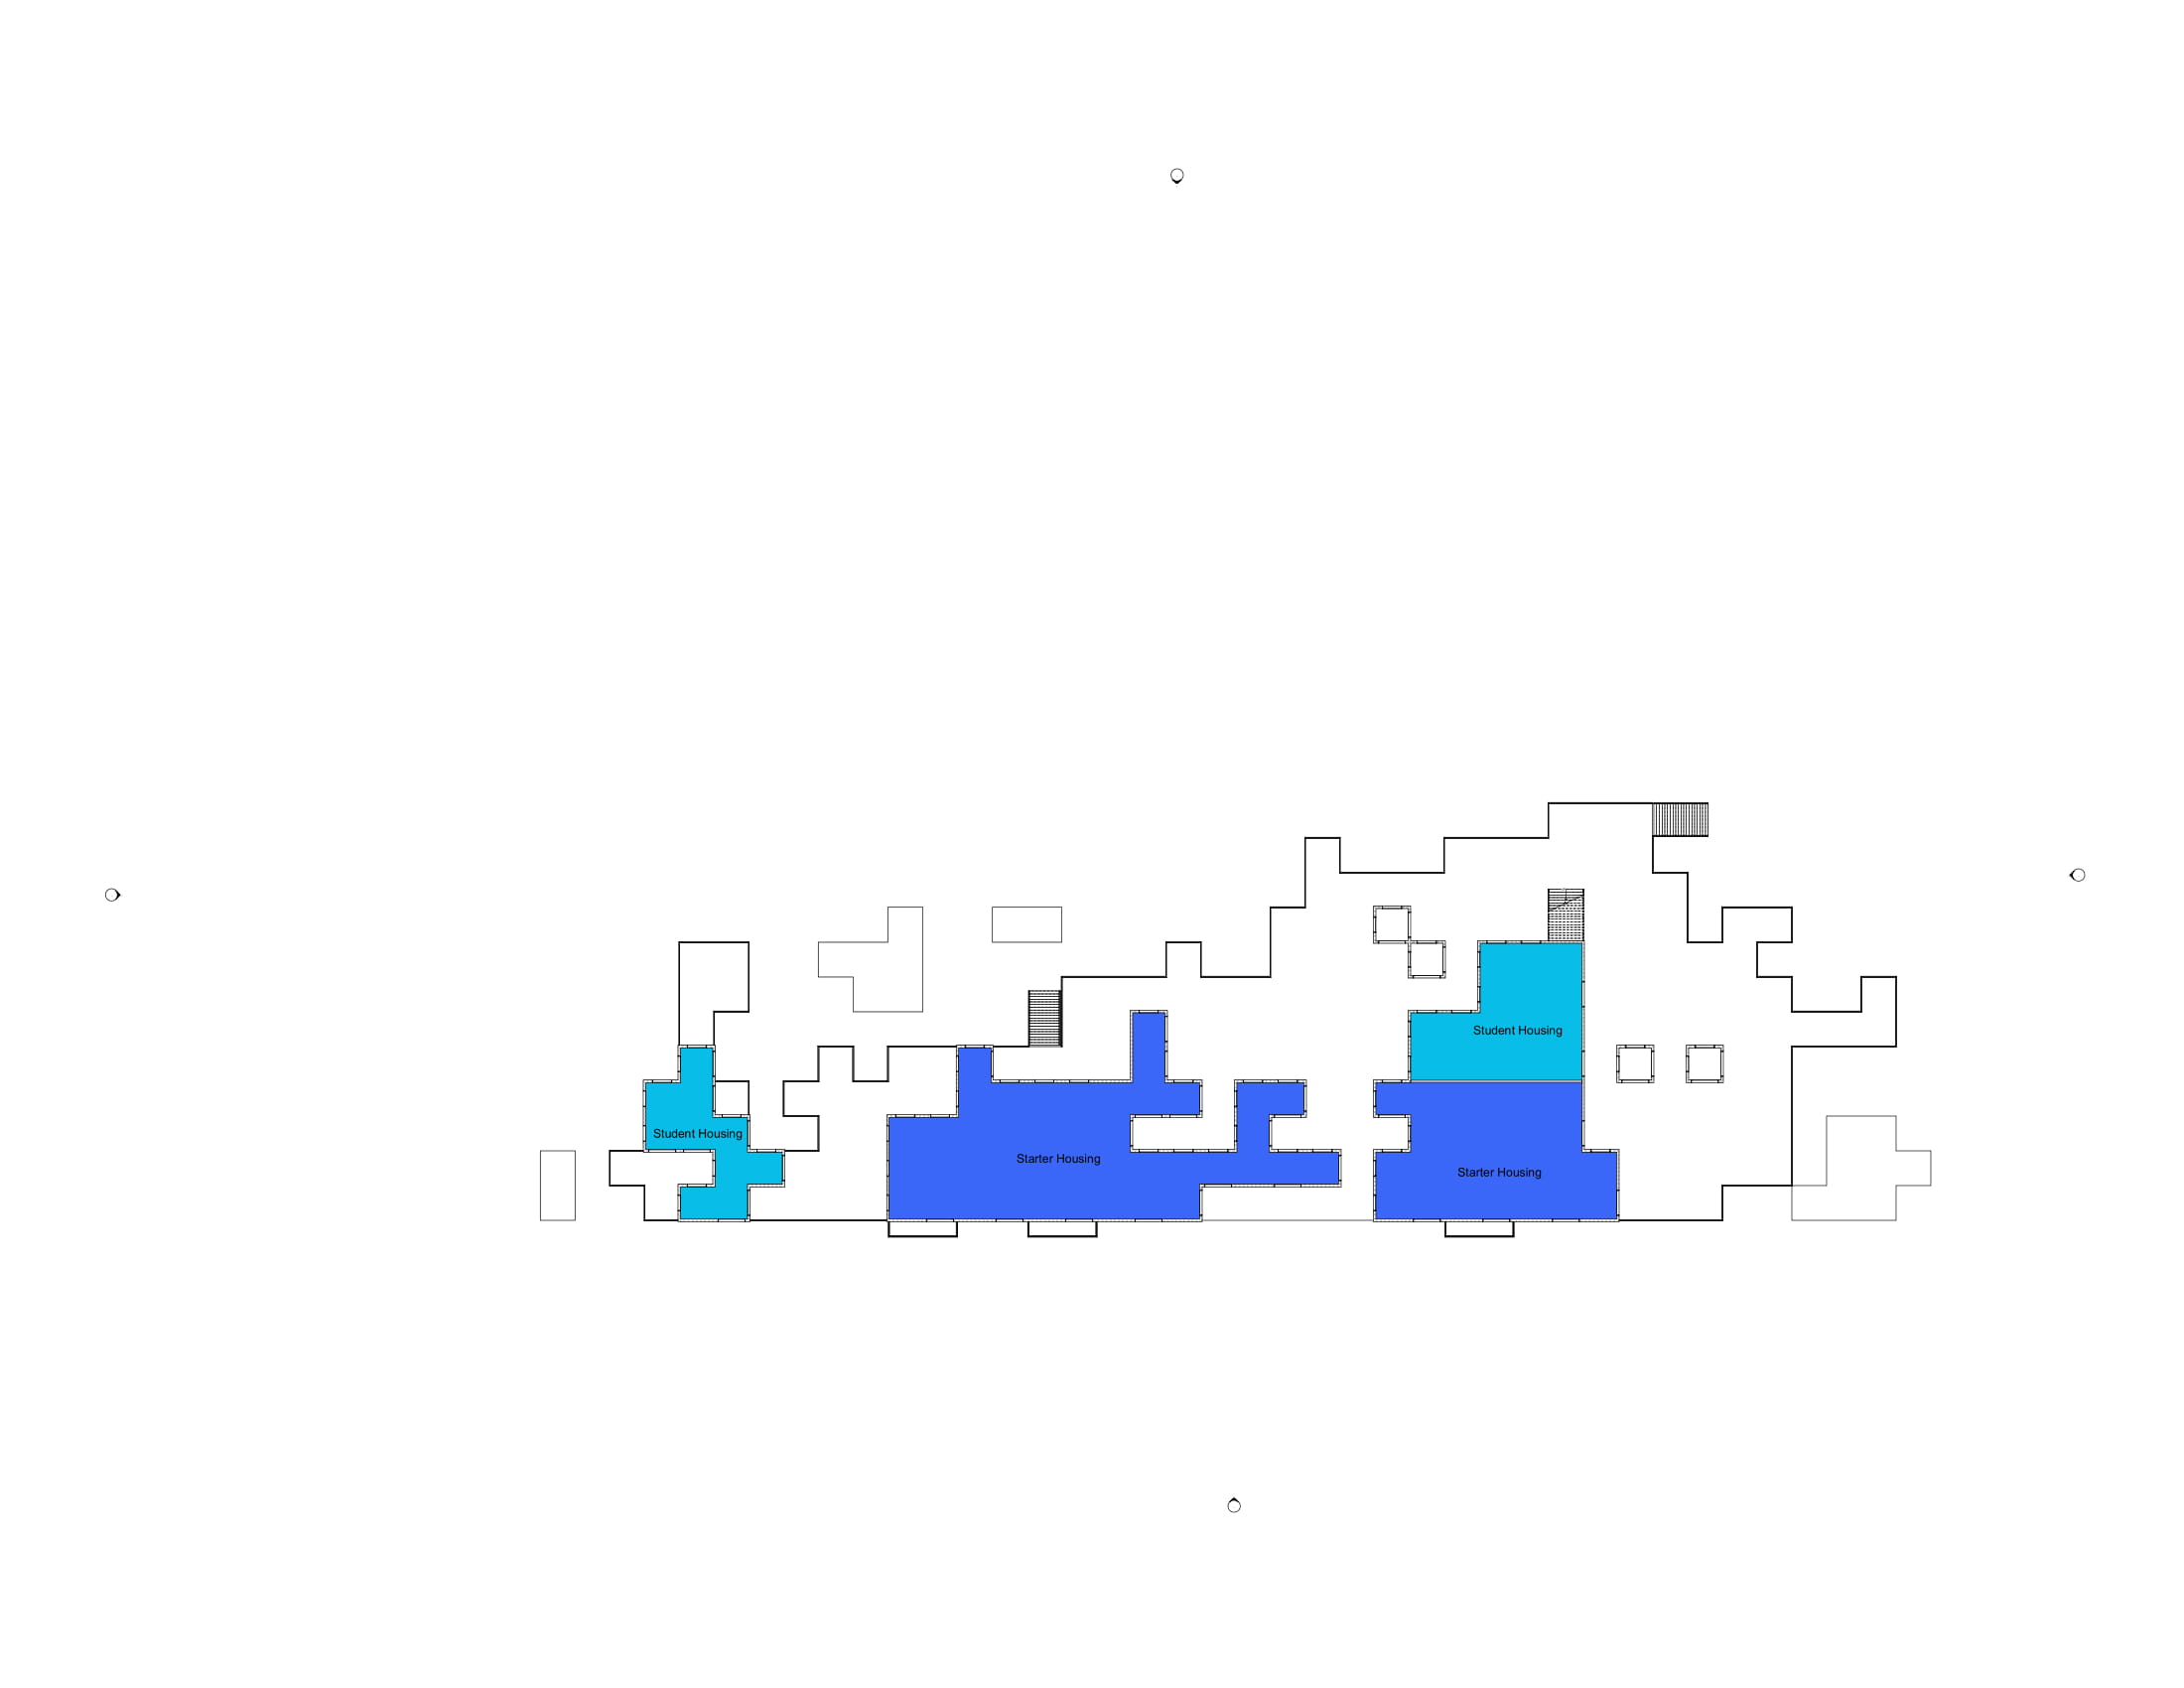
One of the last steps for the design process is to configure several floorplans. For the residences, we made two kinds per target group. For the other facilities, we decided to make stencils, since these individual rooms do not have that big of an impact on the entire building. Nevertheless, a floorplan for the small and big cinema hall is created. On the left side of the floorplans, you can see a chart that visualizes a chart of voxels in which the floorplan could fit into. For this chart, I divided the 3,6 x 3,6m voxel by two, since we also used this size for the stairs in Configuring - Process. However, a division by six would have been a better solution as we noticed later on. Since a room with a width of 5,4 meters of 7,2 meters is not the wanted size and you want something in-between.
Floorplans - residences
As already mentioned, we created two floorplans per target group, leading to eight floorplans in total (two starter houses, two houses for people in the need of assisted living, two studios and two student houses for four people).
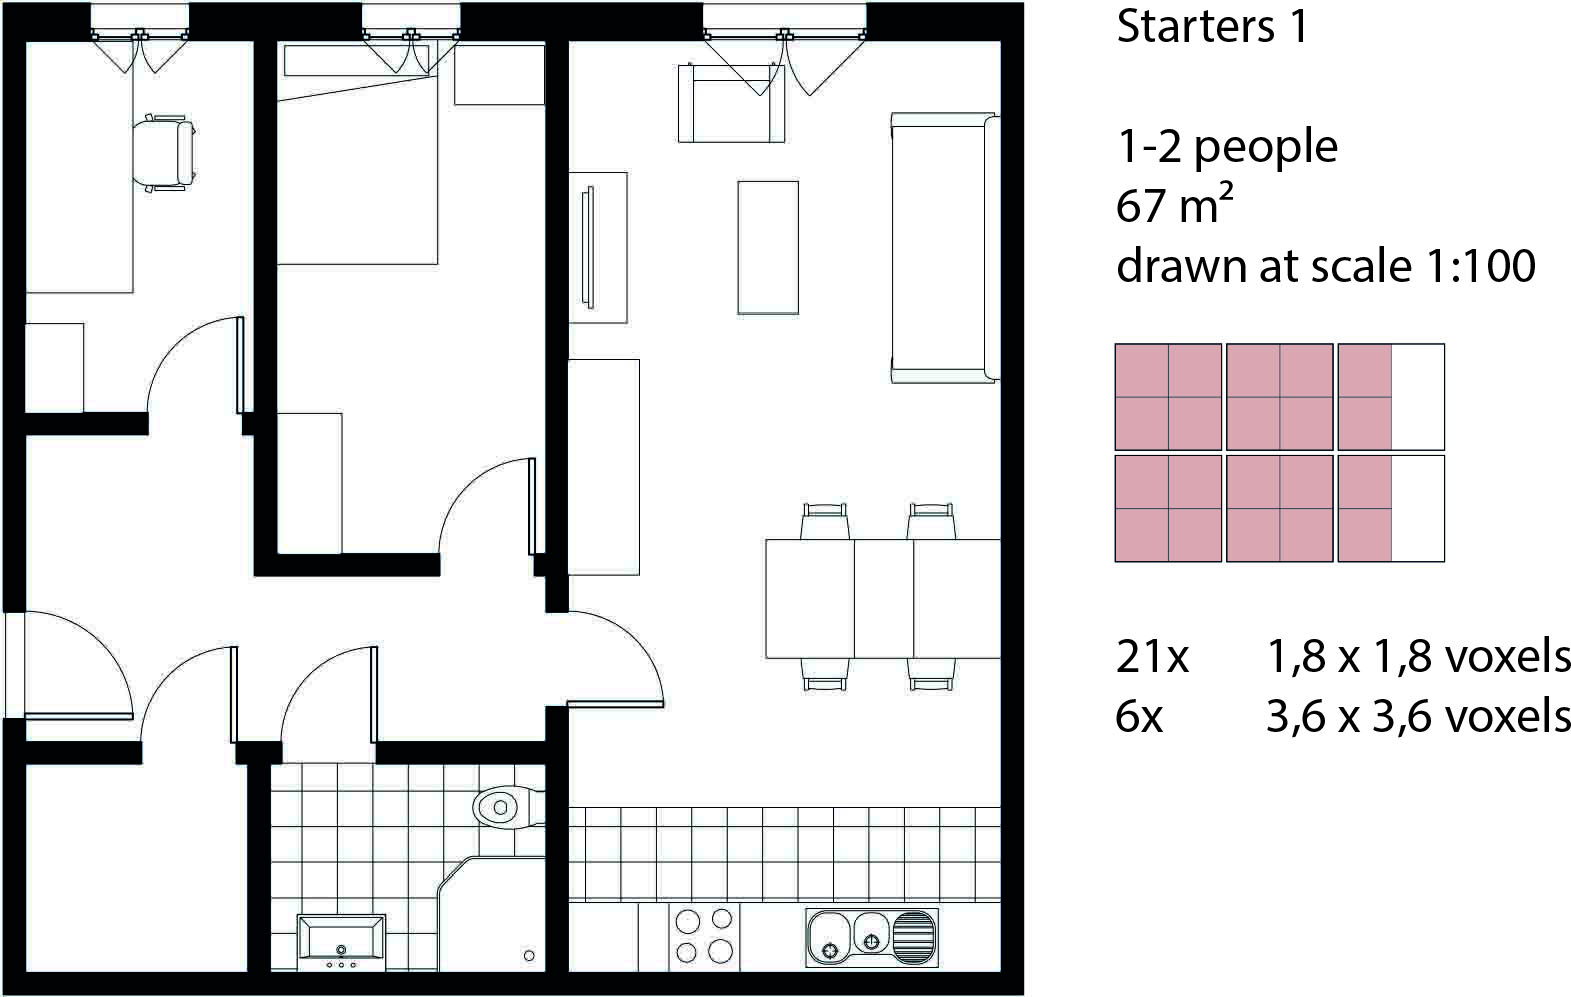
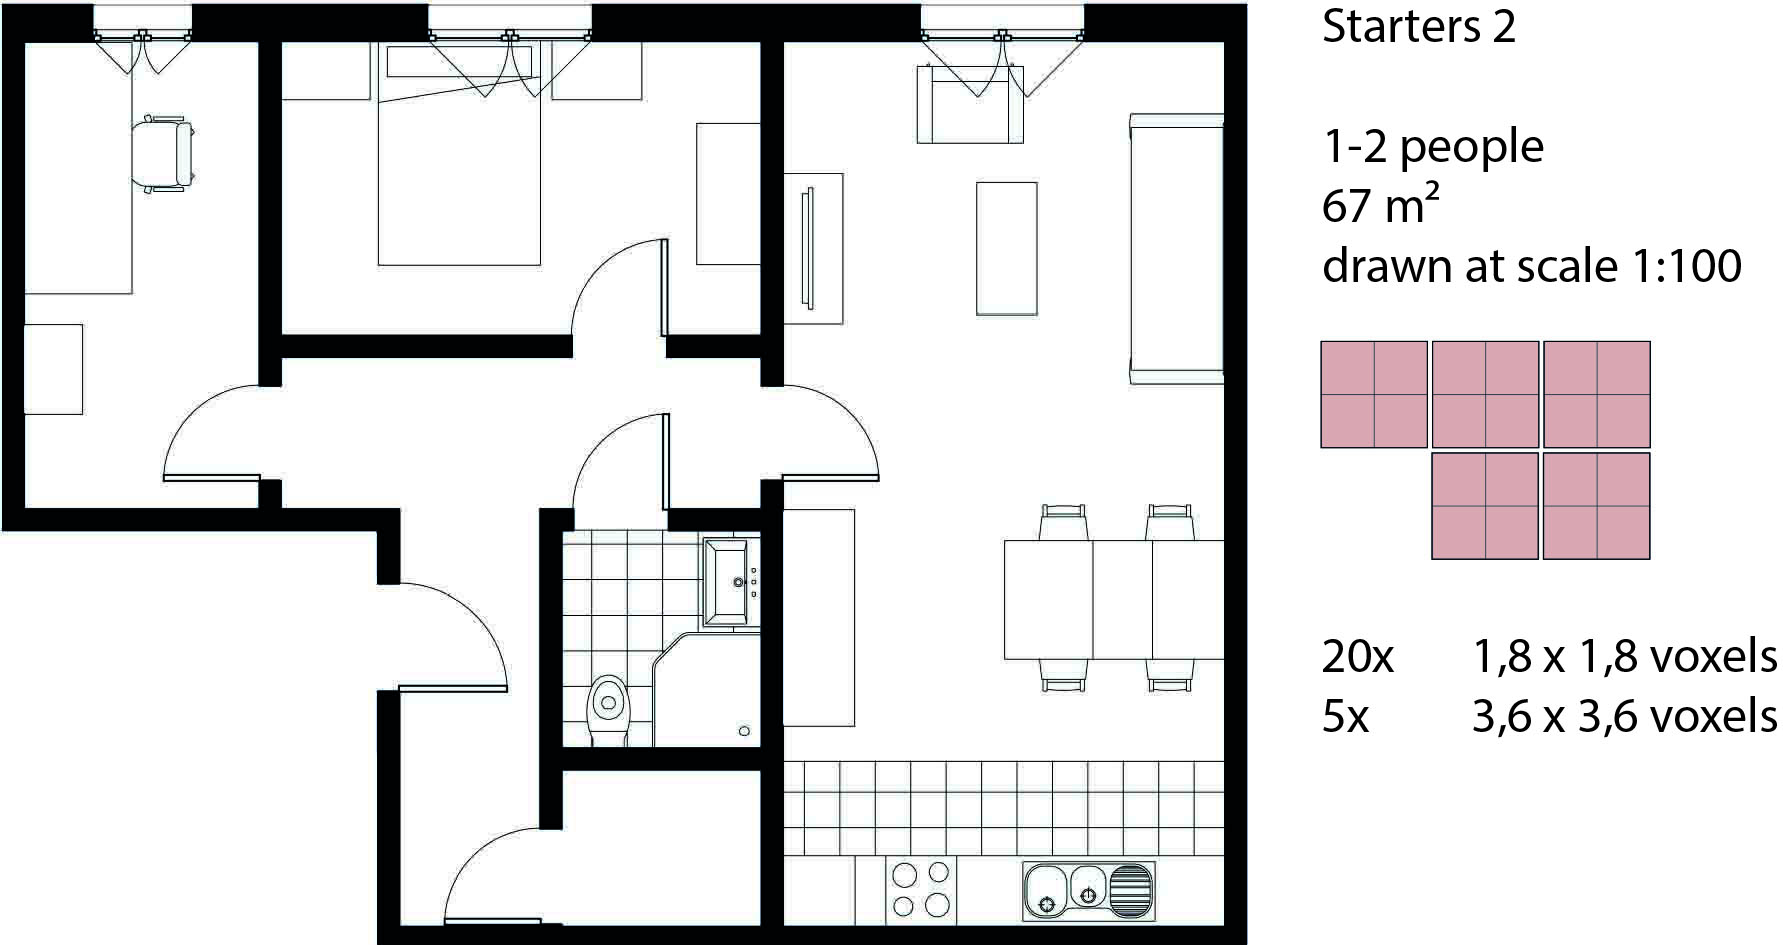
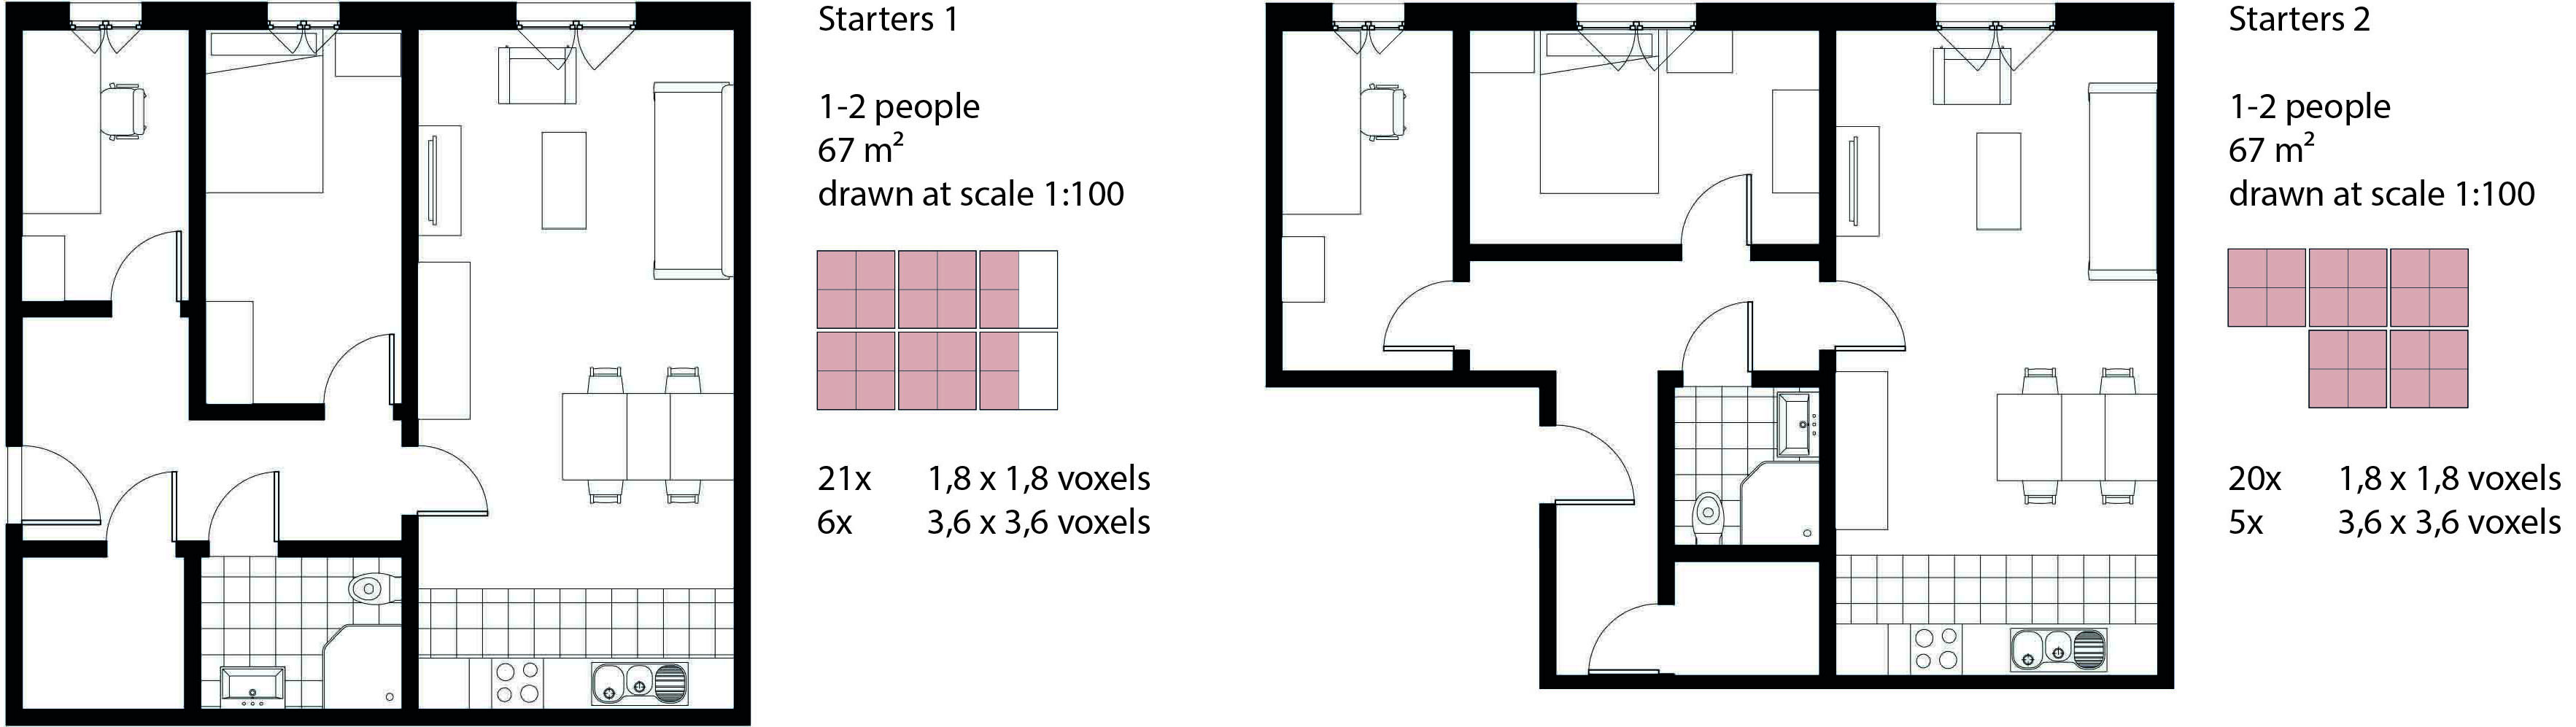
Starter residences
The floorplans (Starters I and Starters II)) for the starters consist of one bedroom, bathroom, living area with an open kitchen and a storage room. As already mentioned in future residents, starters are at the beginning of their lives: They probably just graduated and first want to work for a while before they start their own family. It is therefore important that there is enough space for the residents to grow within their own four walls so that they do not have to move out at the slightest (but still biggest) change in their lives. This is why a study room has been added to the plan, which later can fulfill its purpose as a nursery.
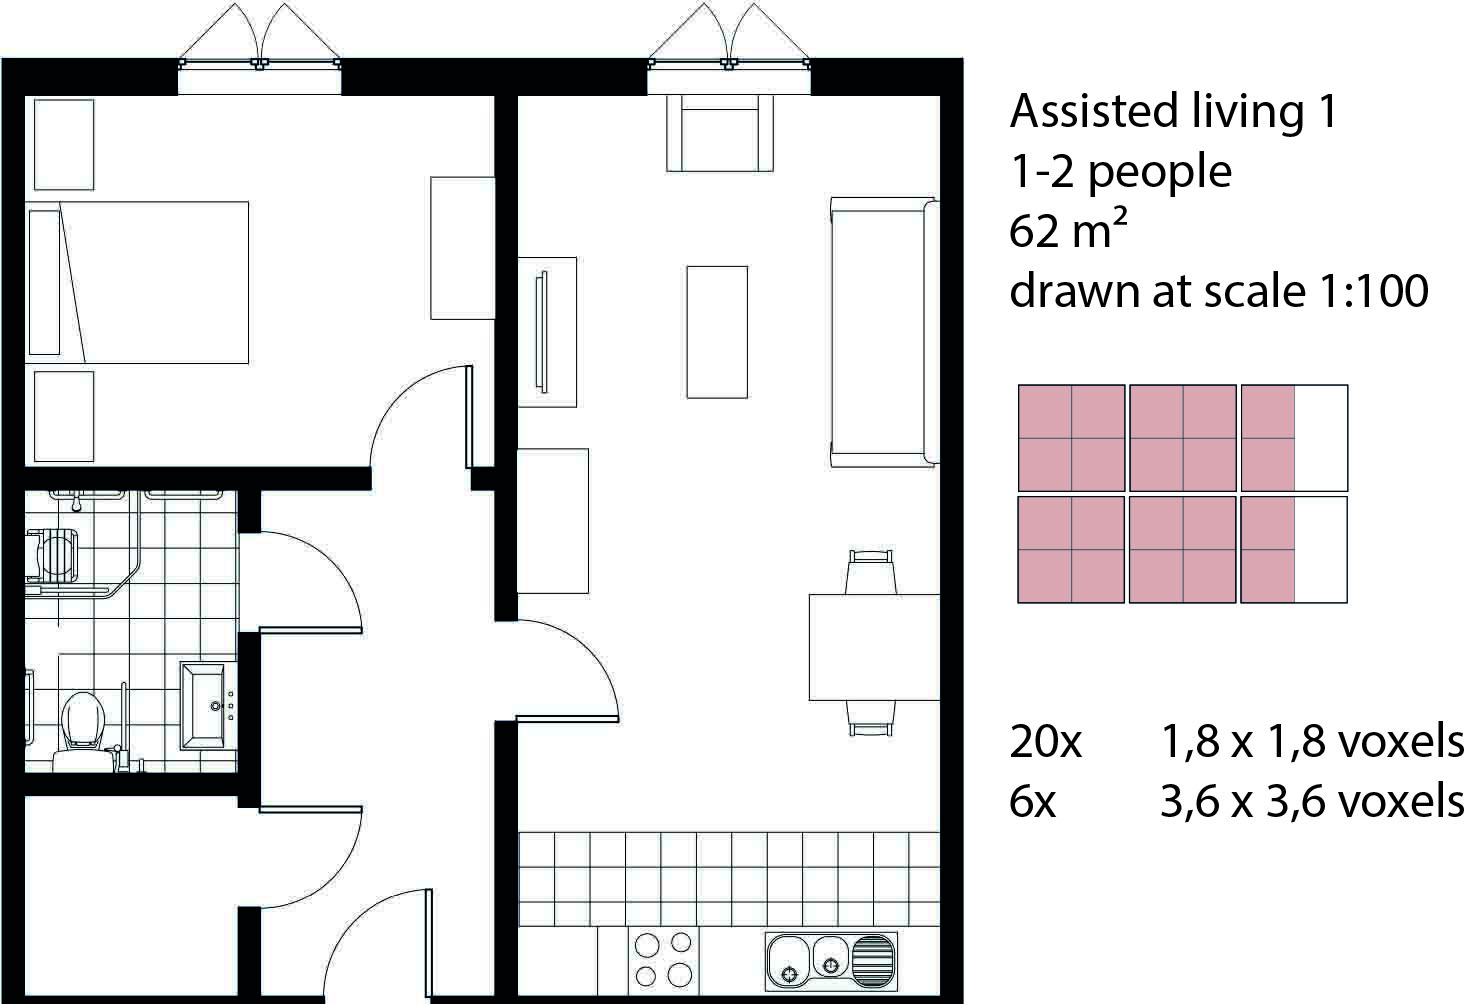
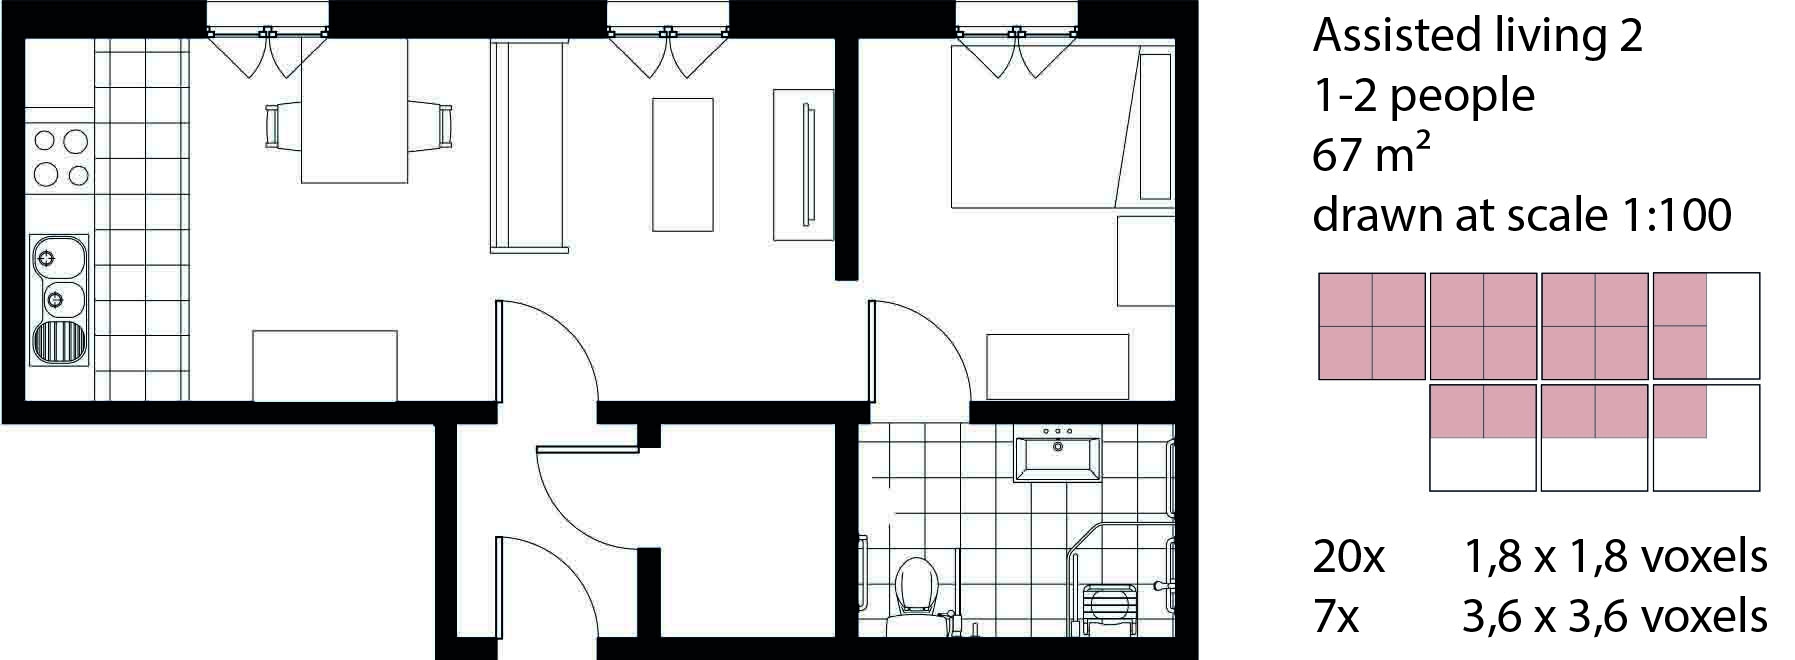
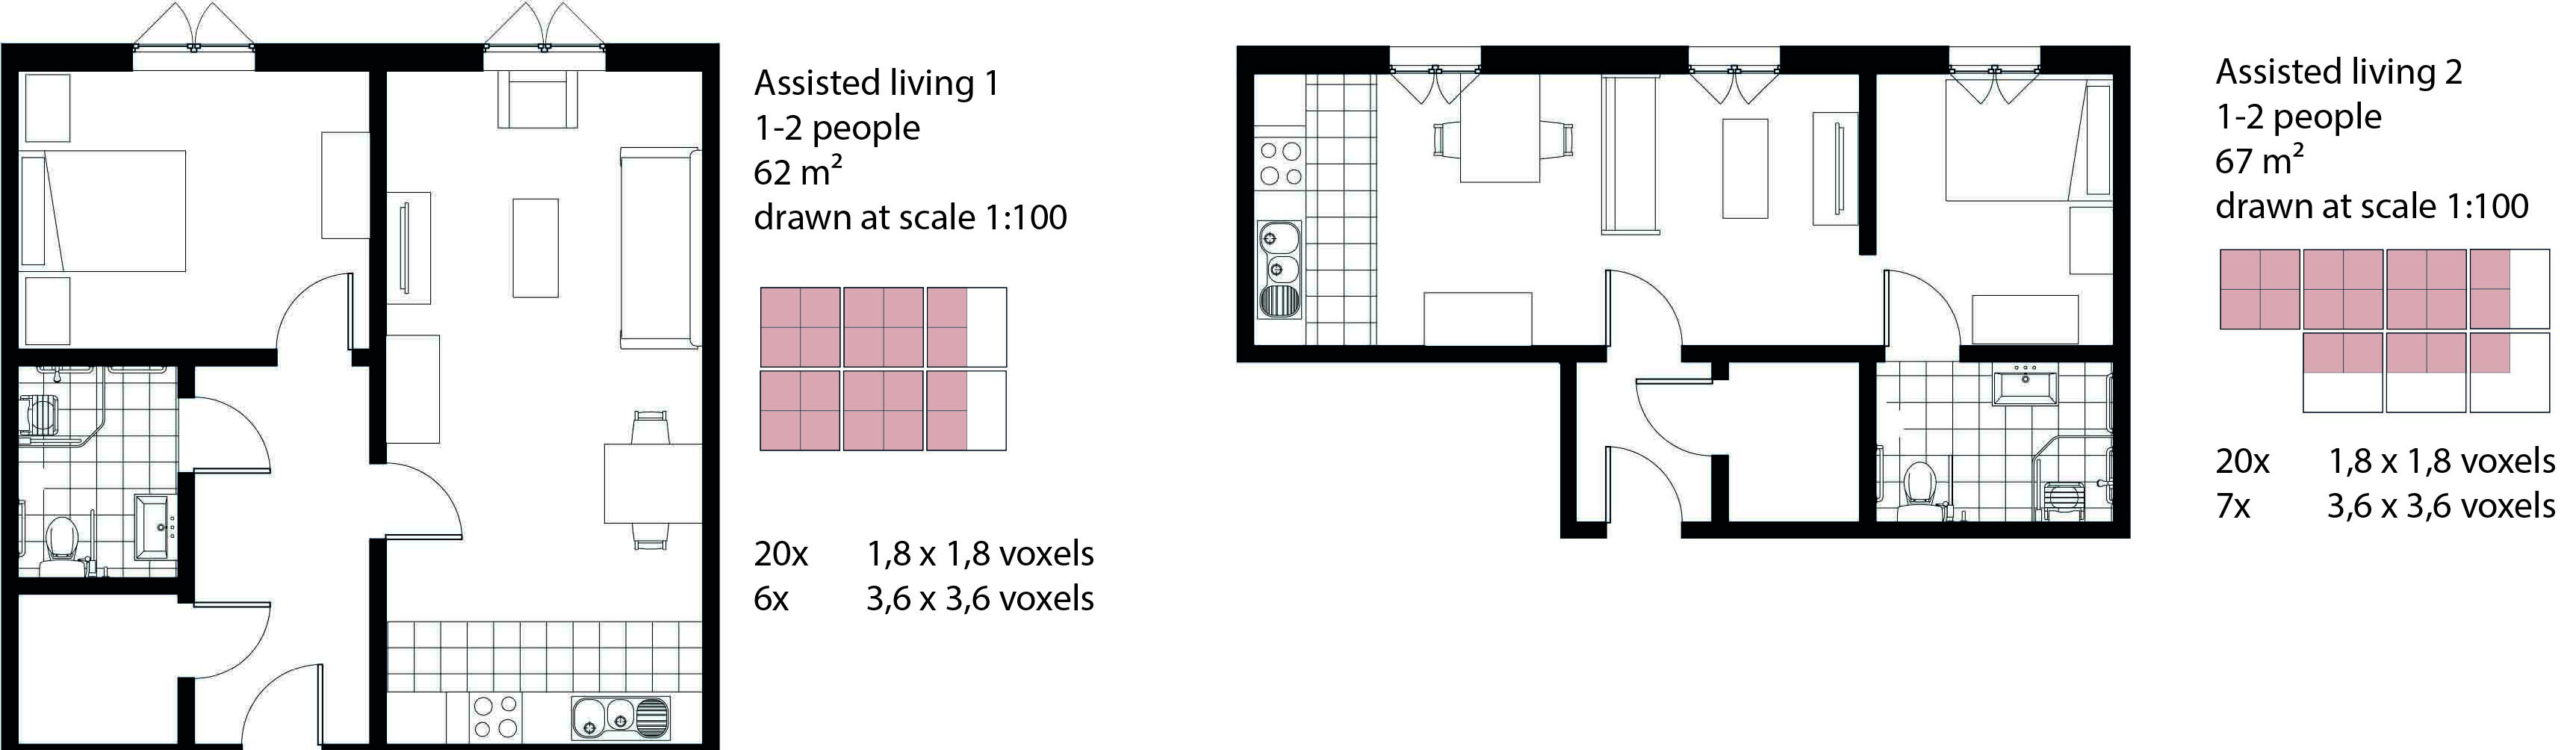
Residences for assisted livings
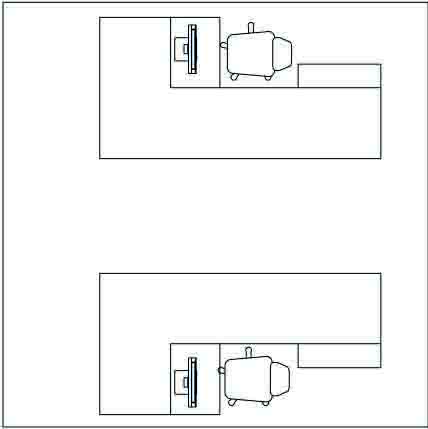
A big difference between these floorplans (Assisted Living I and Assisted Living II) and the other one is the spaciousness of the rooms. According to the Bouwbesluit (Ministerie van Binnenlandse Zaken en Koninkrijksrelaties, z.d.), every room needs to have at least one space where a wheelchair cut turns 360°. For this, a diameter of 1,5 meters is needed. Besides the width of the rooms, the floorplan is pretty average: one bedroom, bathroom, storage room and a living room with an open kitchen. Though, there is some additional equipment added to the bathroom, like handles around the toilet and the shower and a folding chair in the shower.
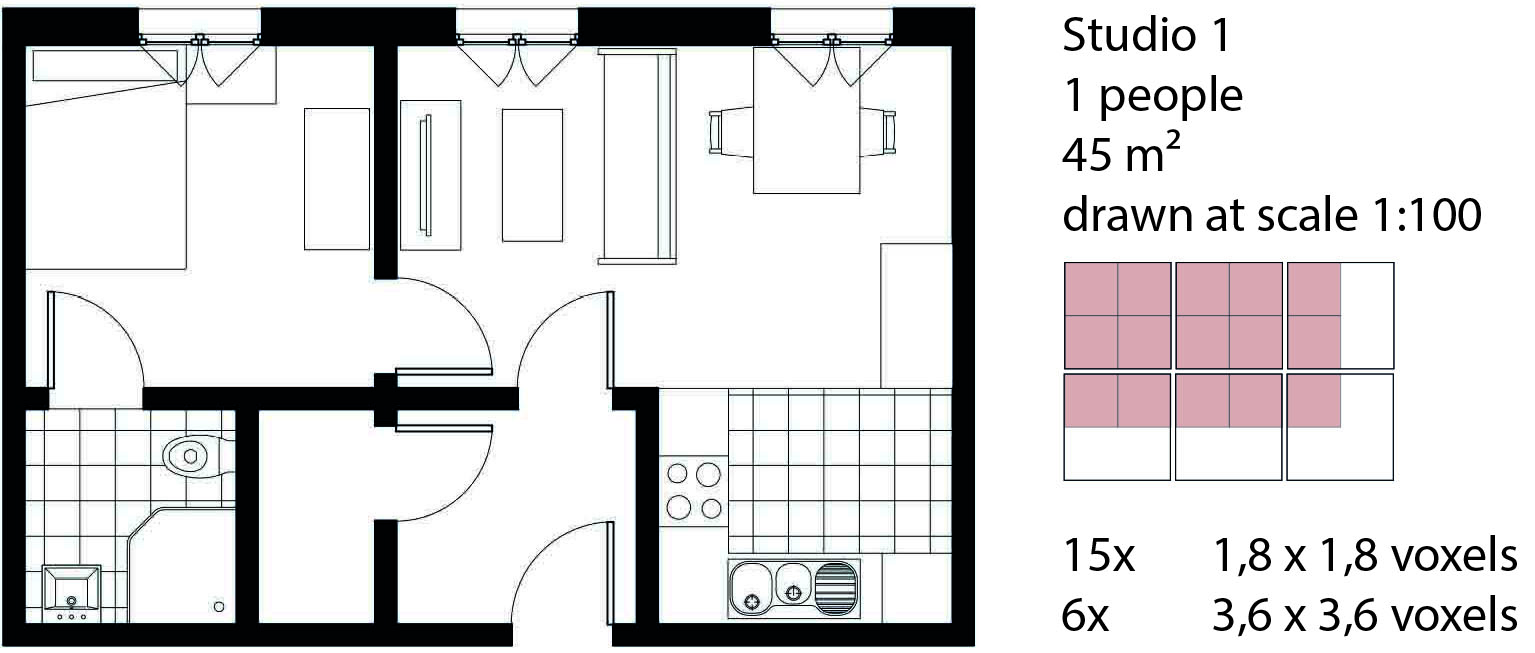
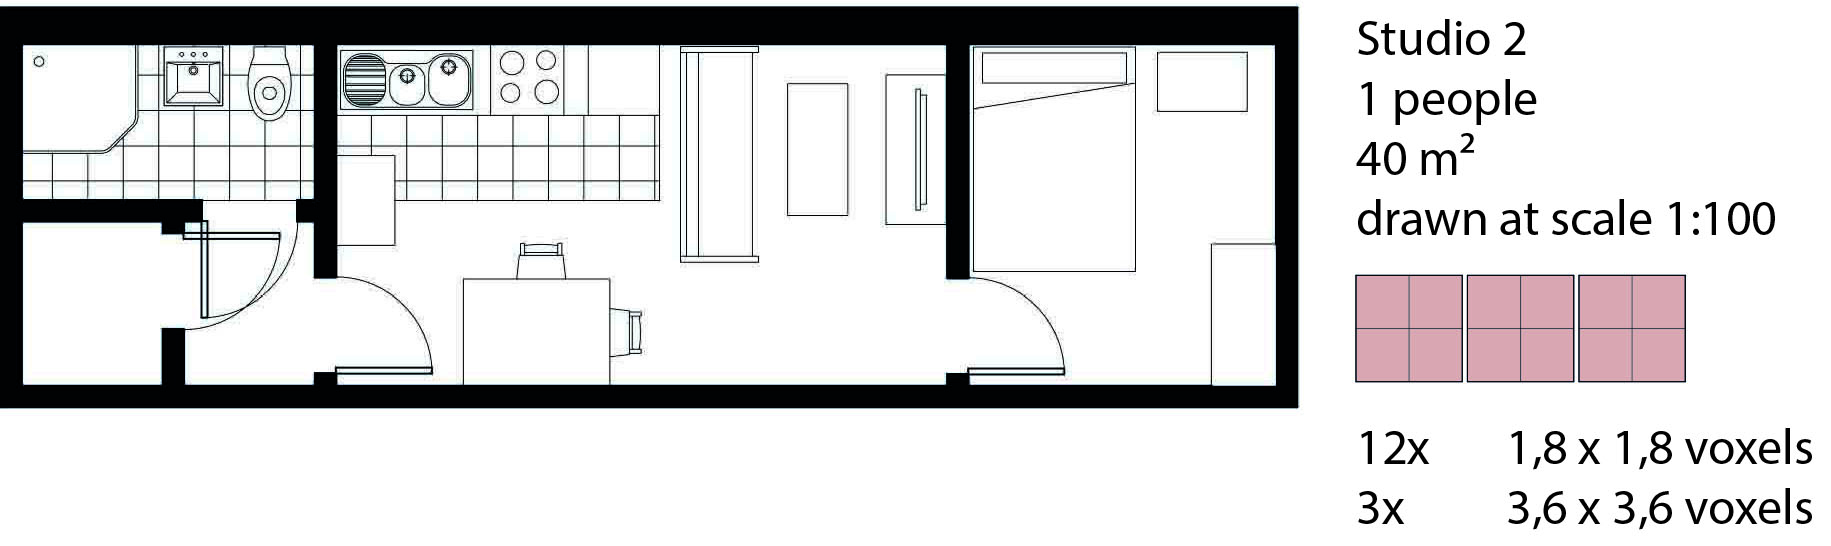
Studio’s
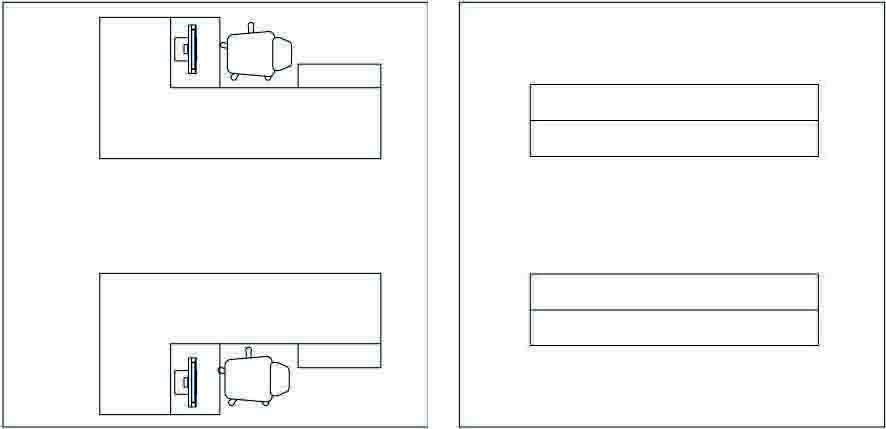
Even though the studio’s (Studio I and Studio II) are smaller than the other residences, they are still quite luxurious with a bedroom separated from the living area. As can be seen in the other floorplans before, these residences also have a living room with an open kitchen.

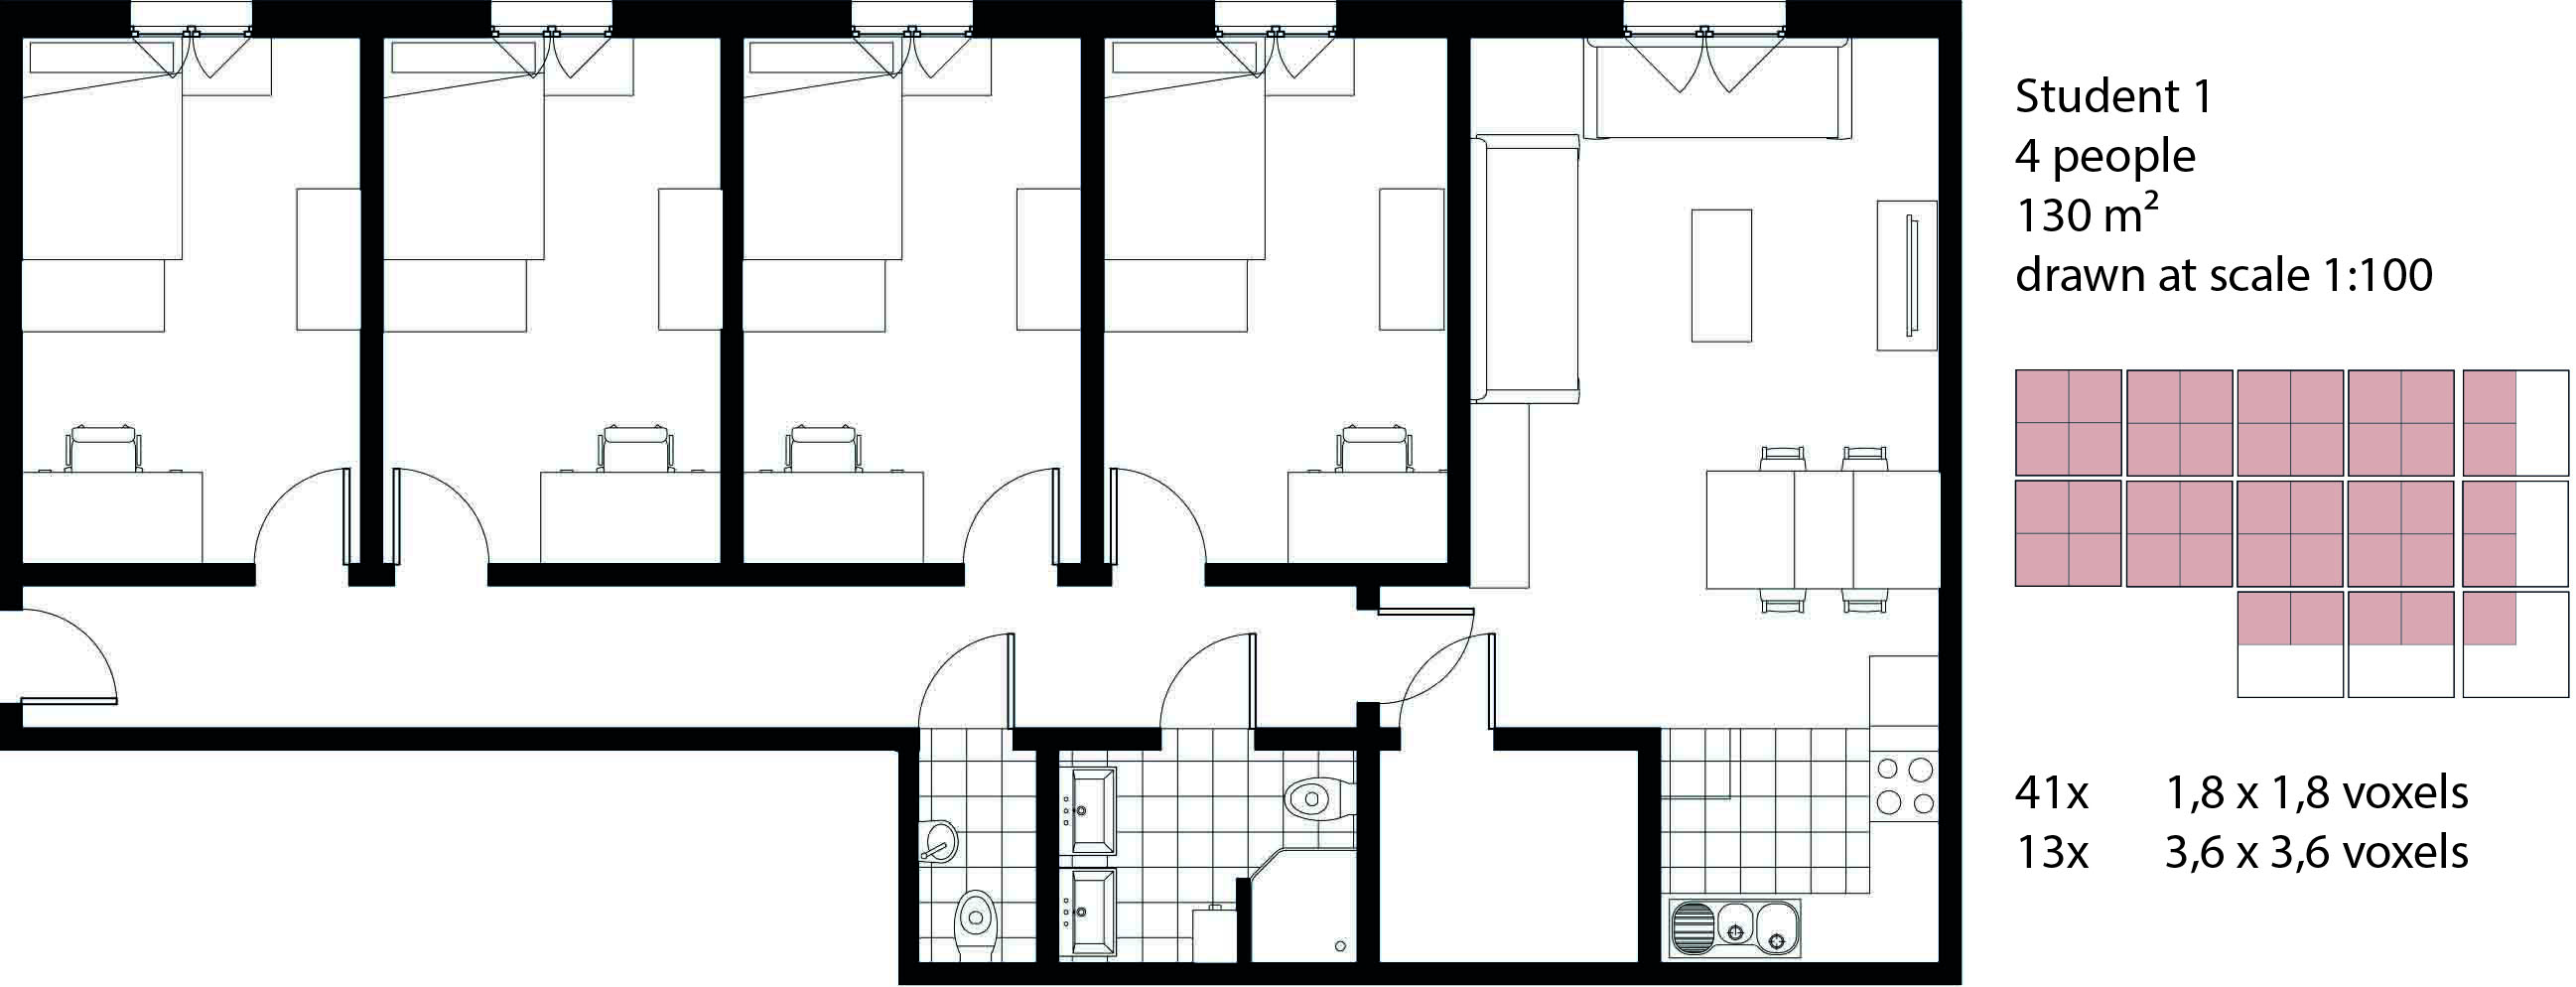
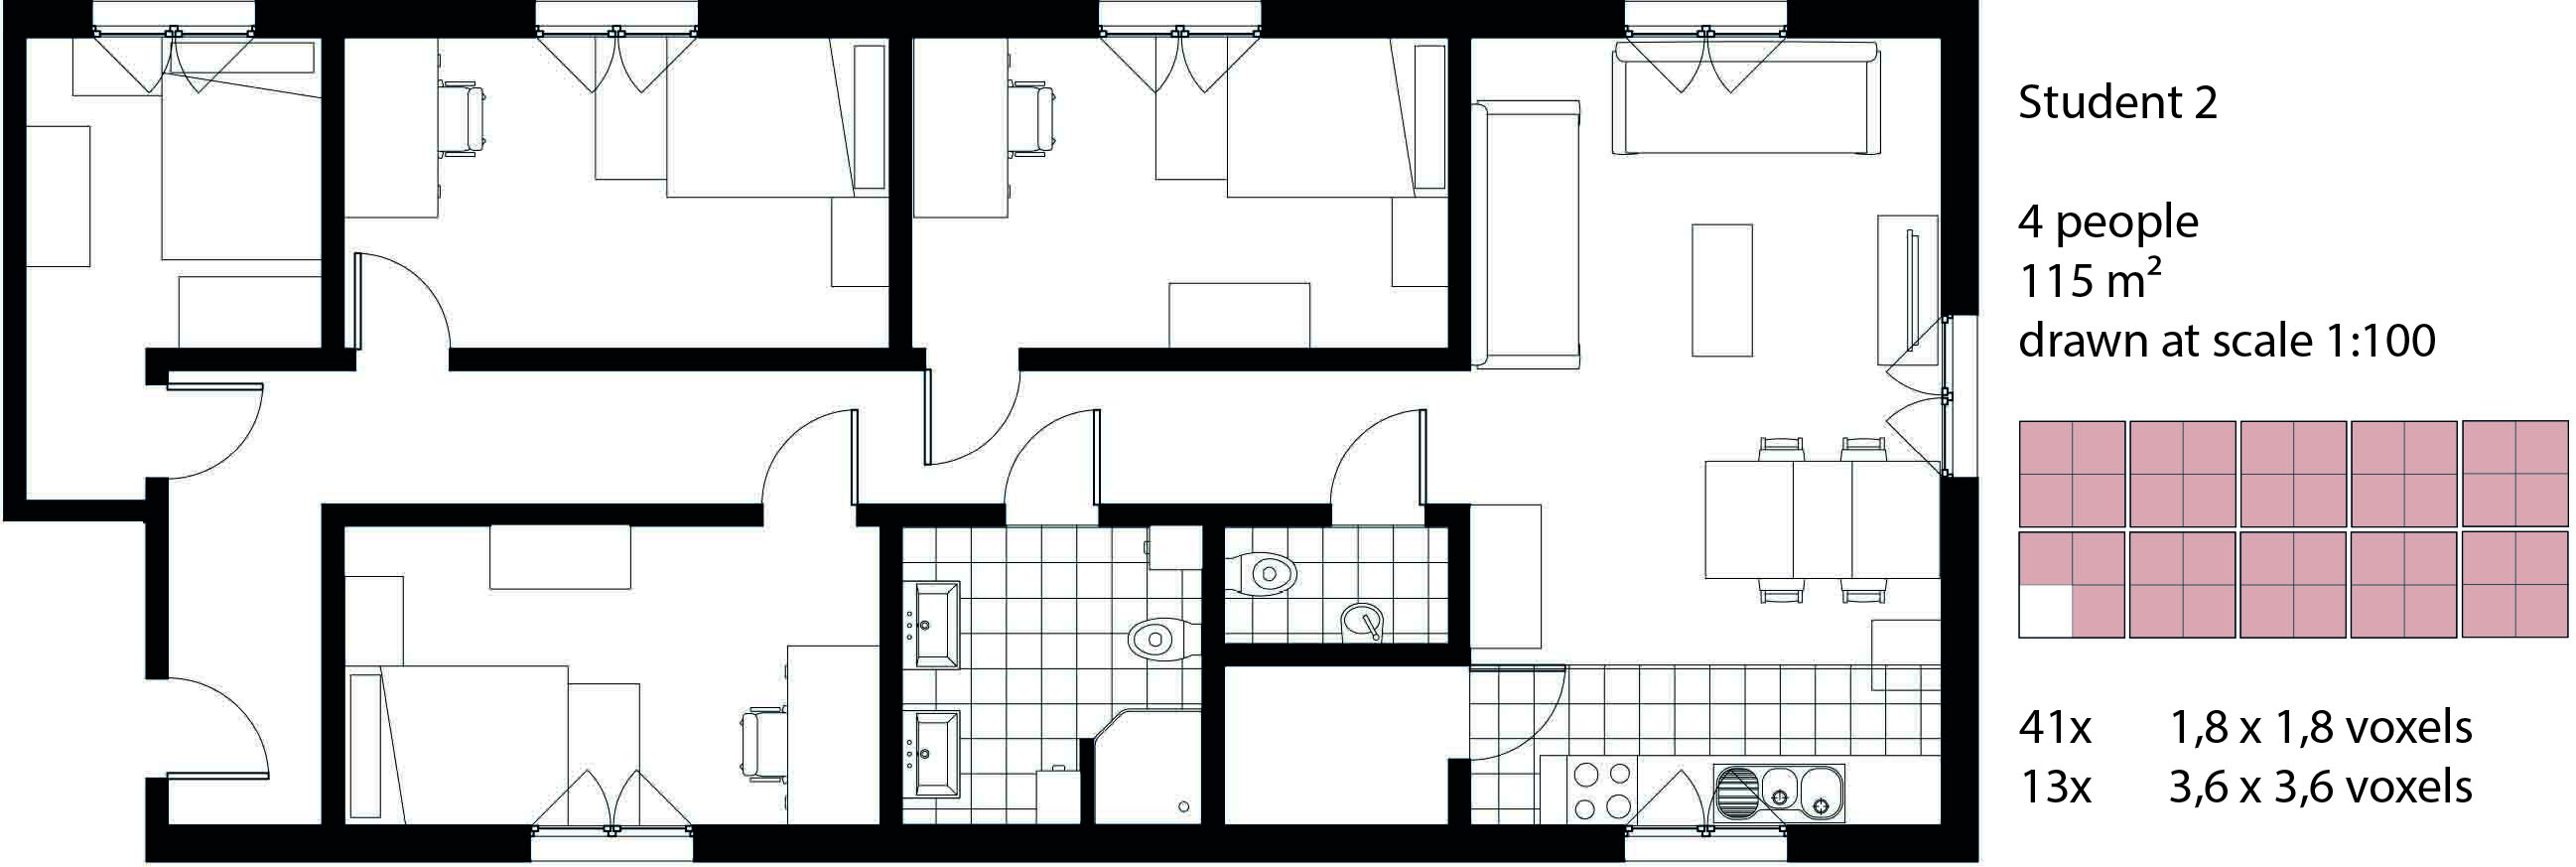
Student houses
In contrast to the previous floorplans, the student houses (Student I and Student II) have four bedrooms which are connected by a long corridor. Occasionally, the corridor is where small, spontaneous, conversations arise and small gatherings take place (if the people are not in the common room). The four bedrooms all look the same and beside a toilet in the bathroom, there is another one added separately. Since this is a residence for more people, the kitchen and living room are bigger than the ones we showed before.

Floorplans - stencils
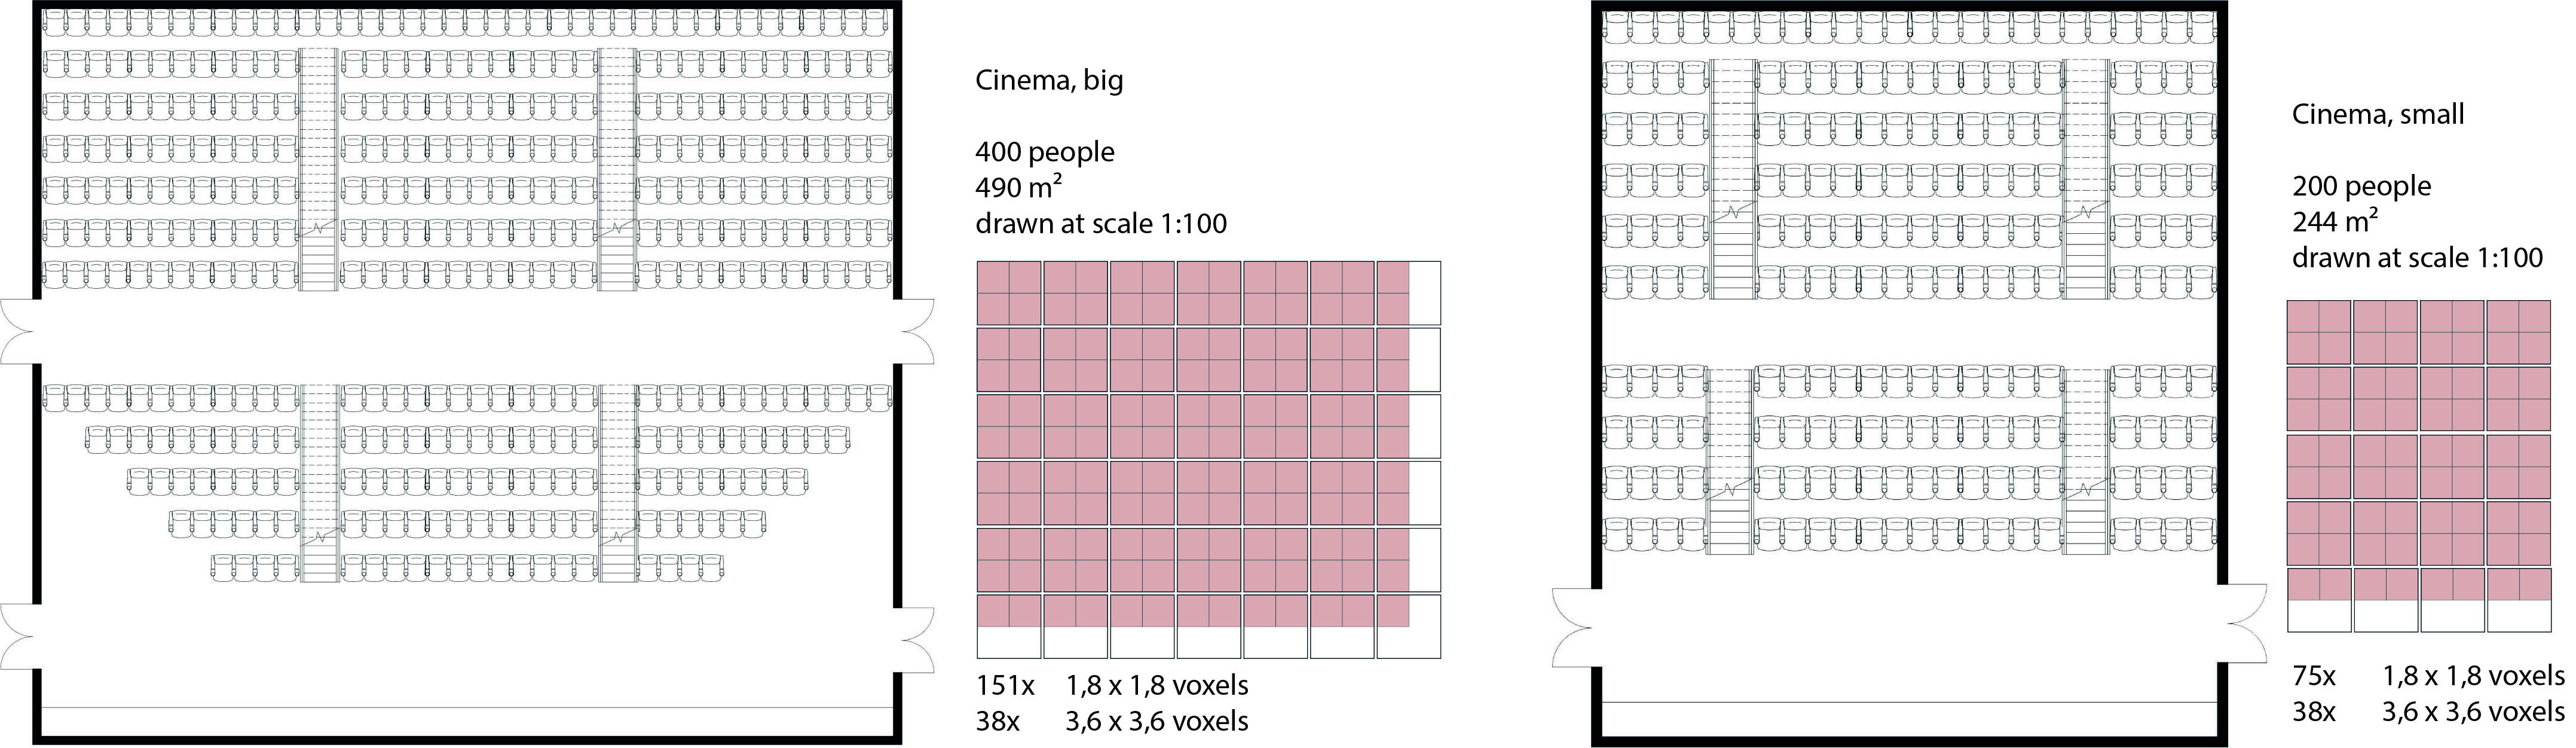
As already mentioned before, the other facilities do not have a big impact on the entire building. Since these mostly are repetitions from smaller stencils, we just designed a variety of those, fitting into a voxel size of 3,6 x 3,6 meters. Nevertheless, we designed two floorplans for the cinema halls, due to the bigger size.
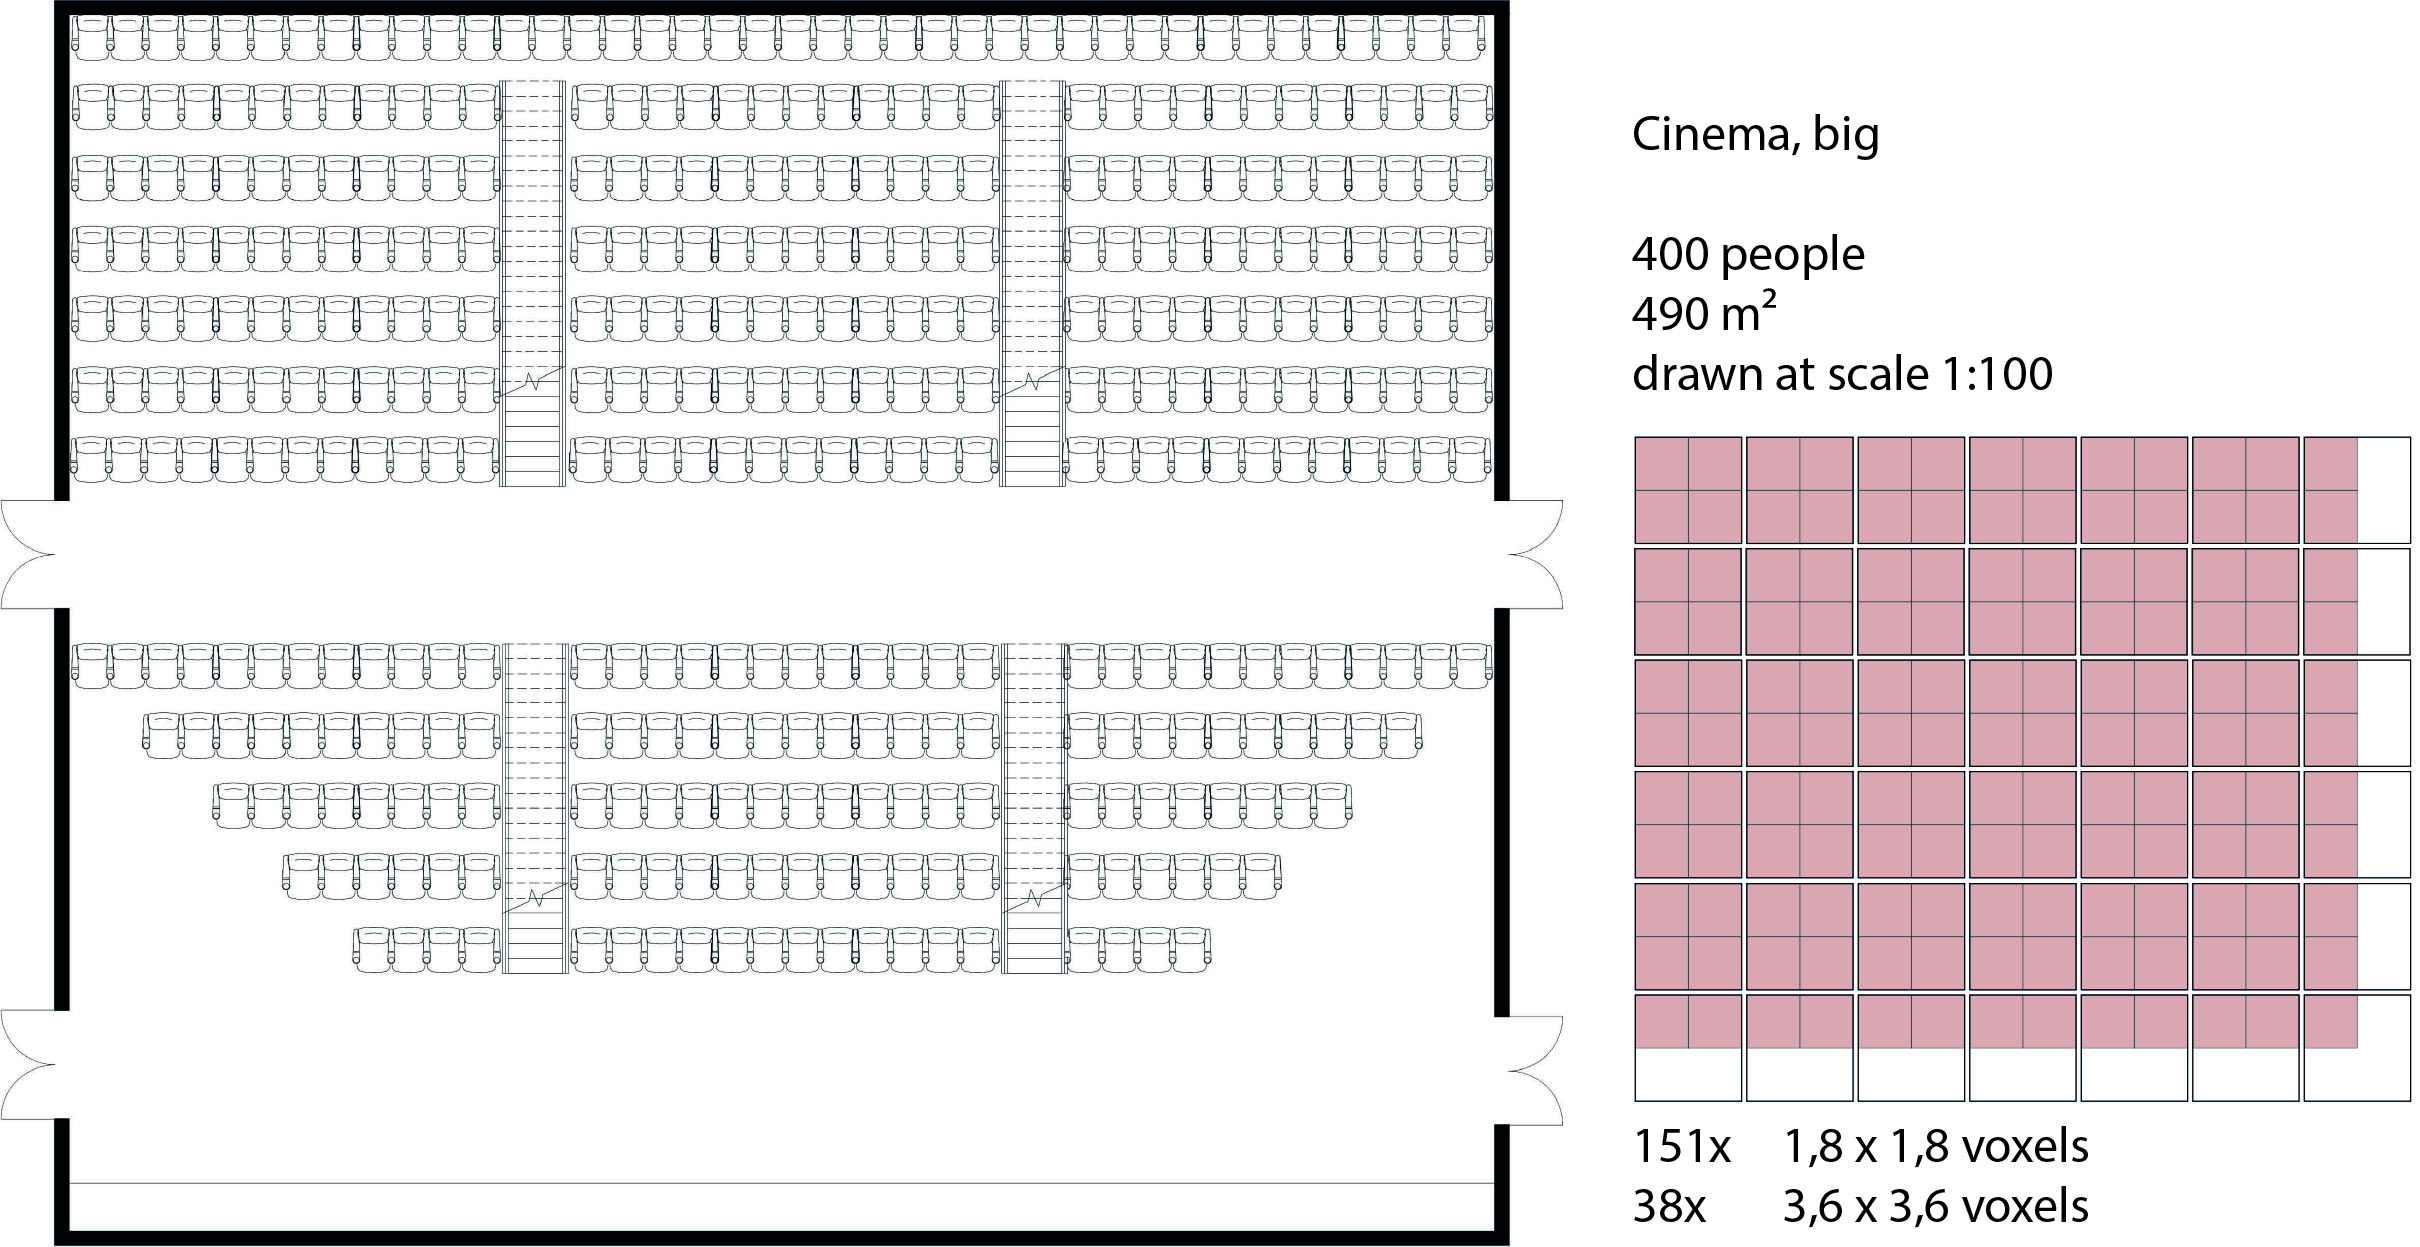
Cinema
For the cinema, there is a small cinema created for 200 people, and a big cinema twice this size. Besides that, the cinemas consist of a buffet and a waiting room for which we made stencils.
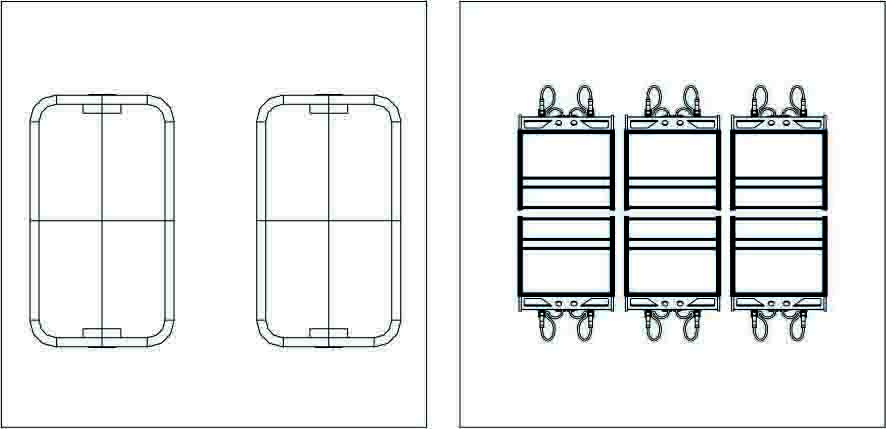
Arcade
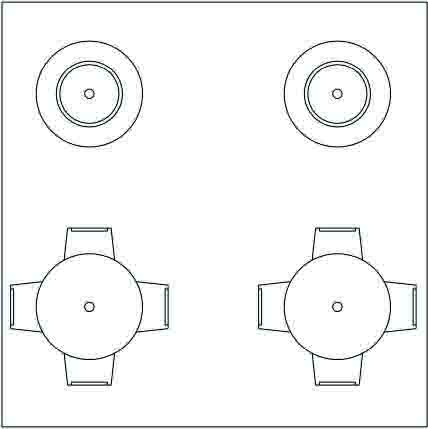
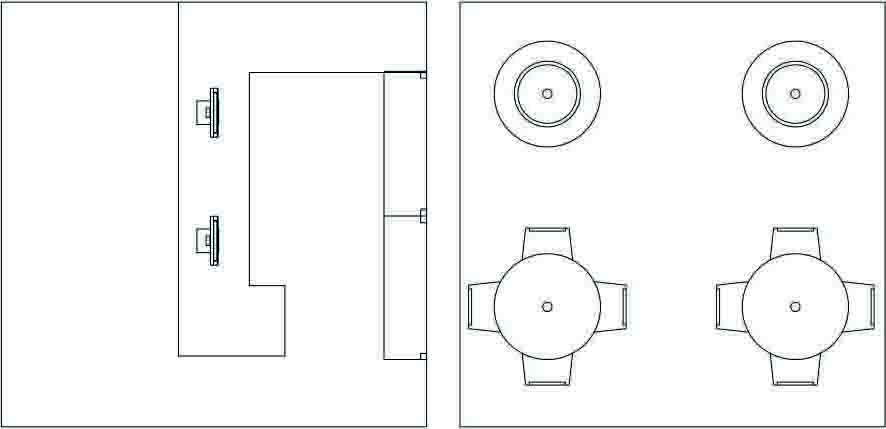
In the arcade, there are many different kinds of games to find with each different kind of machine. For the stencils, we focussed on the aihockey tables and the shooter games since these are probably the most common machines.
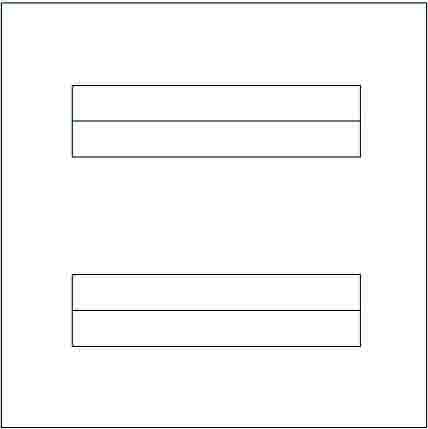
Library
The library mostly consists of a lot of bookshelves and study tables.
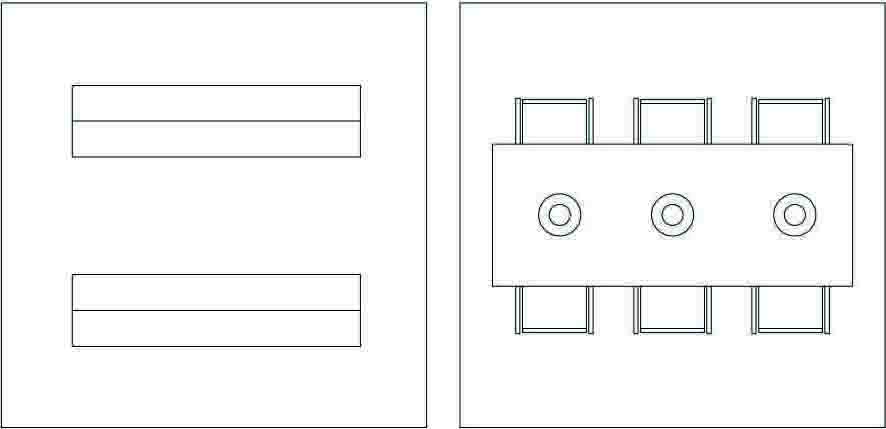
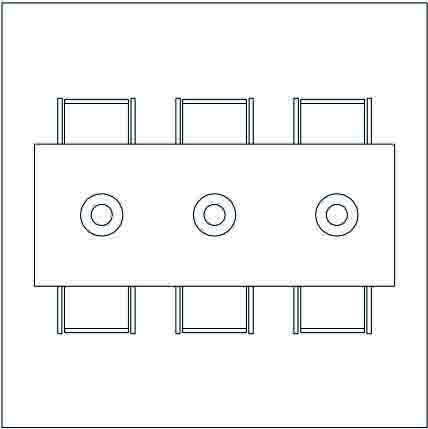
Supermarket
Similar to the library, the supermarket consists of (supermarket)shelves and some cash desks.
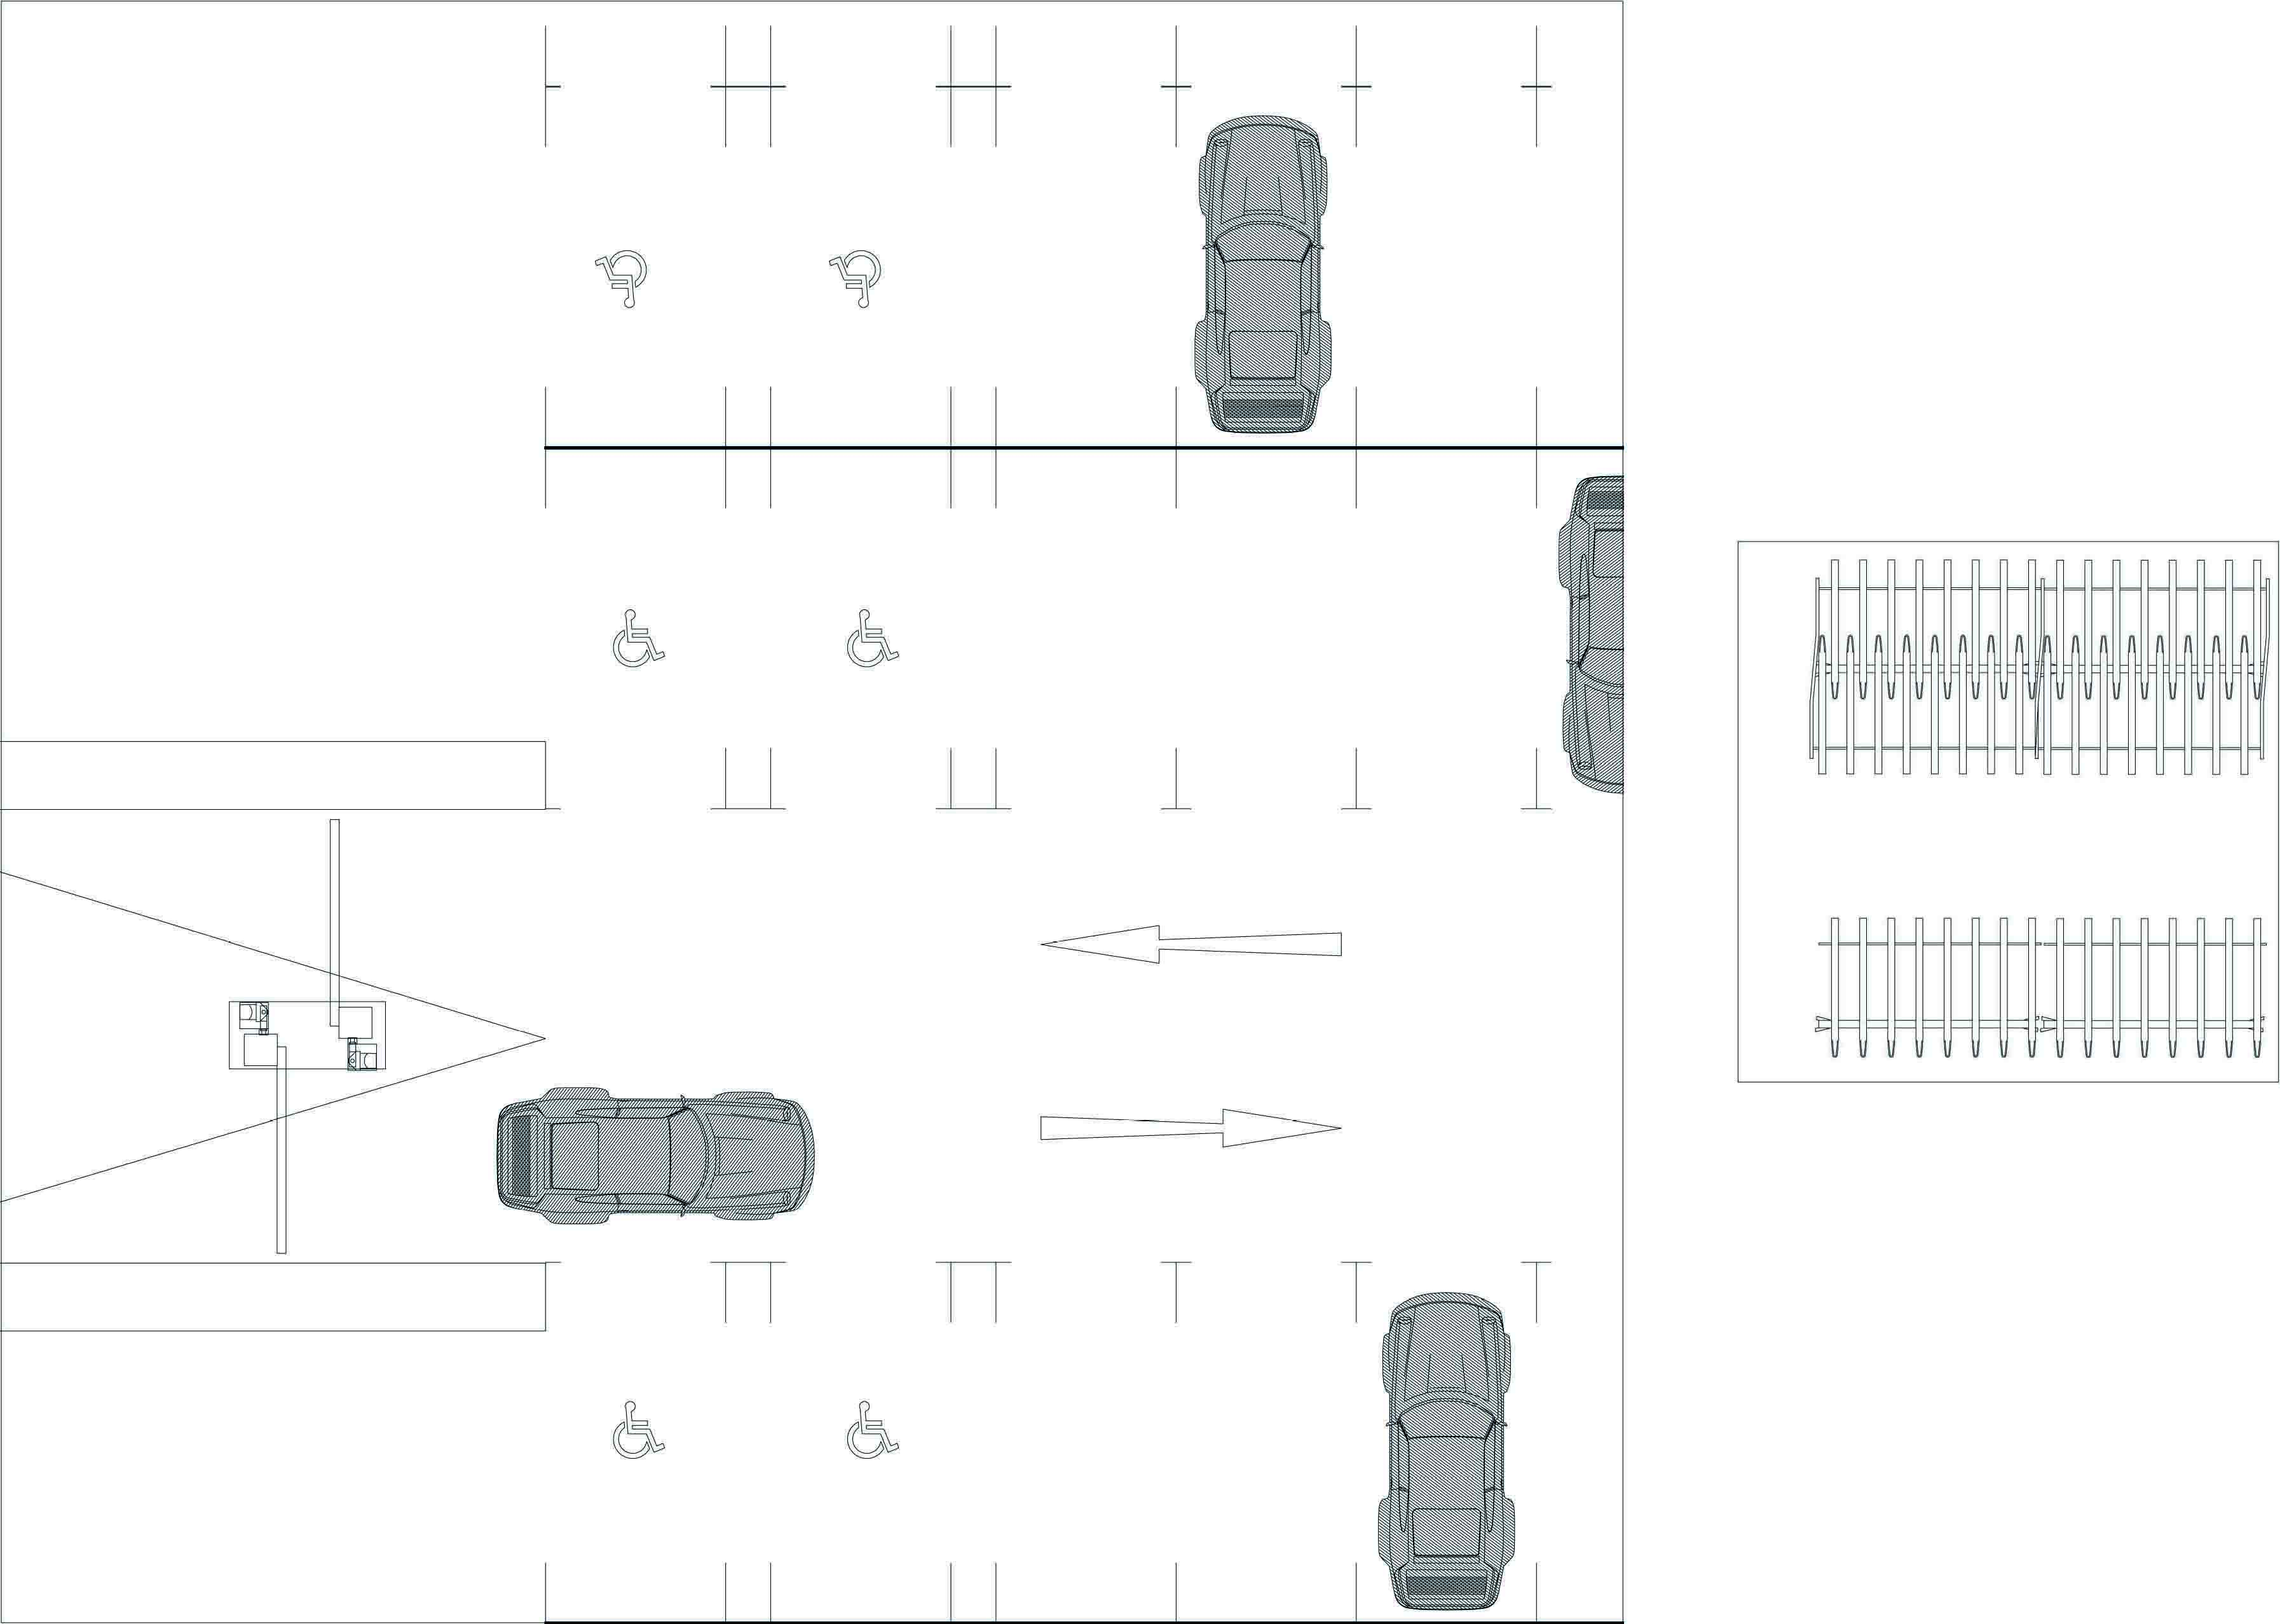
Parking
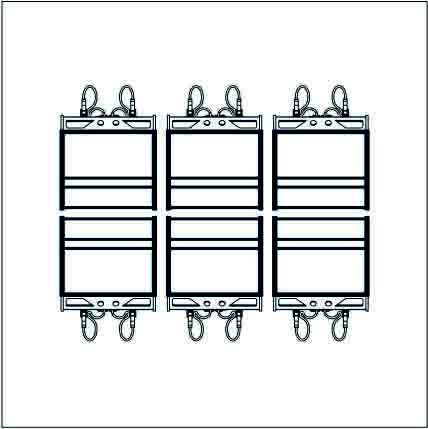
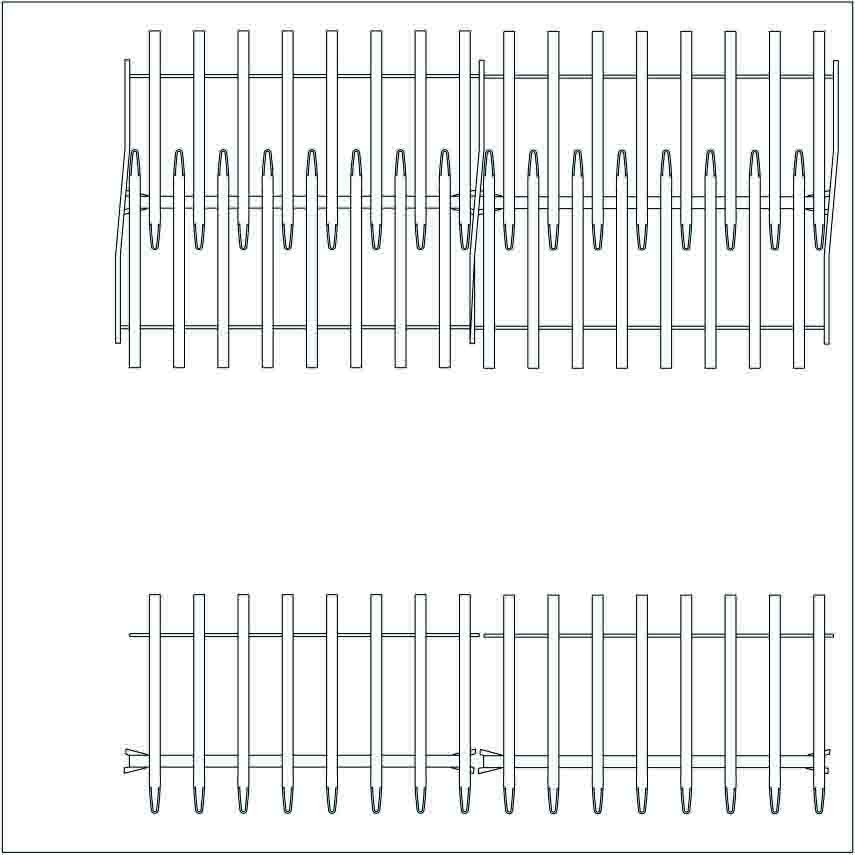
For the parking spaces, we were forced to use a bigger size for the stencils since there would not be enough information in a voxel of 3,6 x 3,6. Therefore, we used a voxel size of 21,6 x 21,6 meters for the parking garage and 7,2 x 7,2 for the bicycle stands. The parking garage is provided by a barrier for the entrance and exit. Furthermore, besides the normal parking spaces, there are multiple disabled parking spaces and charging stations for e-cars.
To save costly space, the bicycle stands are stacked as we know it from the train station in Delft.
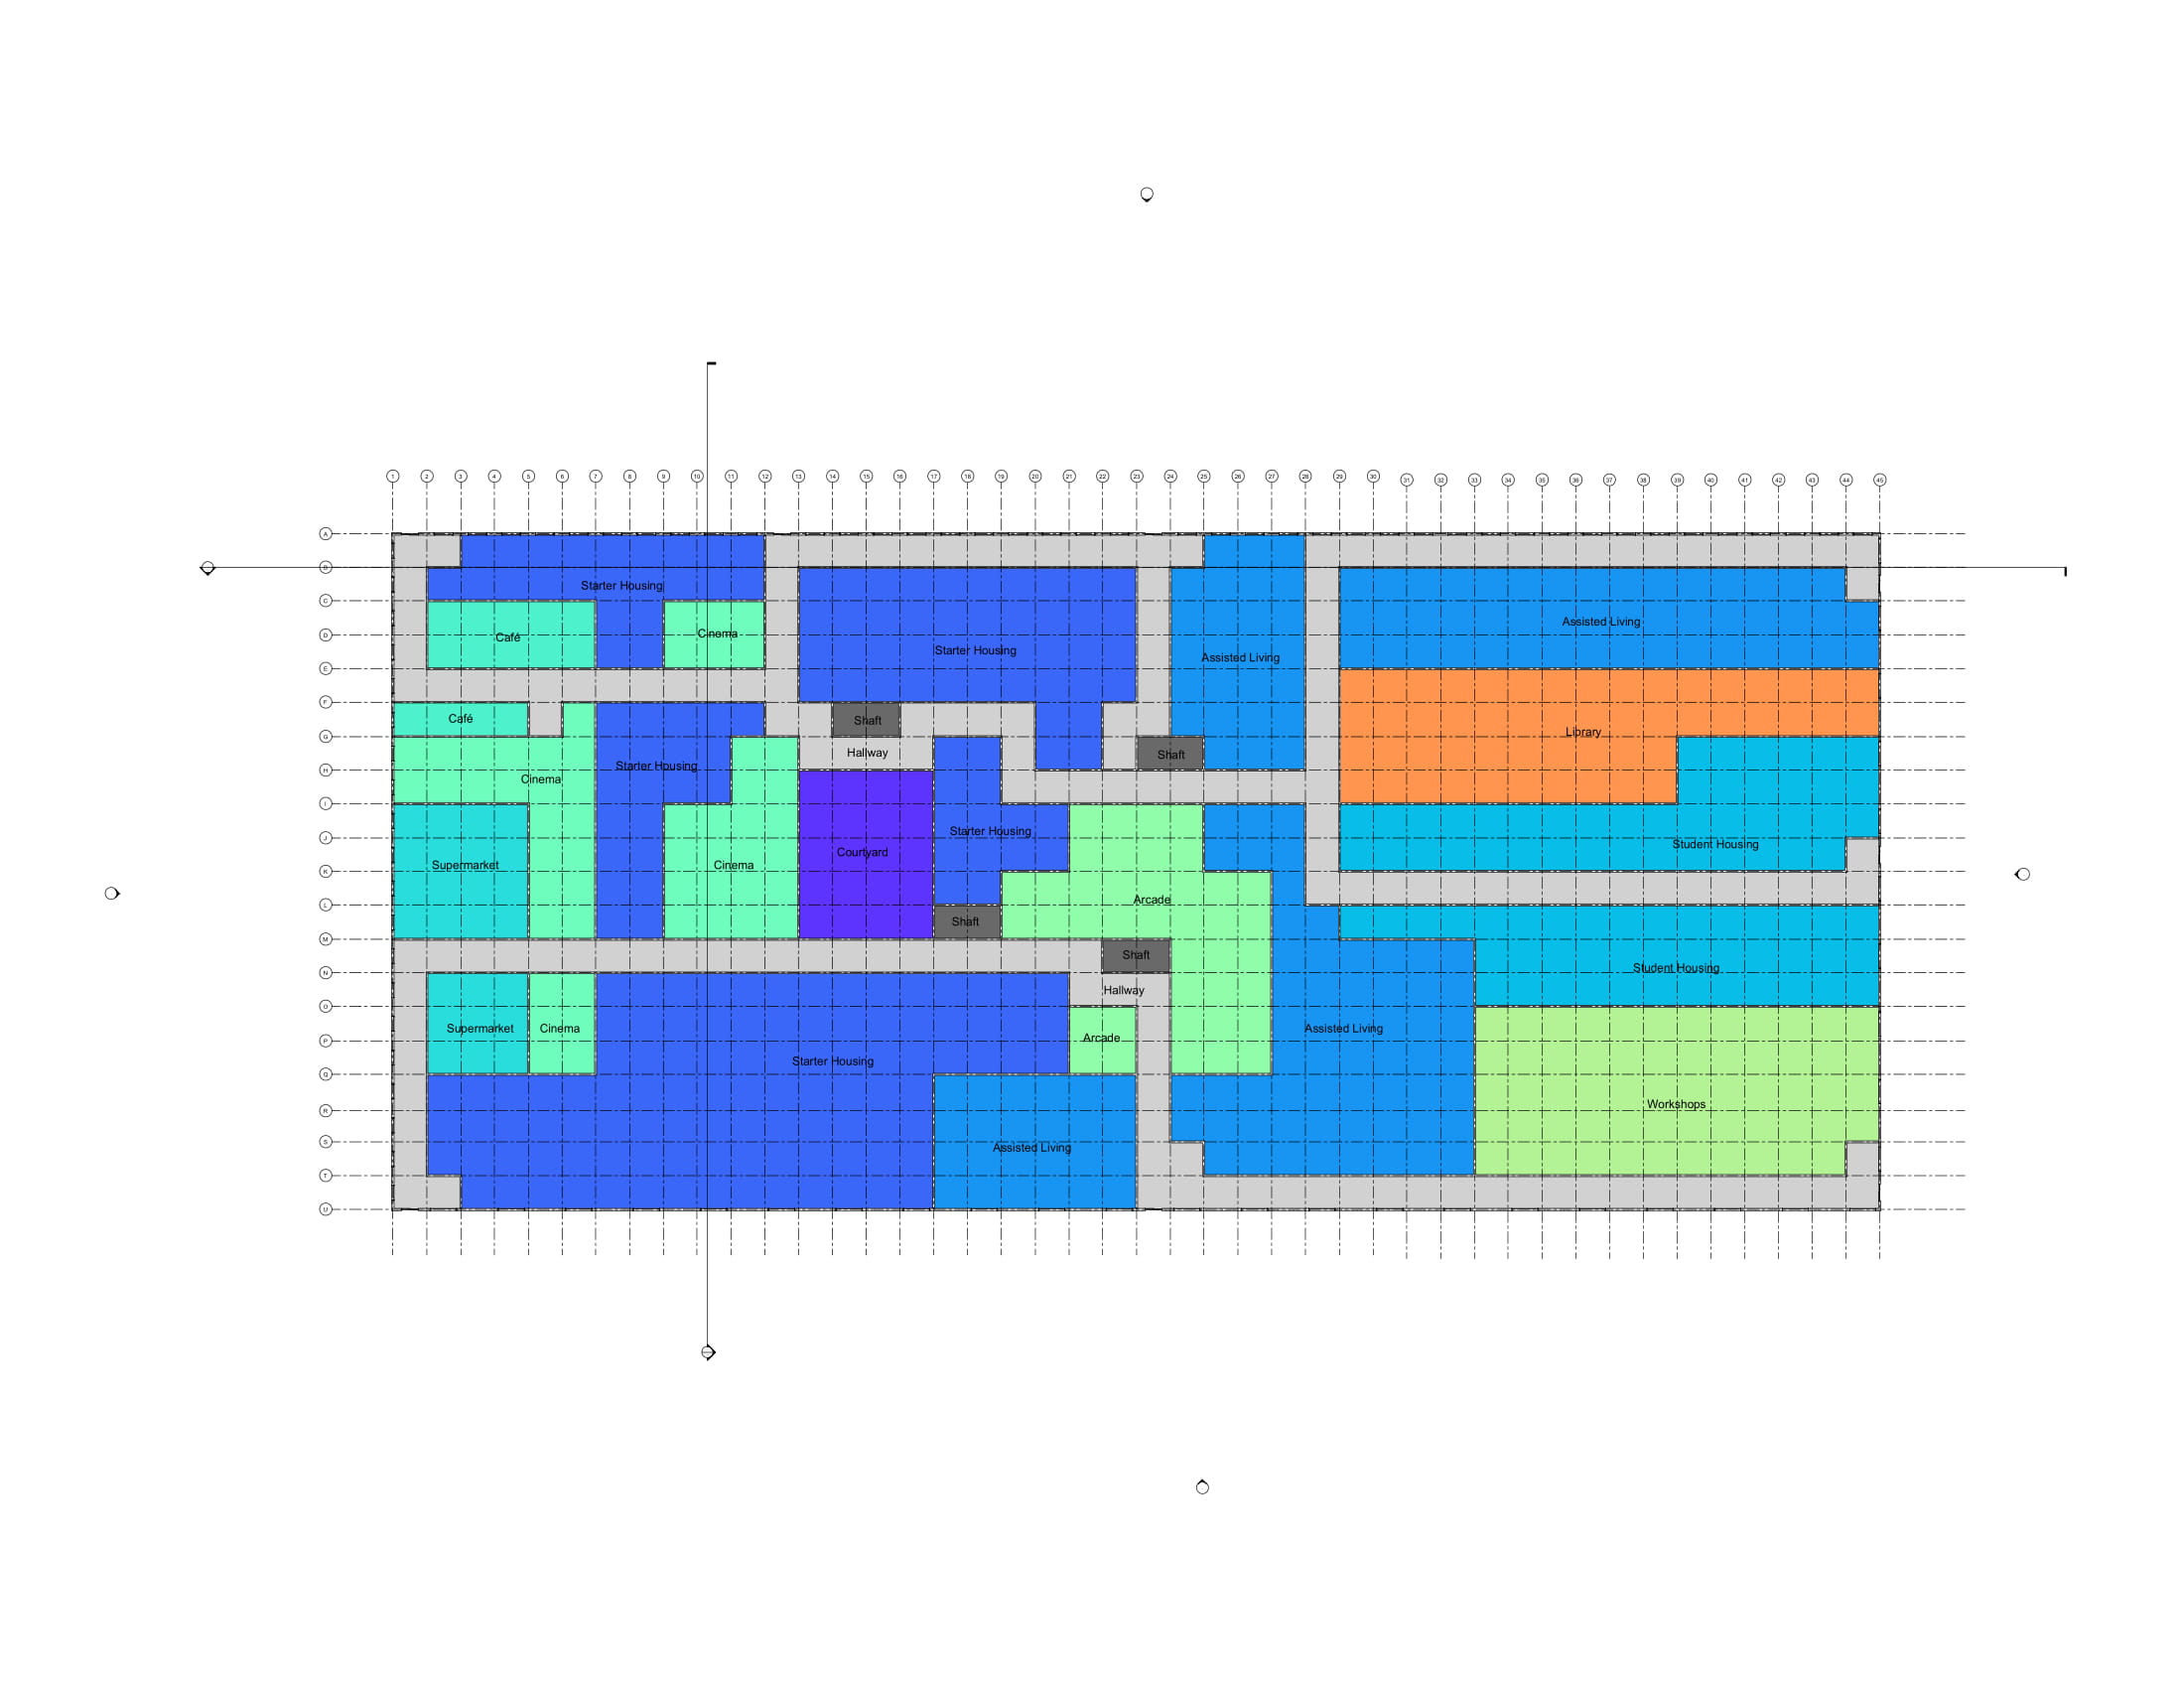
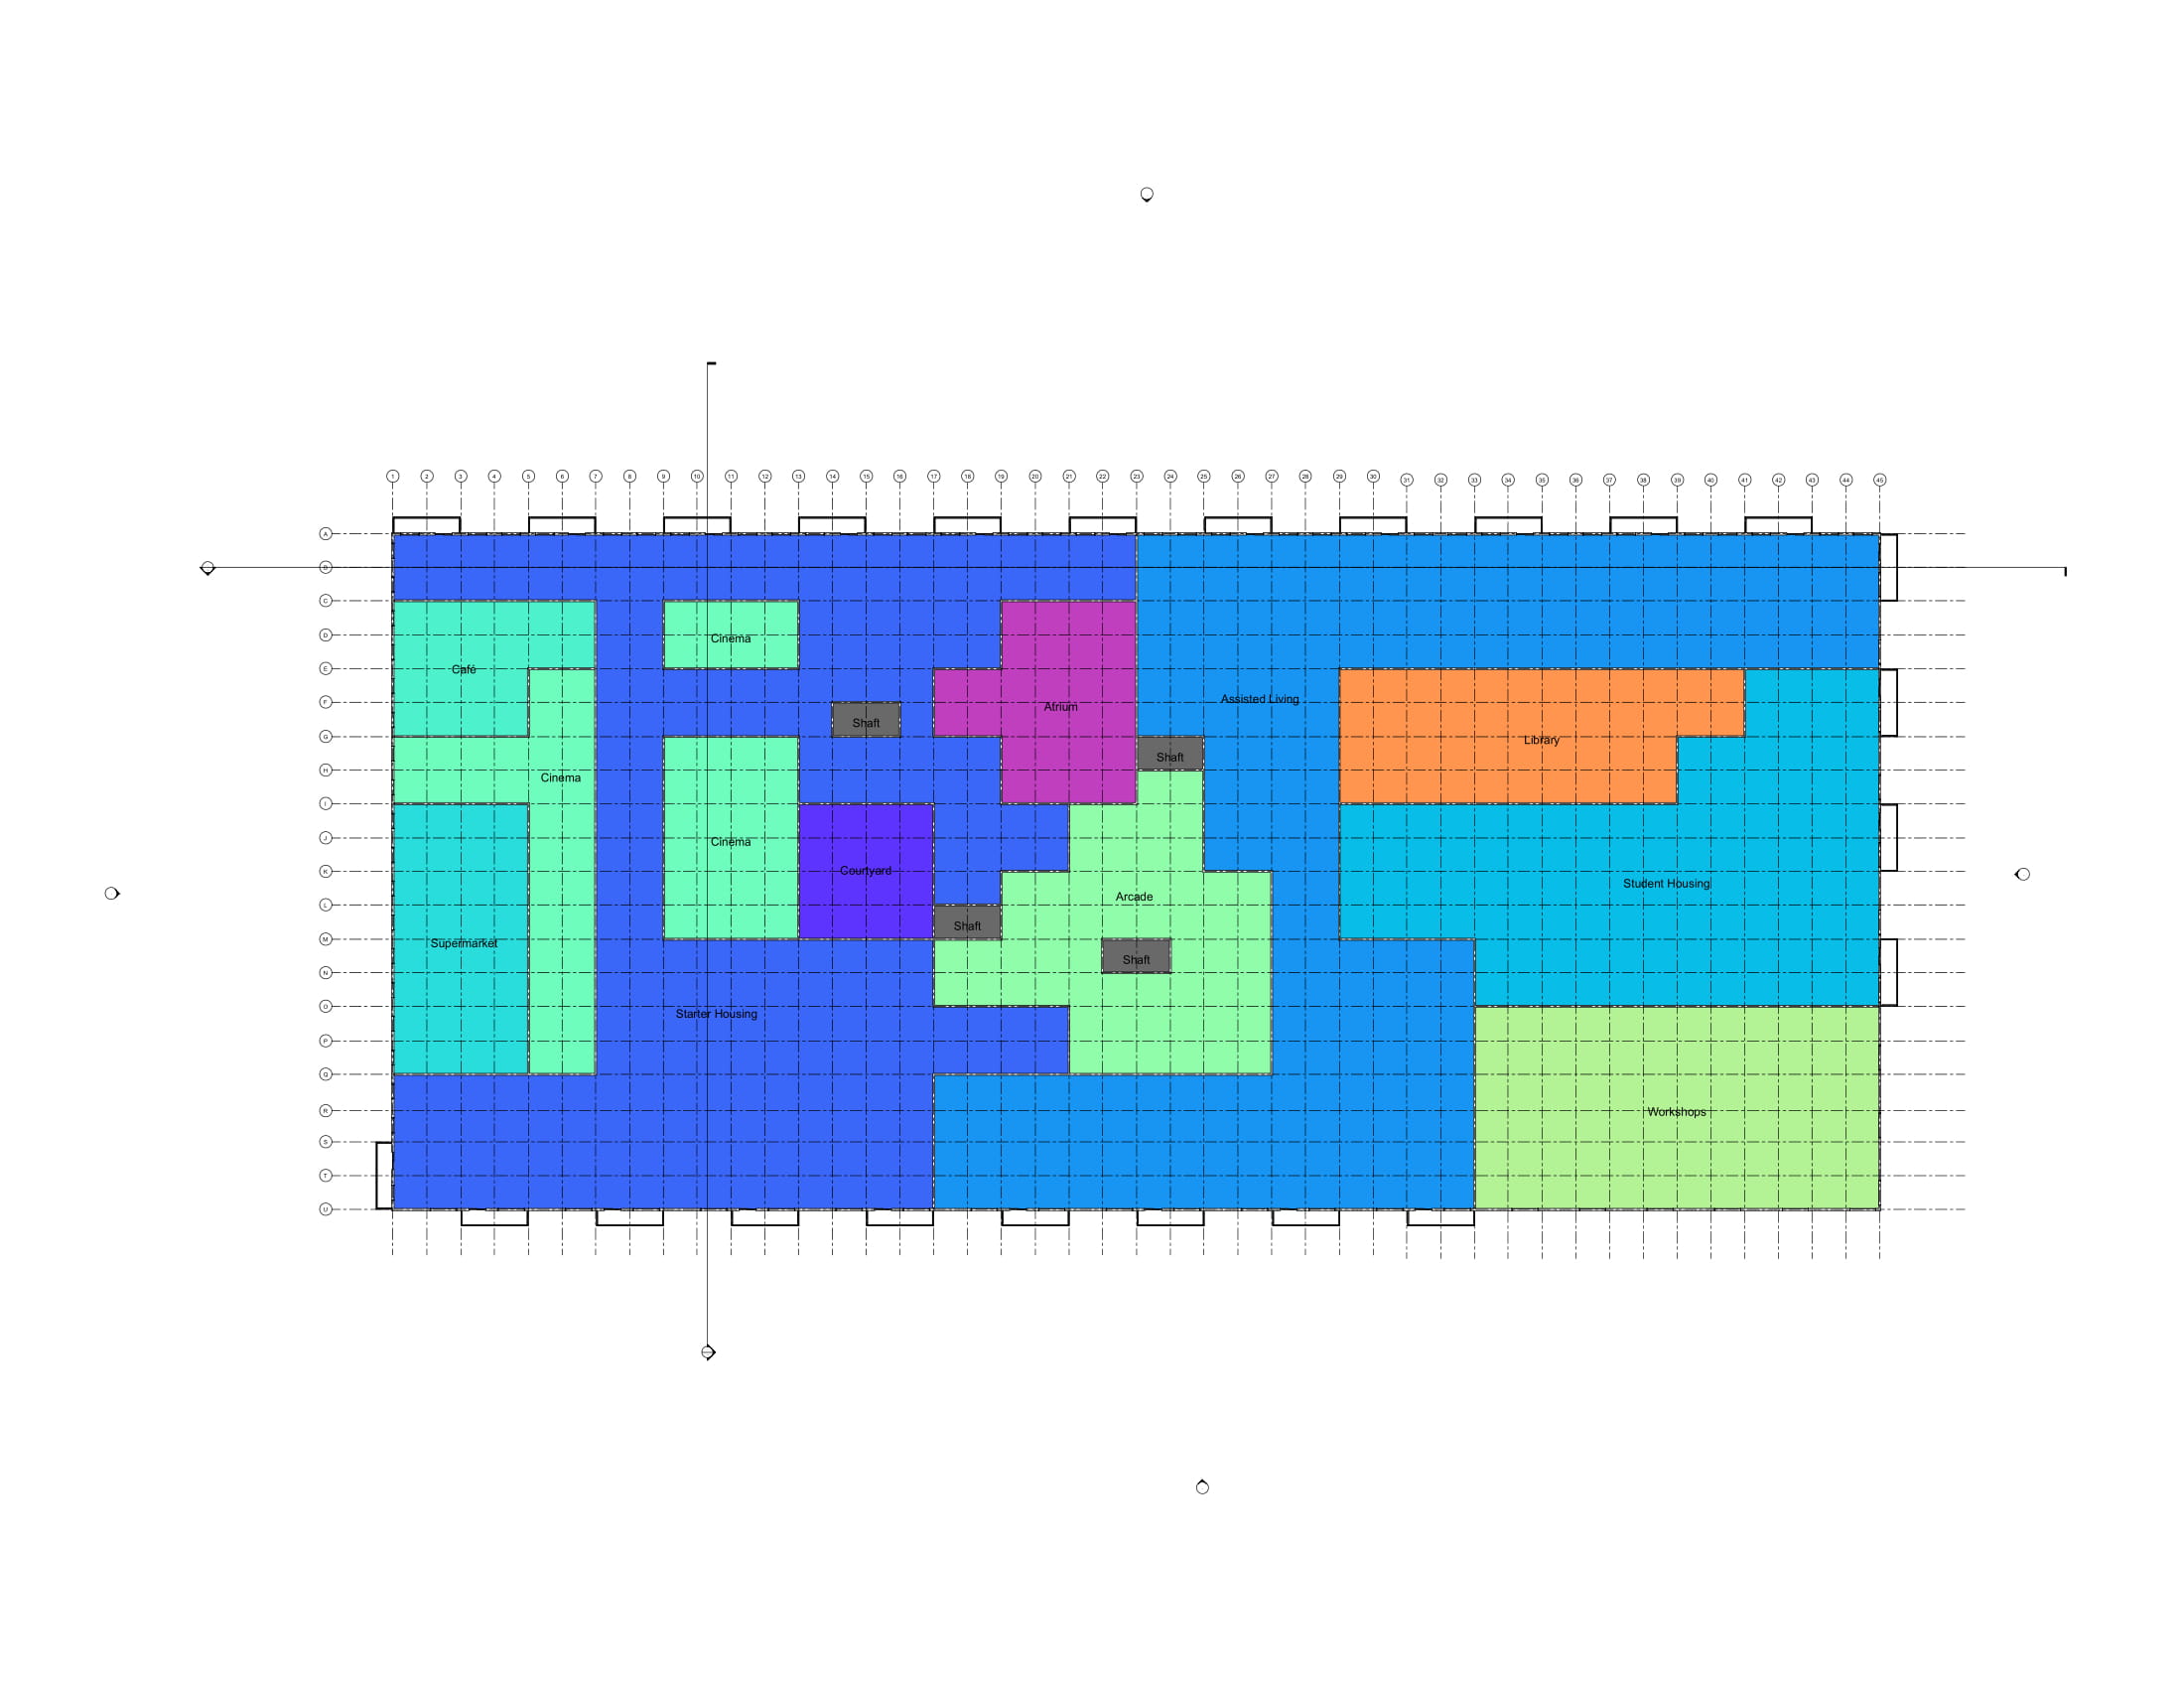
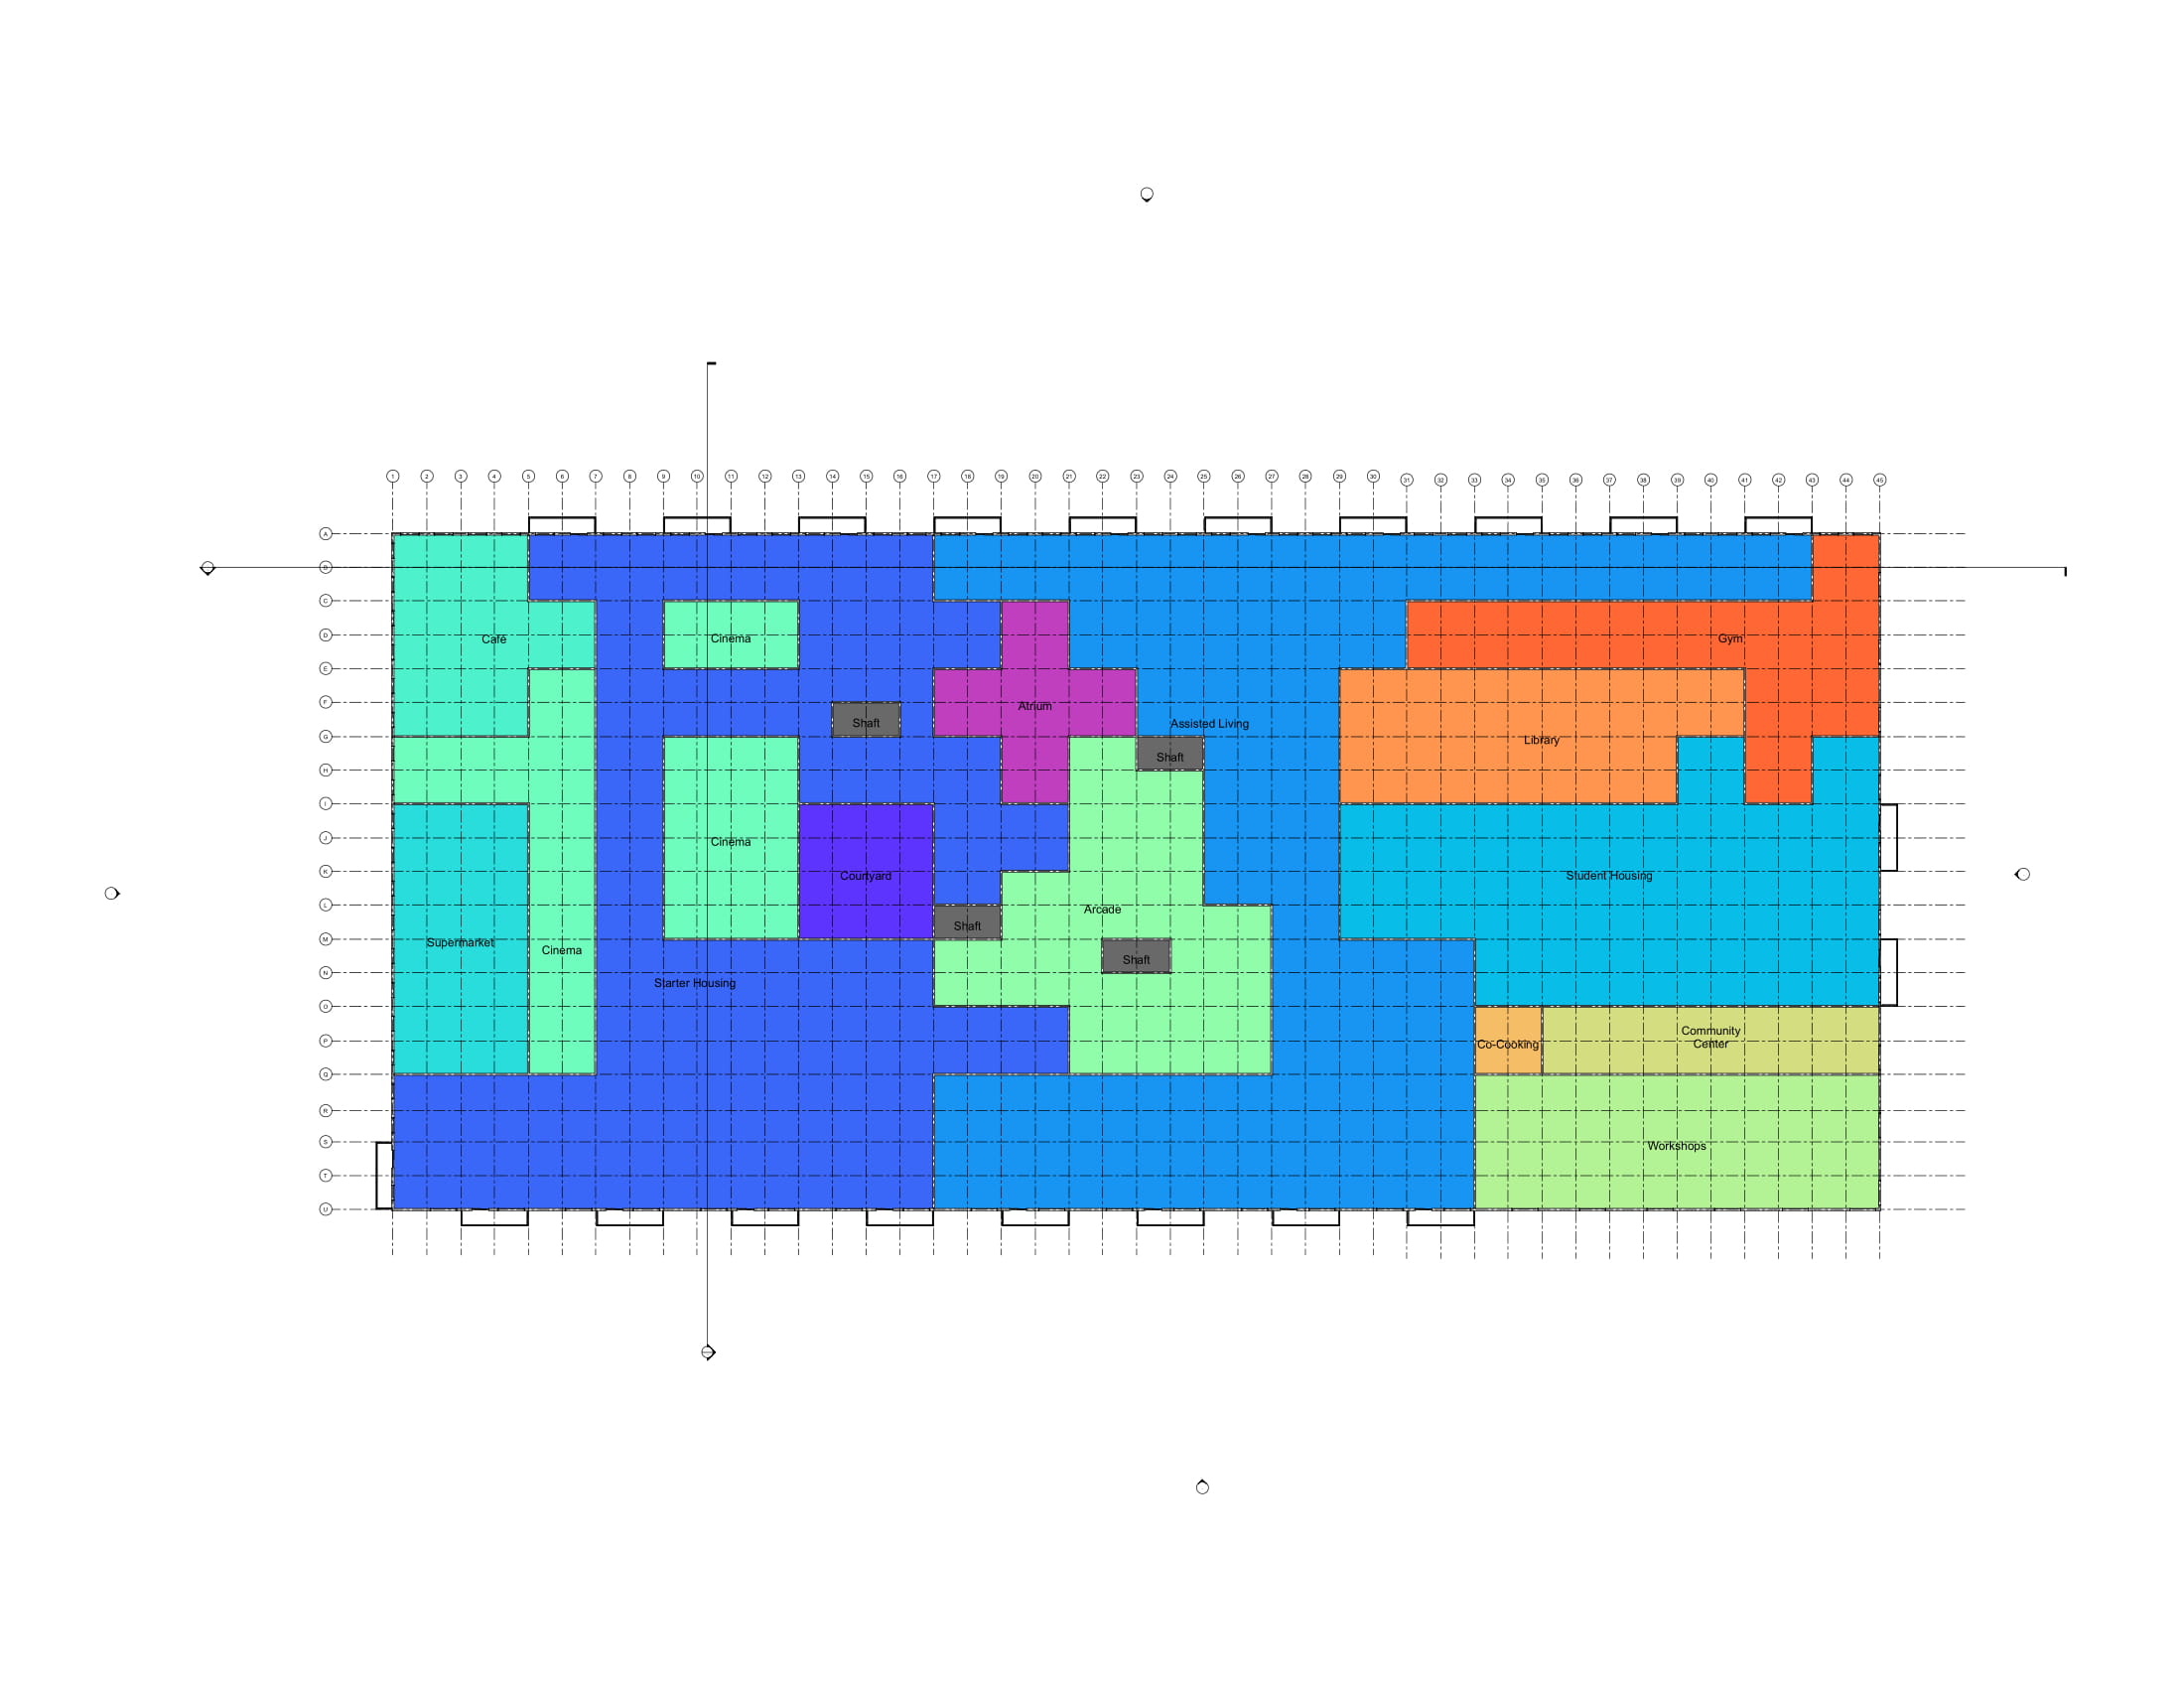
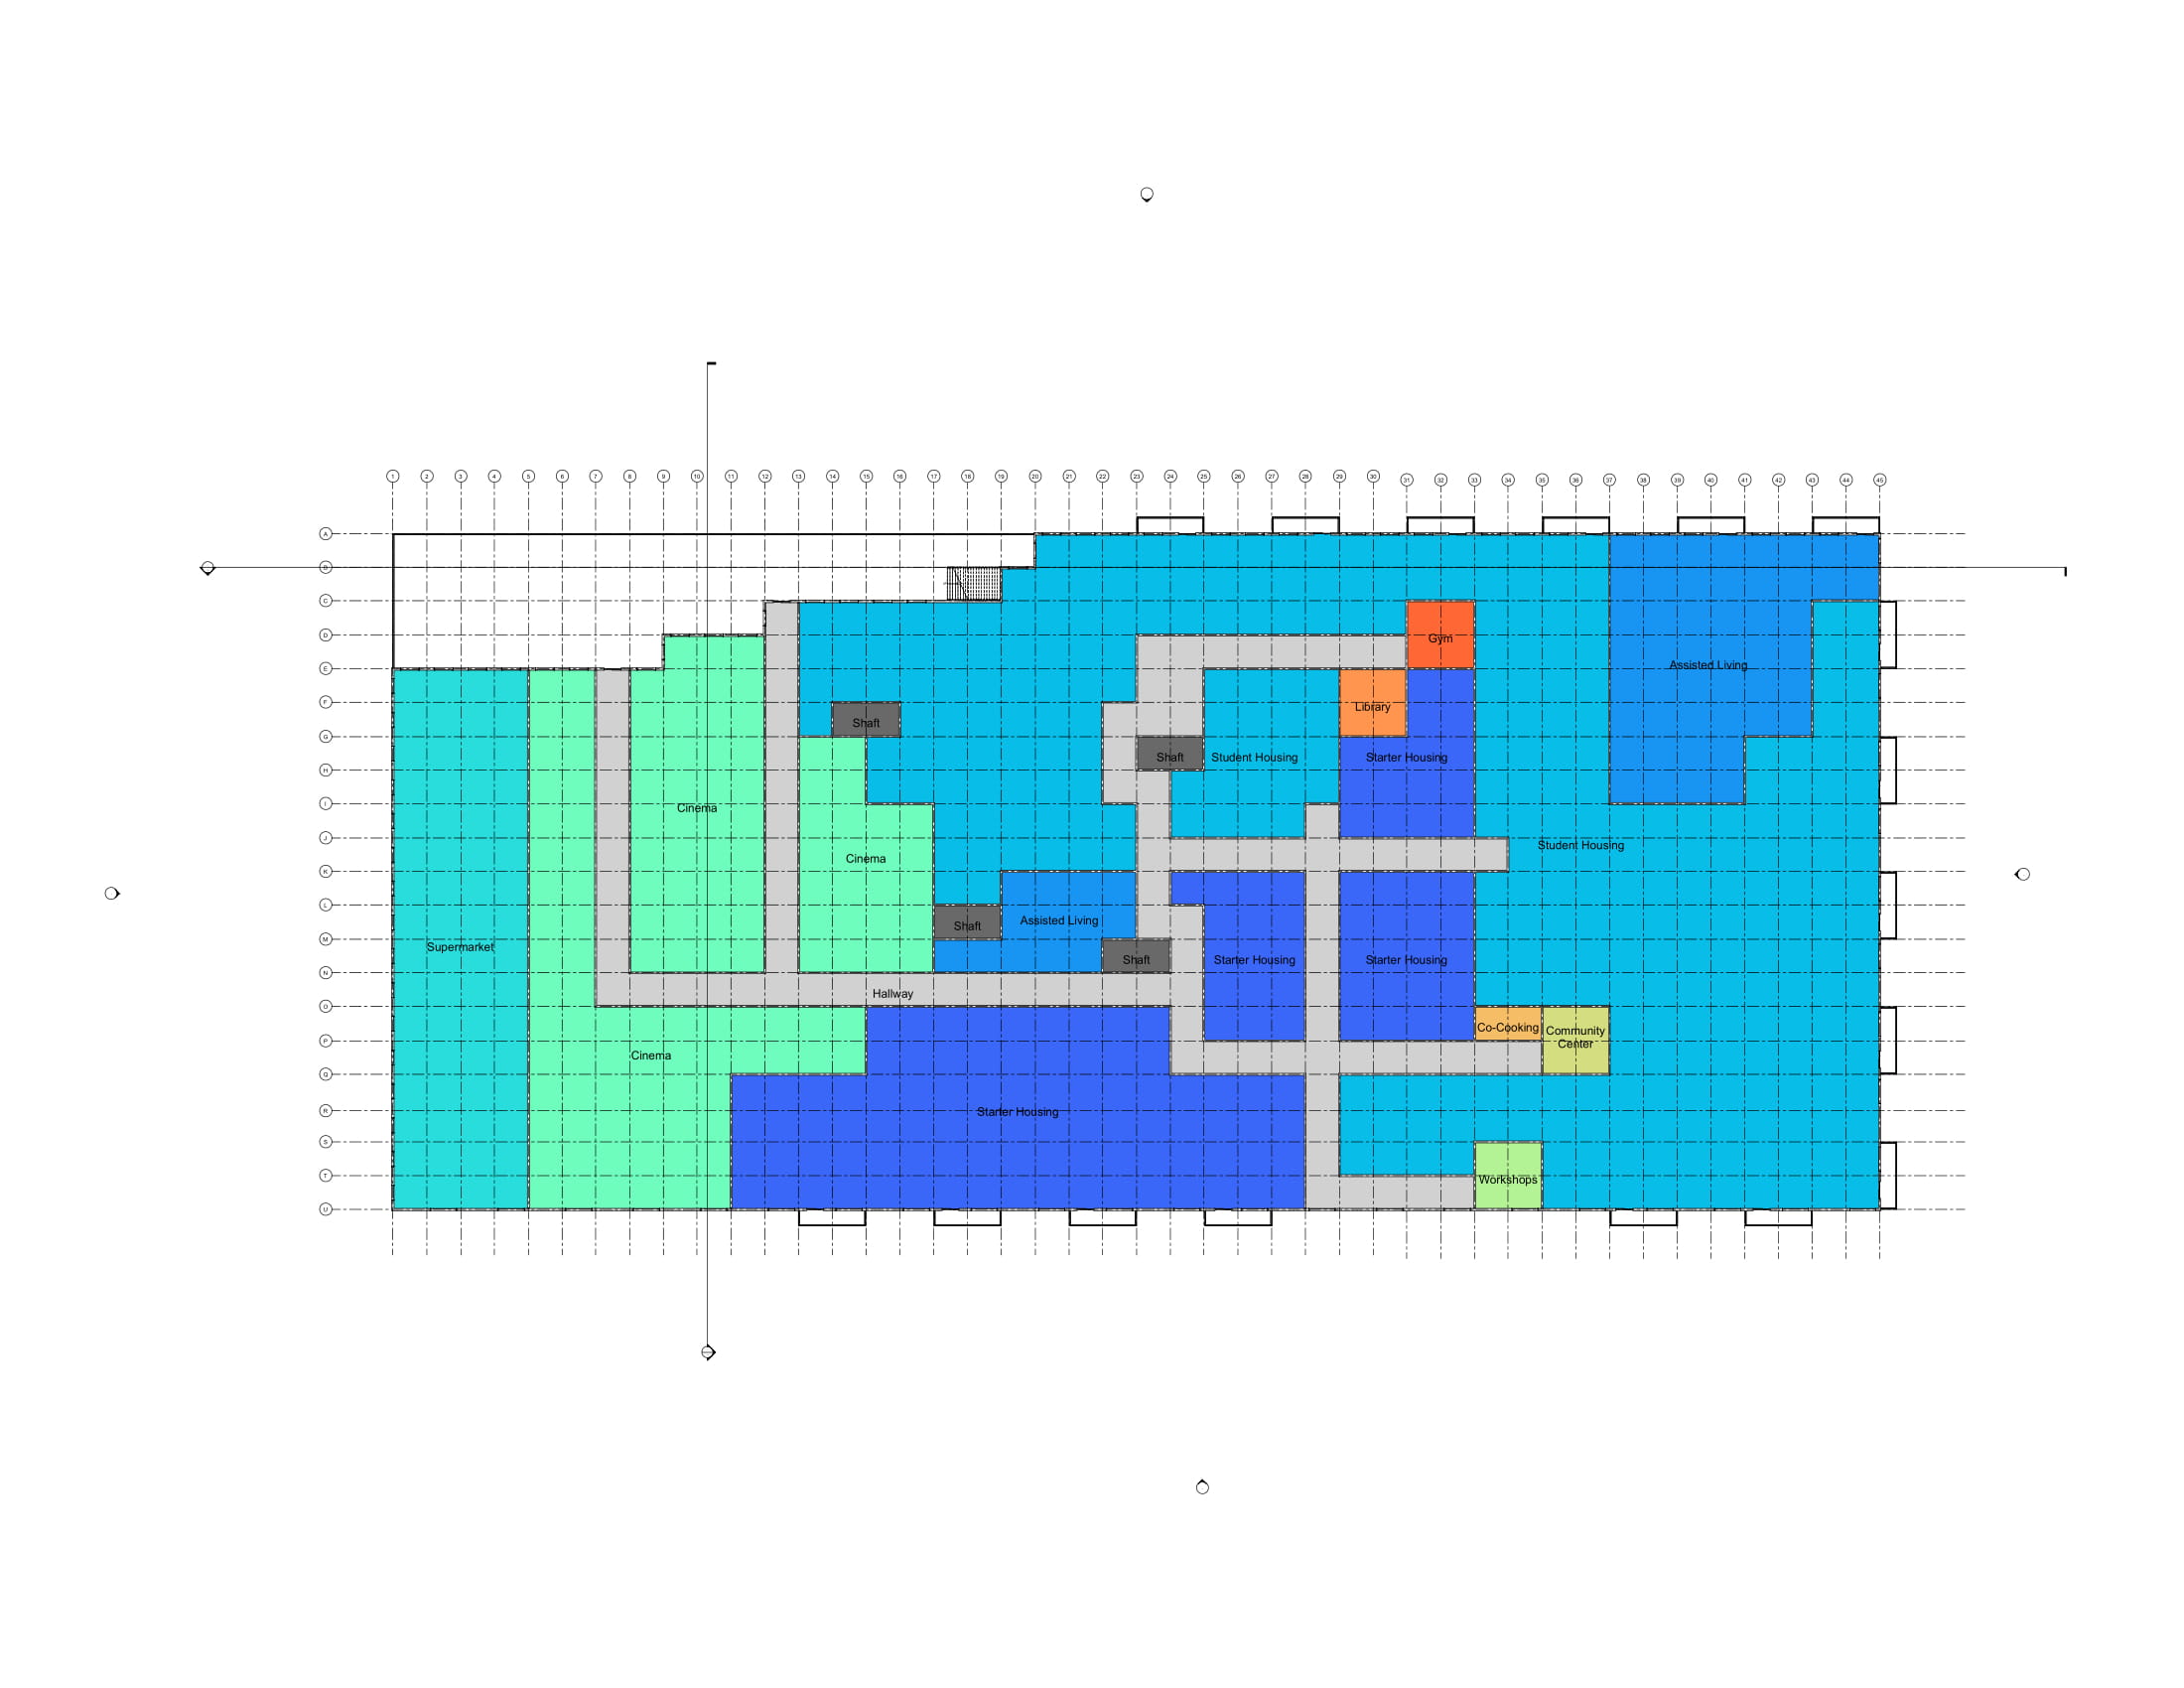
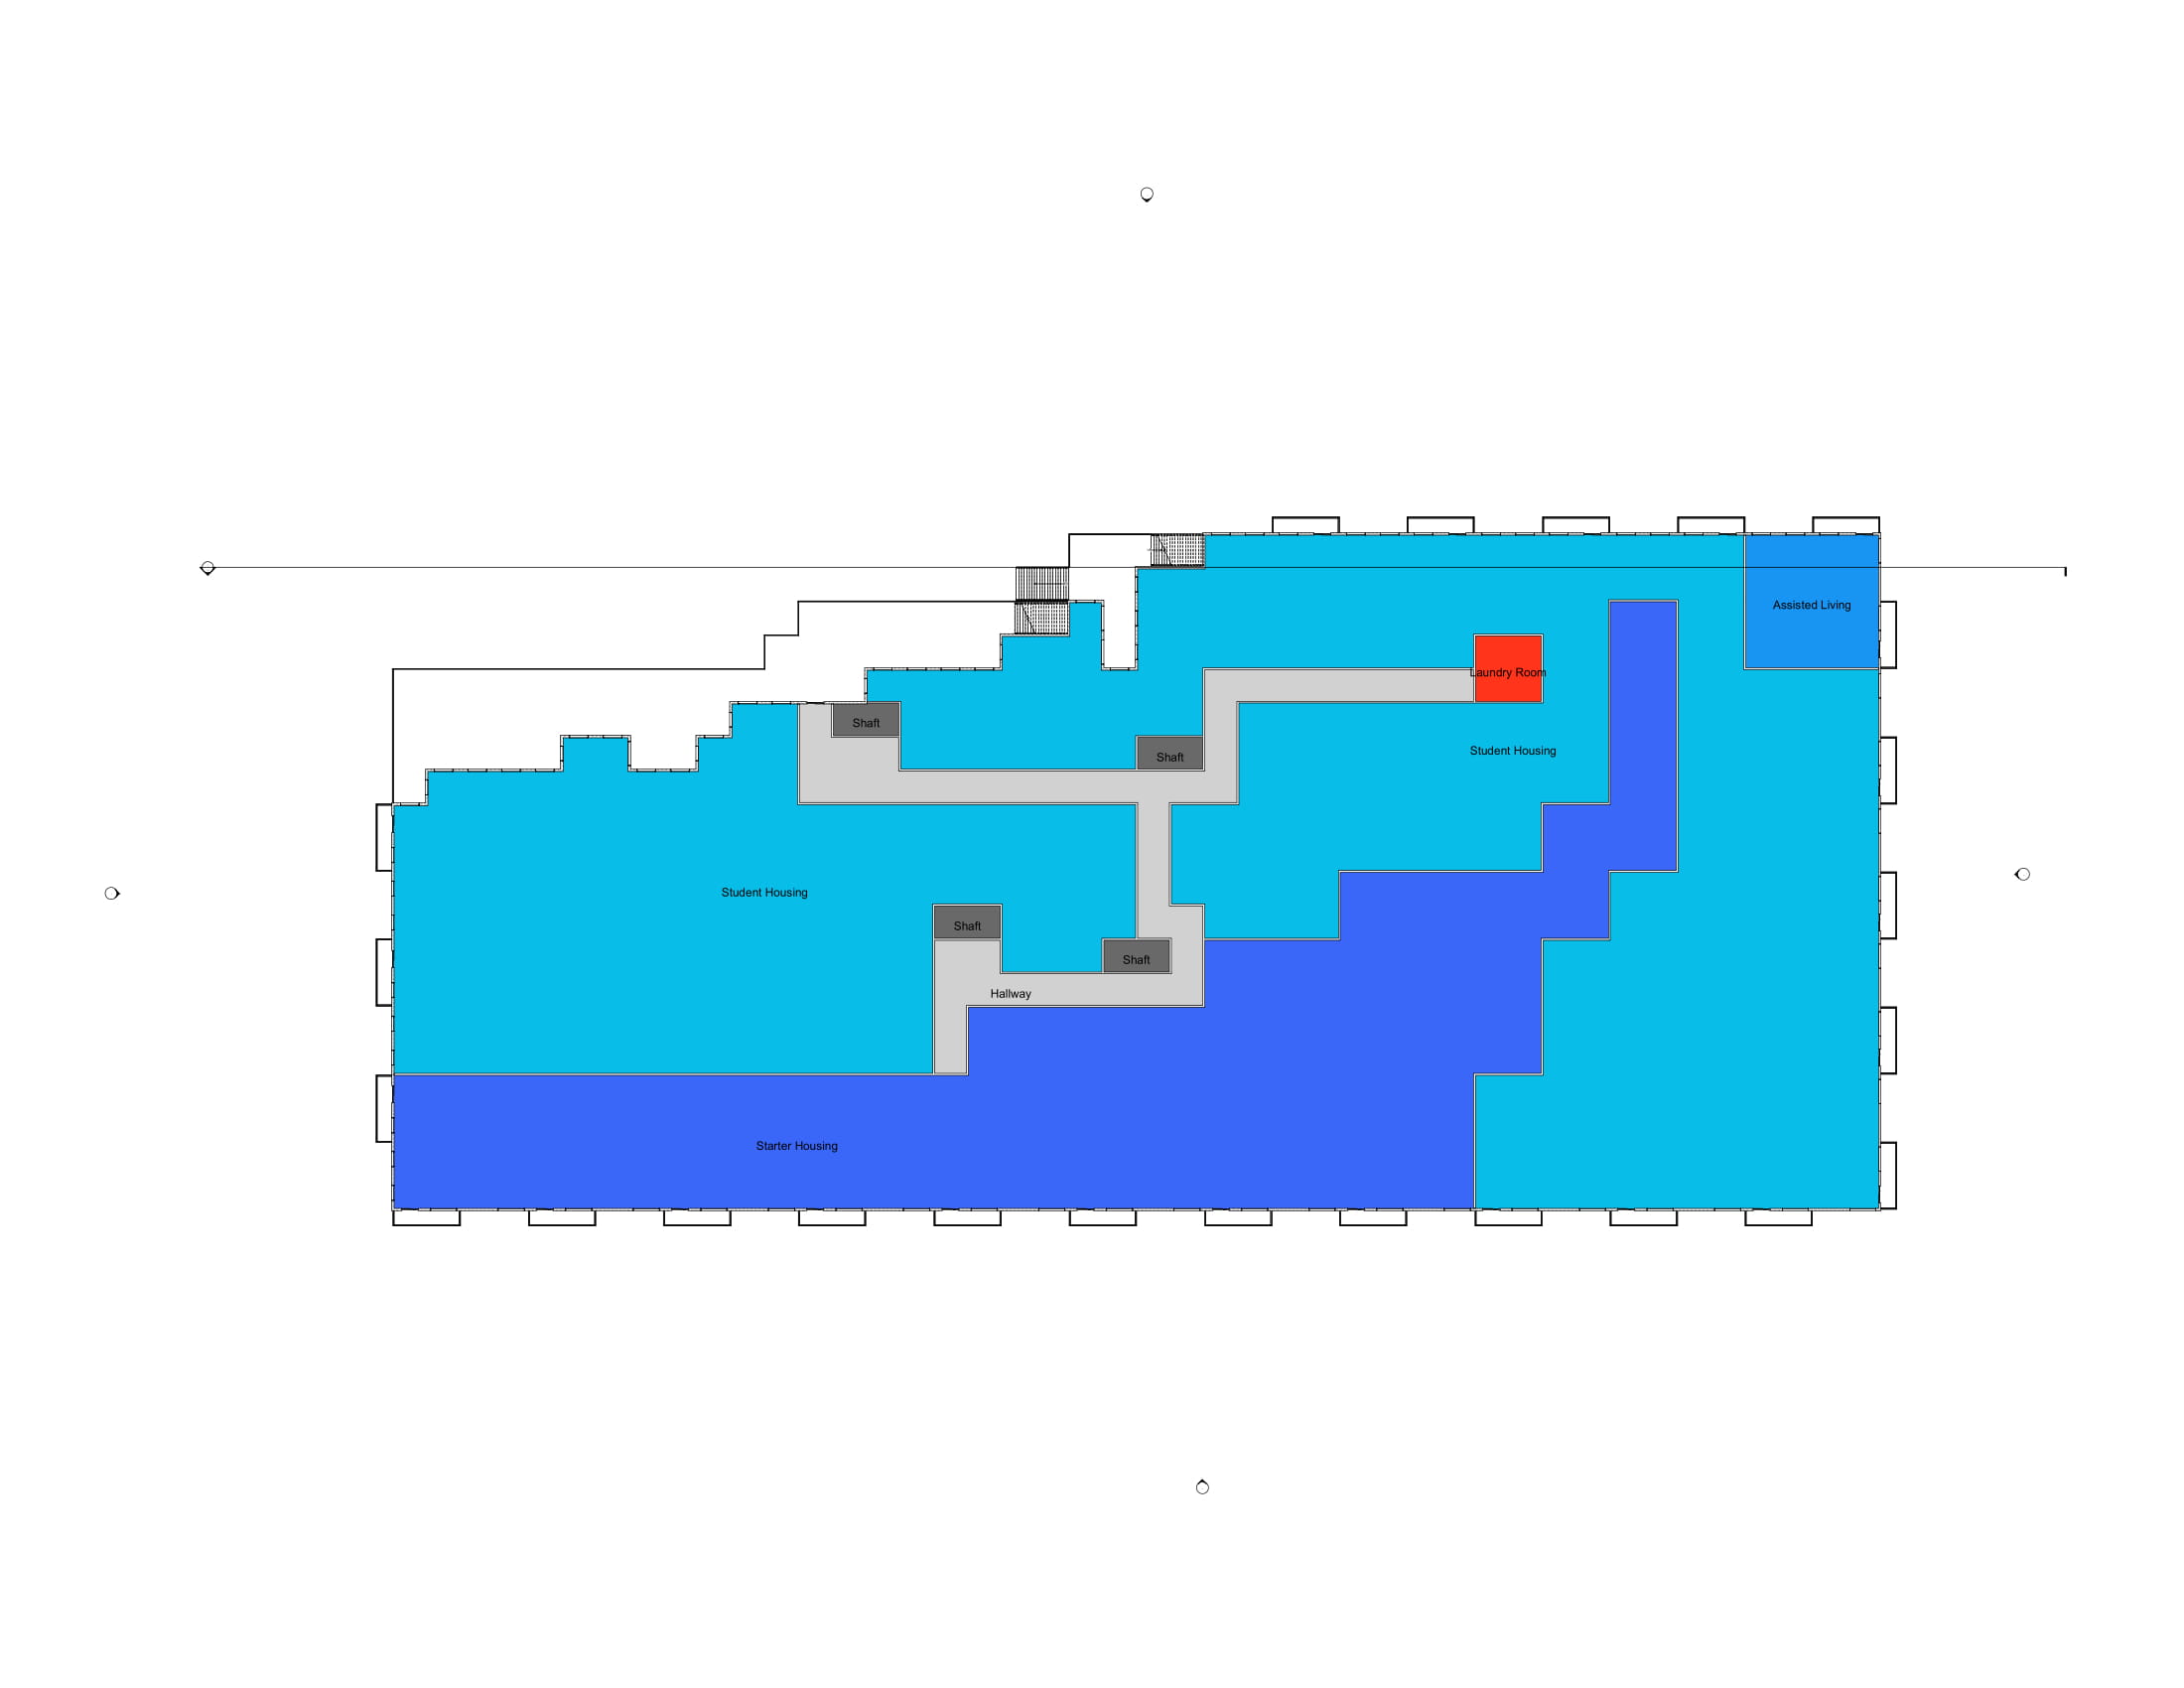
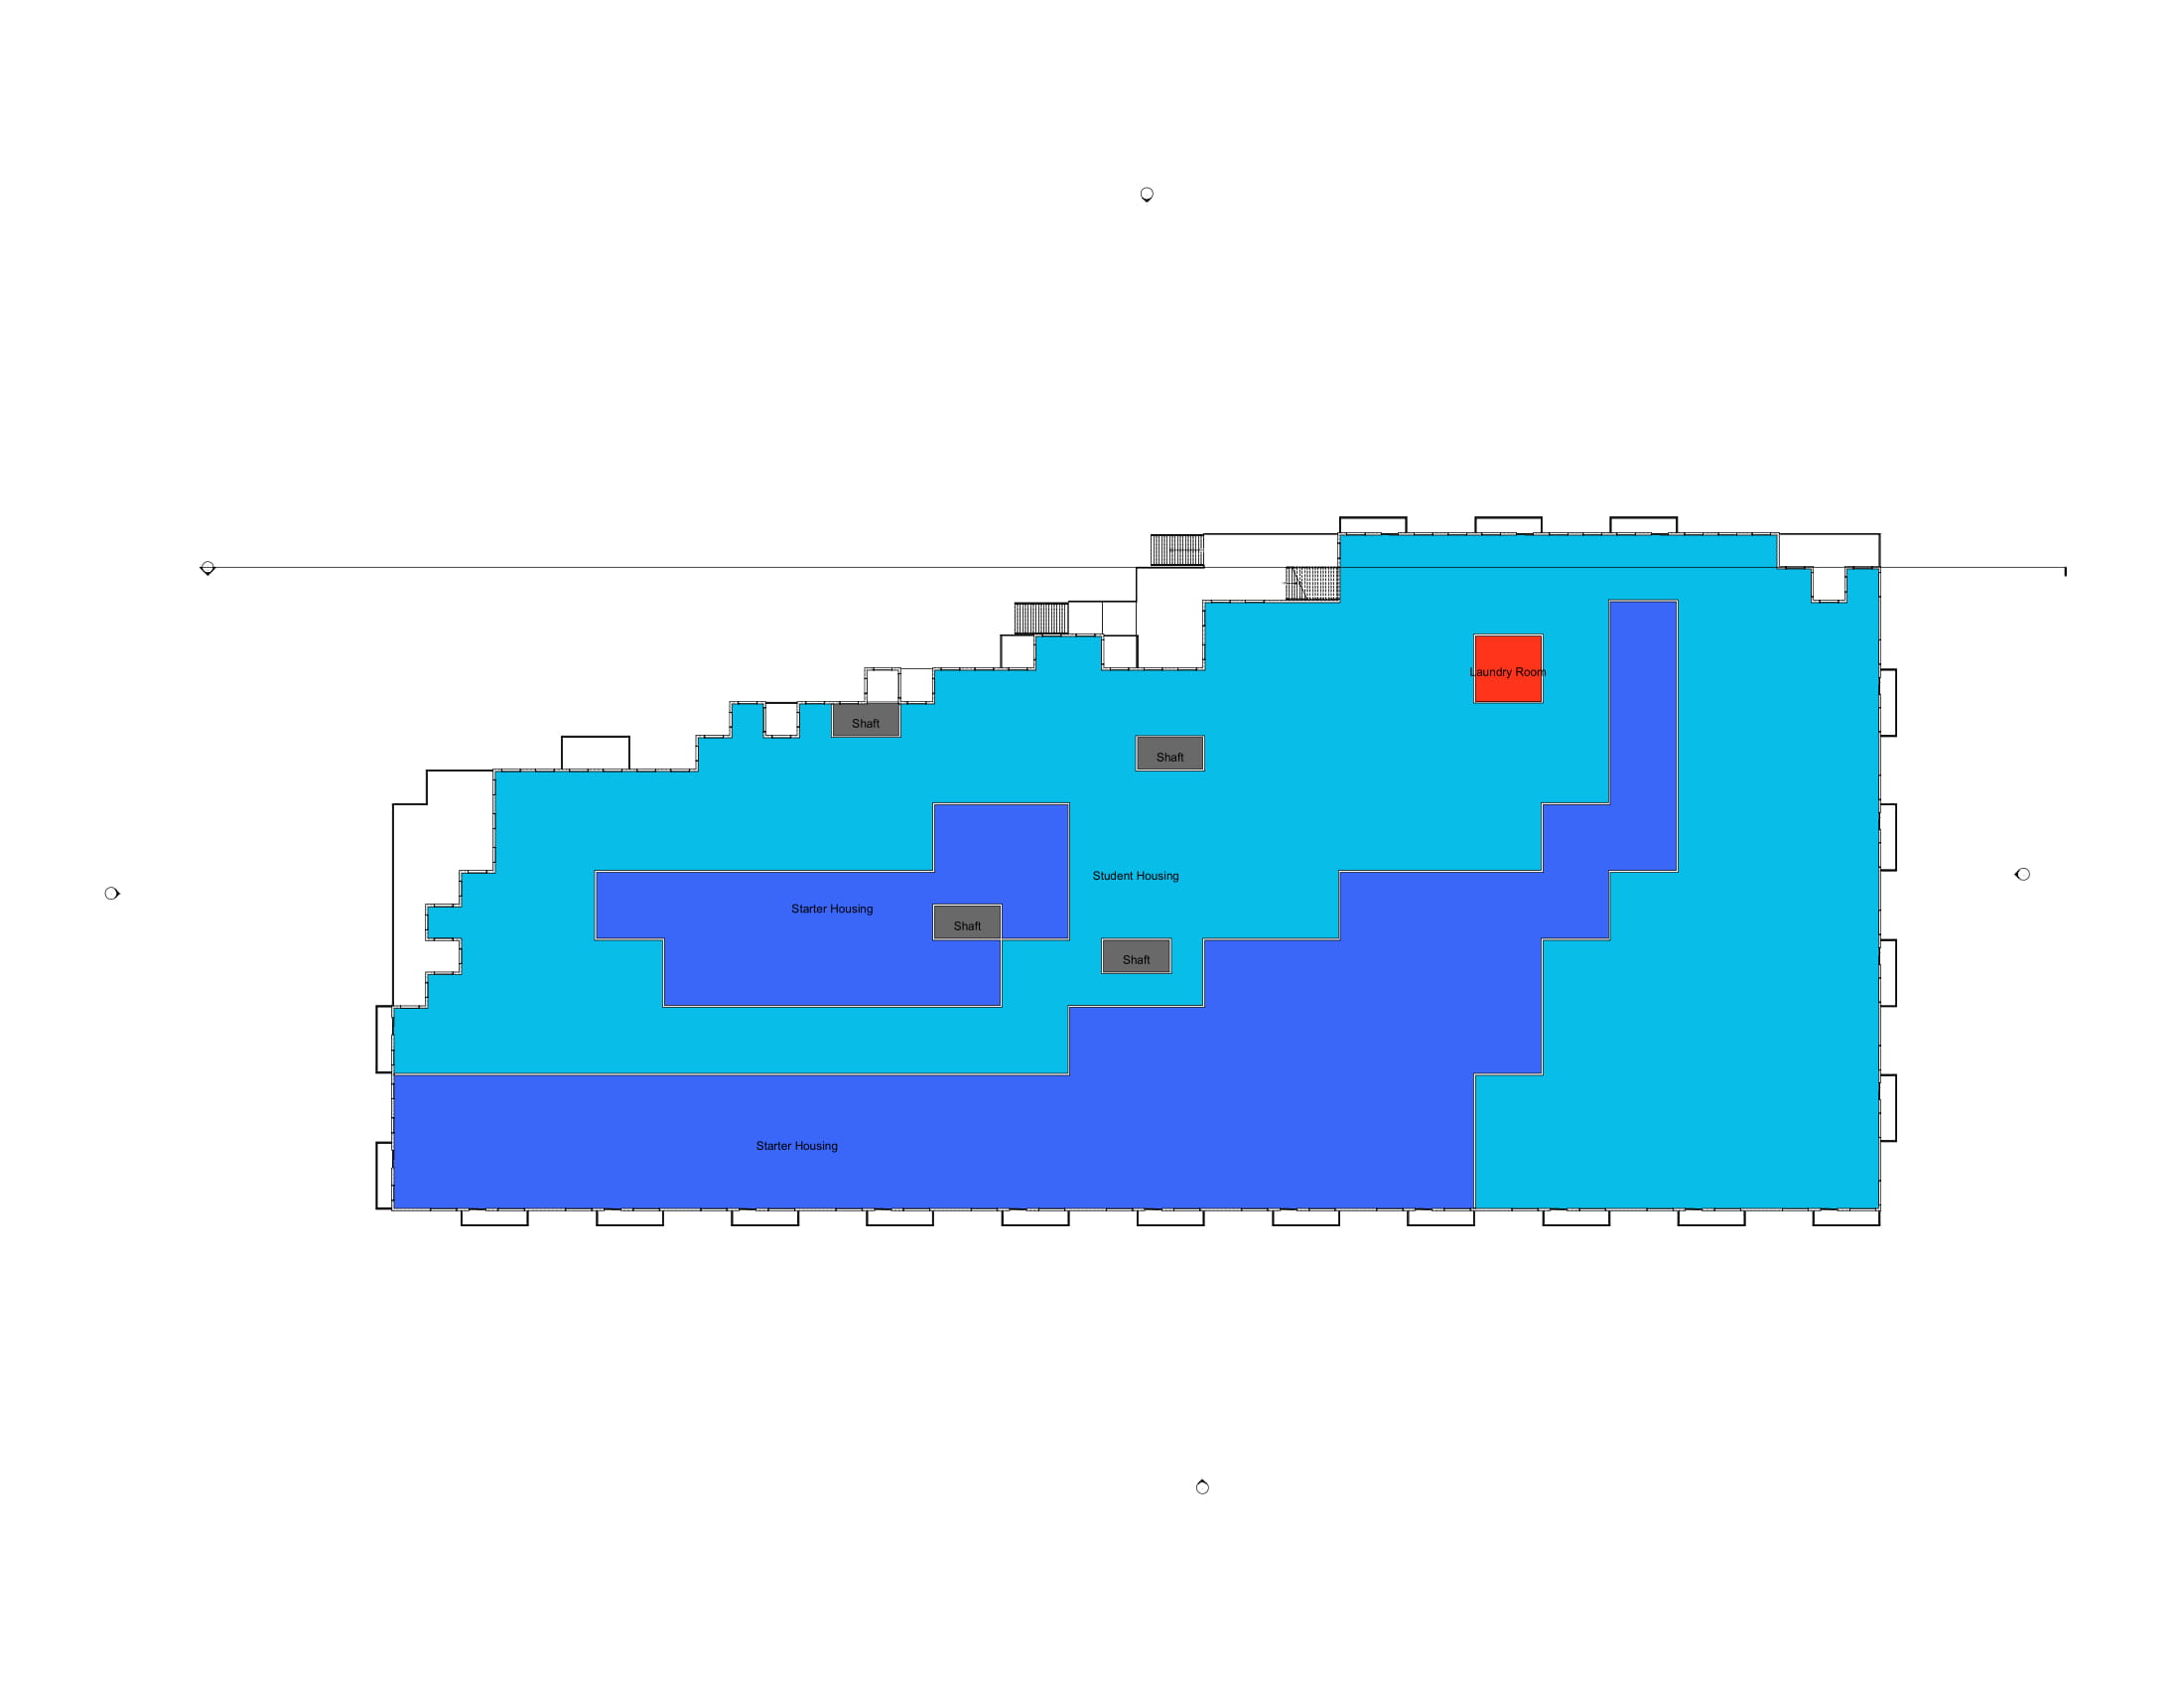
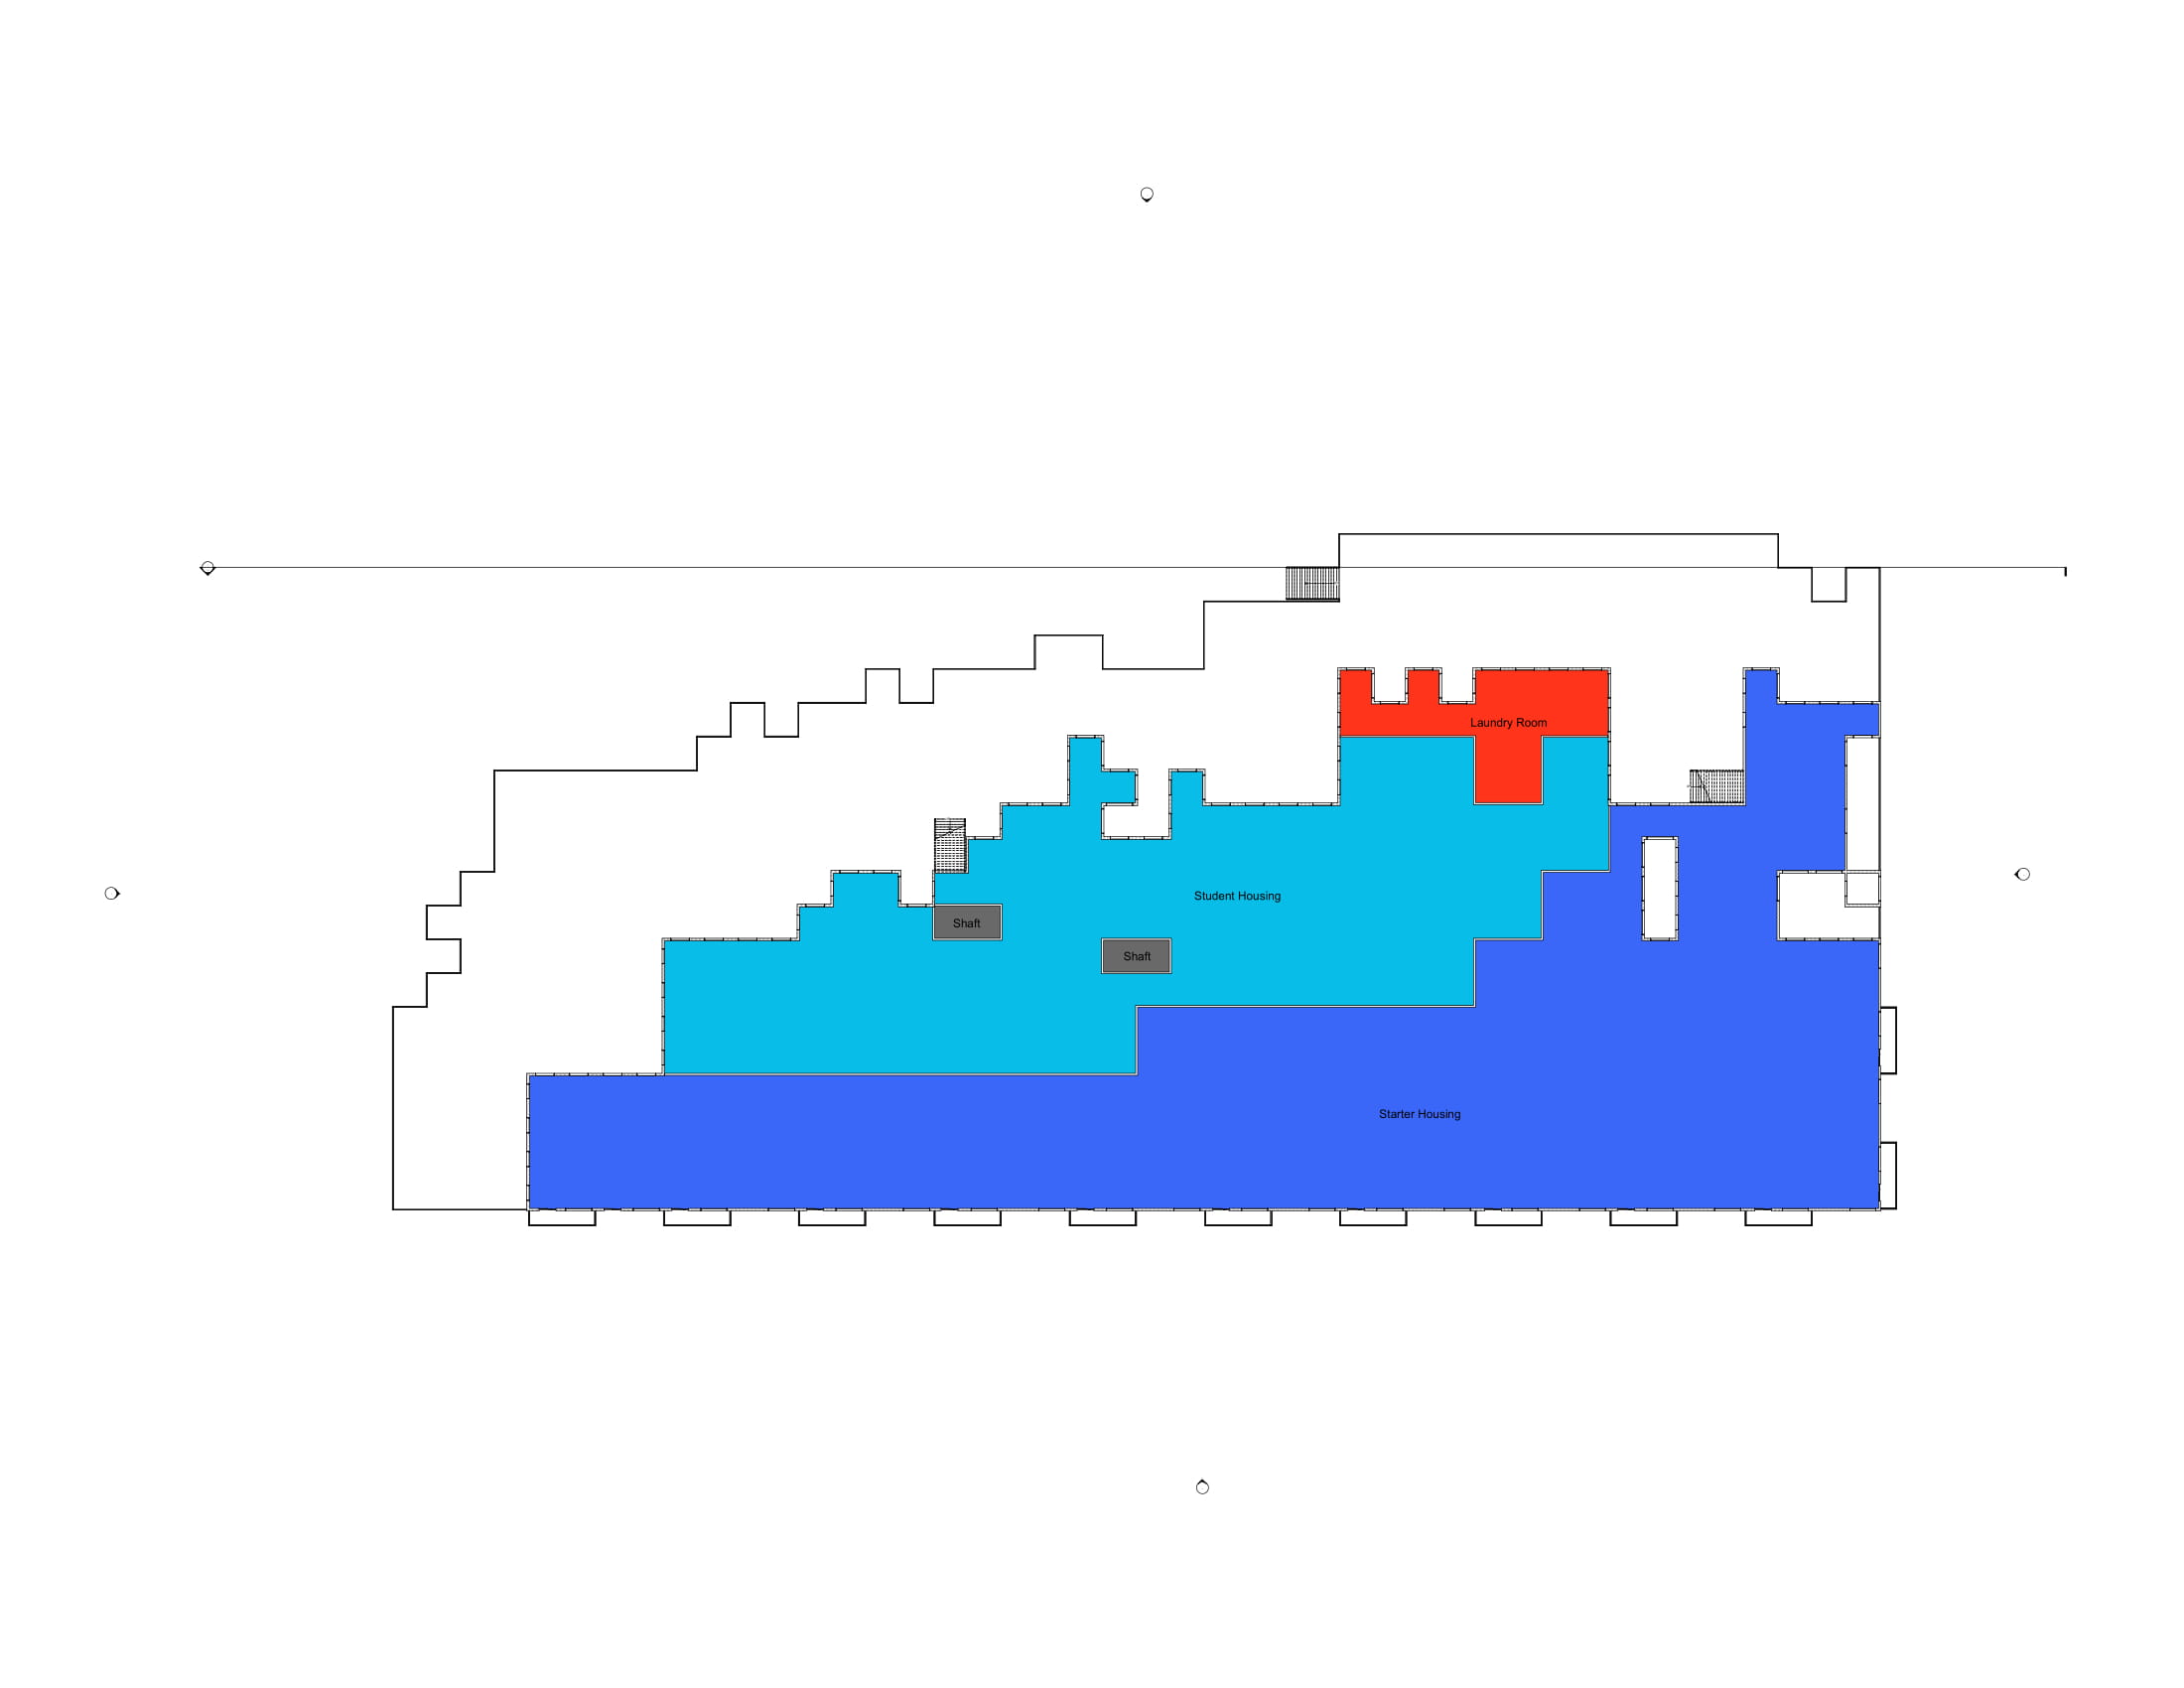
Floorplans - total floors
These floorplans are based on the results of Notebook 9. As already mentioned there, there are some problems we could not solve due to a few oversights that went unsolved owing to a lack of time. The building is quite wide and as a consequence, a lot of spaces experience little light. In addition, many spaces have been placed in unsuitable positions, as for example the supermarket that has a height of five floors. Furthermore, some functions even got sliced into multiple clusters, for instance, the cinema was split into three separate parts on some floors.
Note: During the final presentation we got the tip to remove some voxel so the building would not be that massif. These changes are, unfortunately, only visible in the renders.


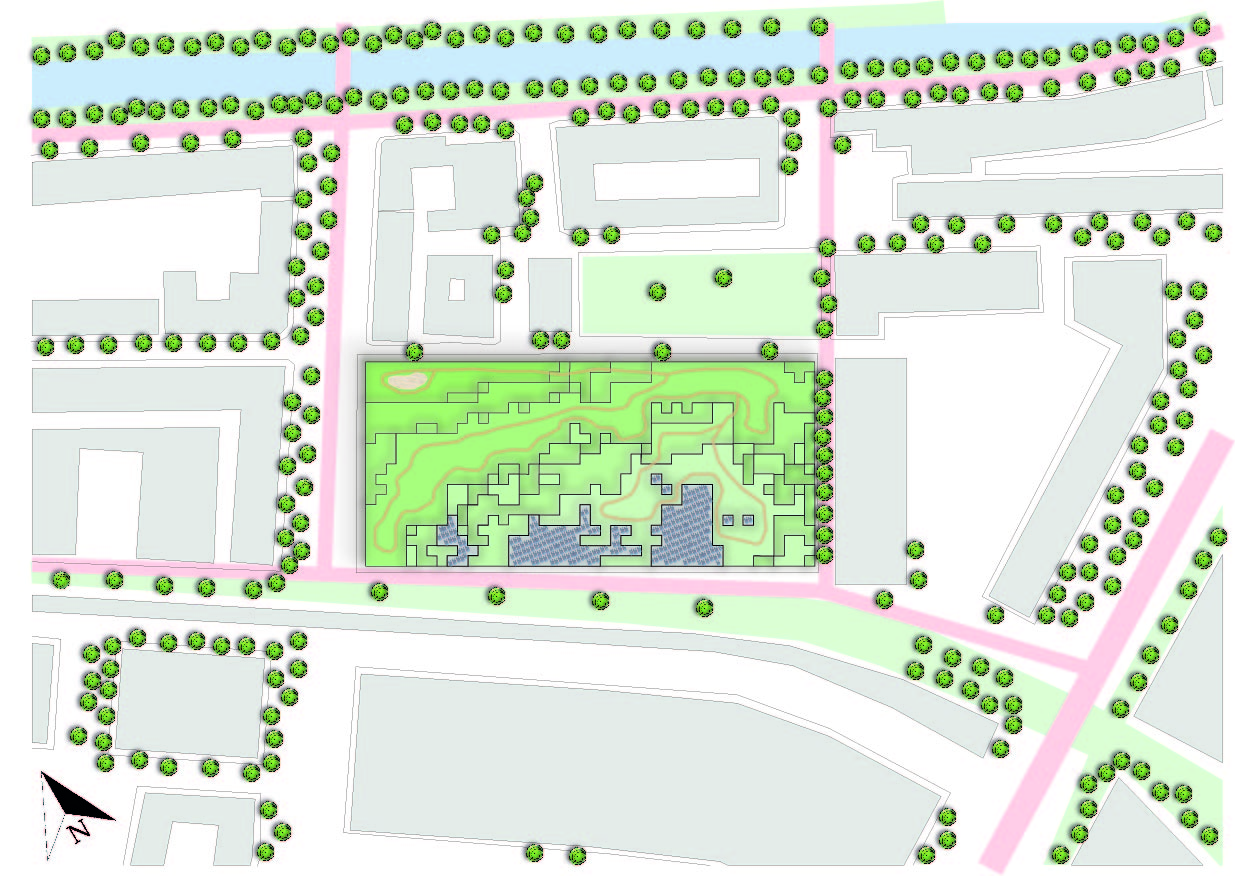
Urban plan
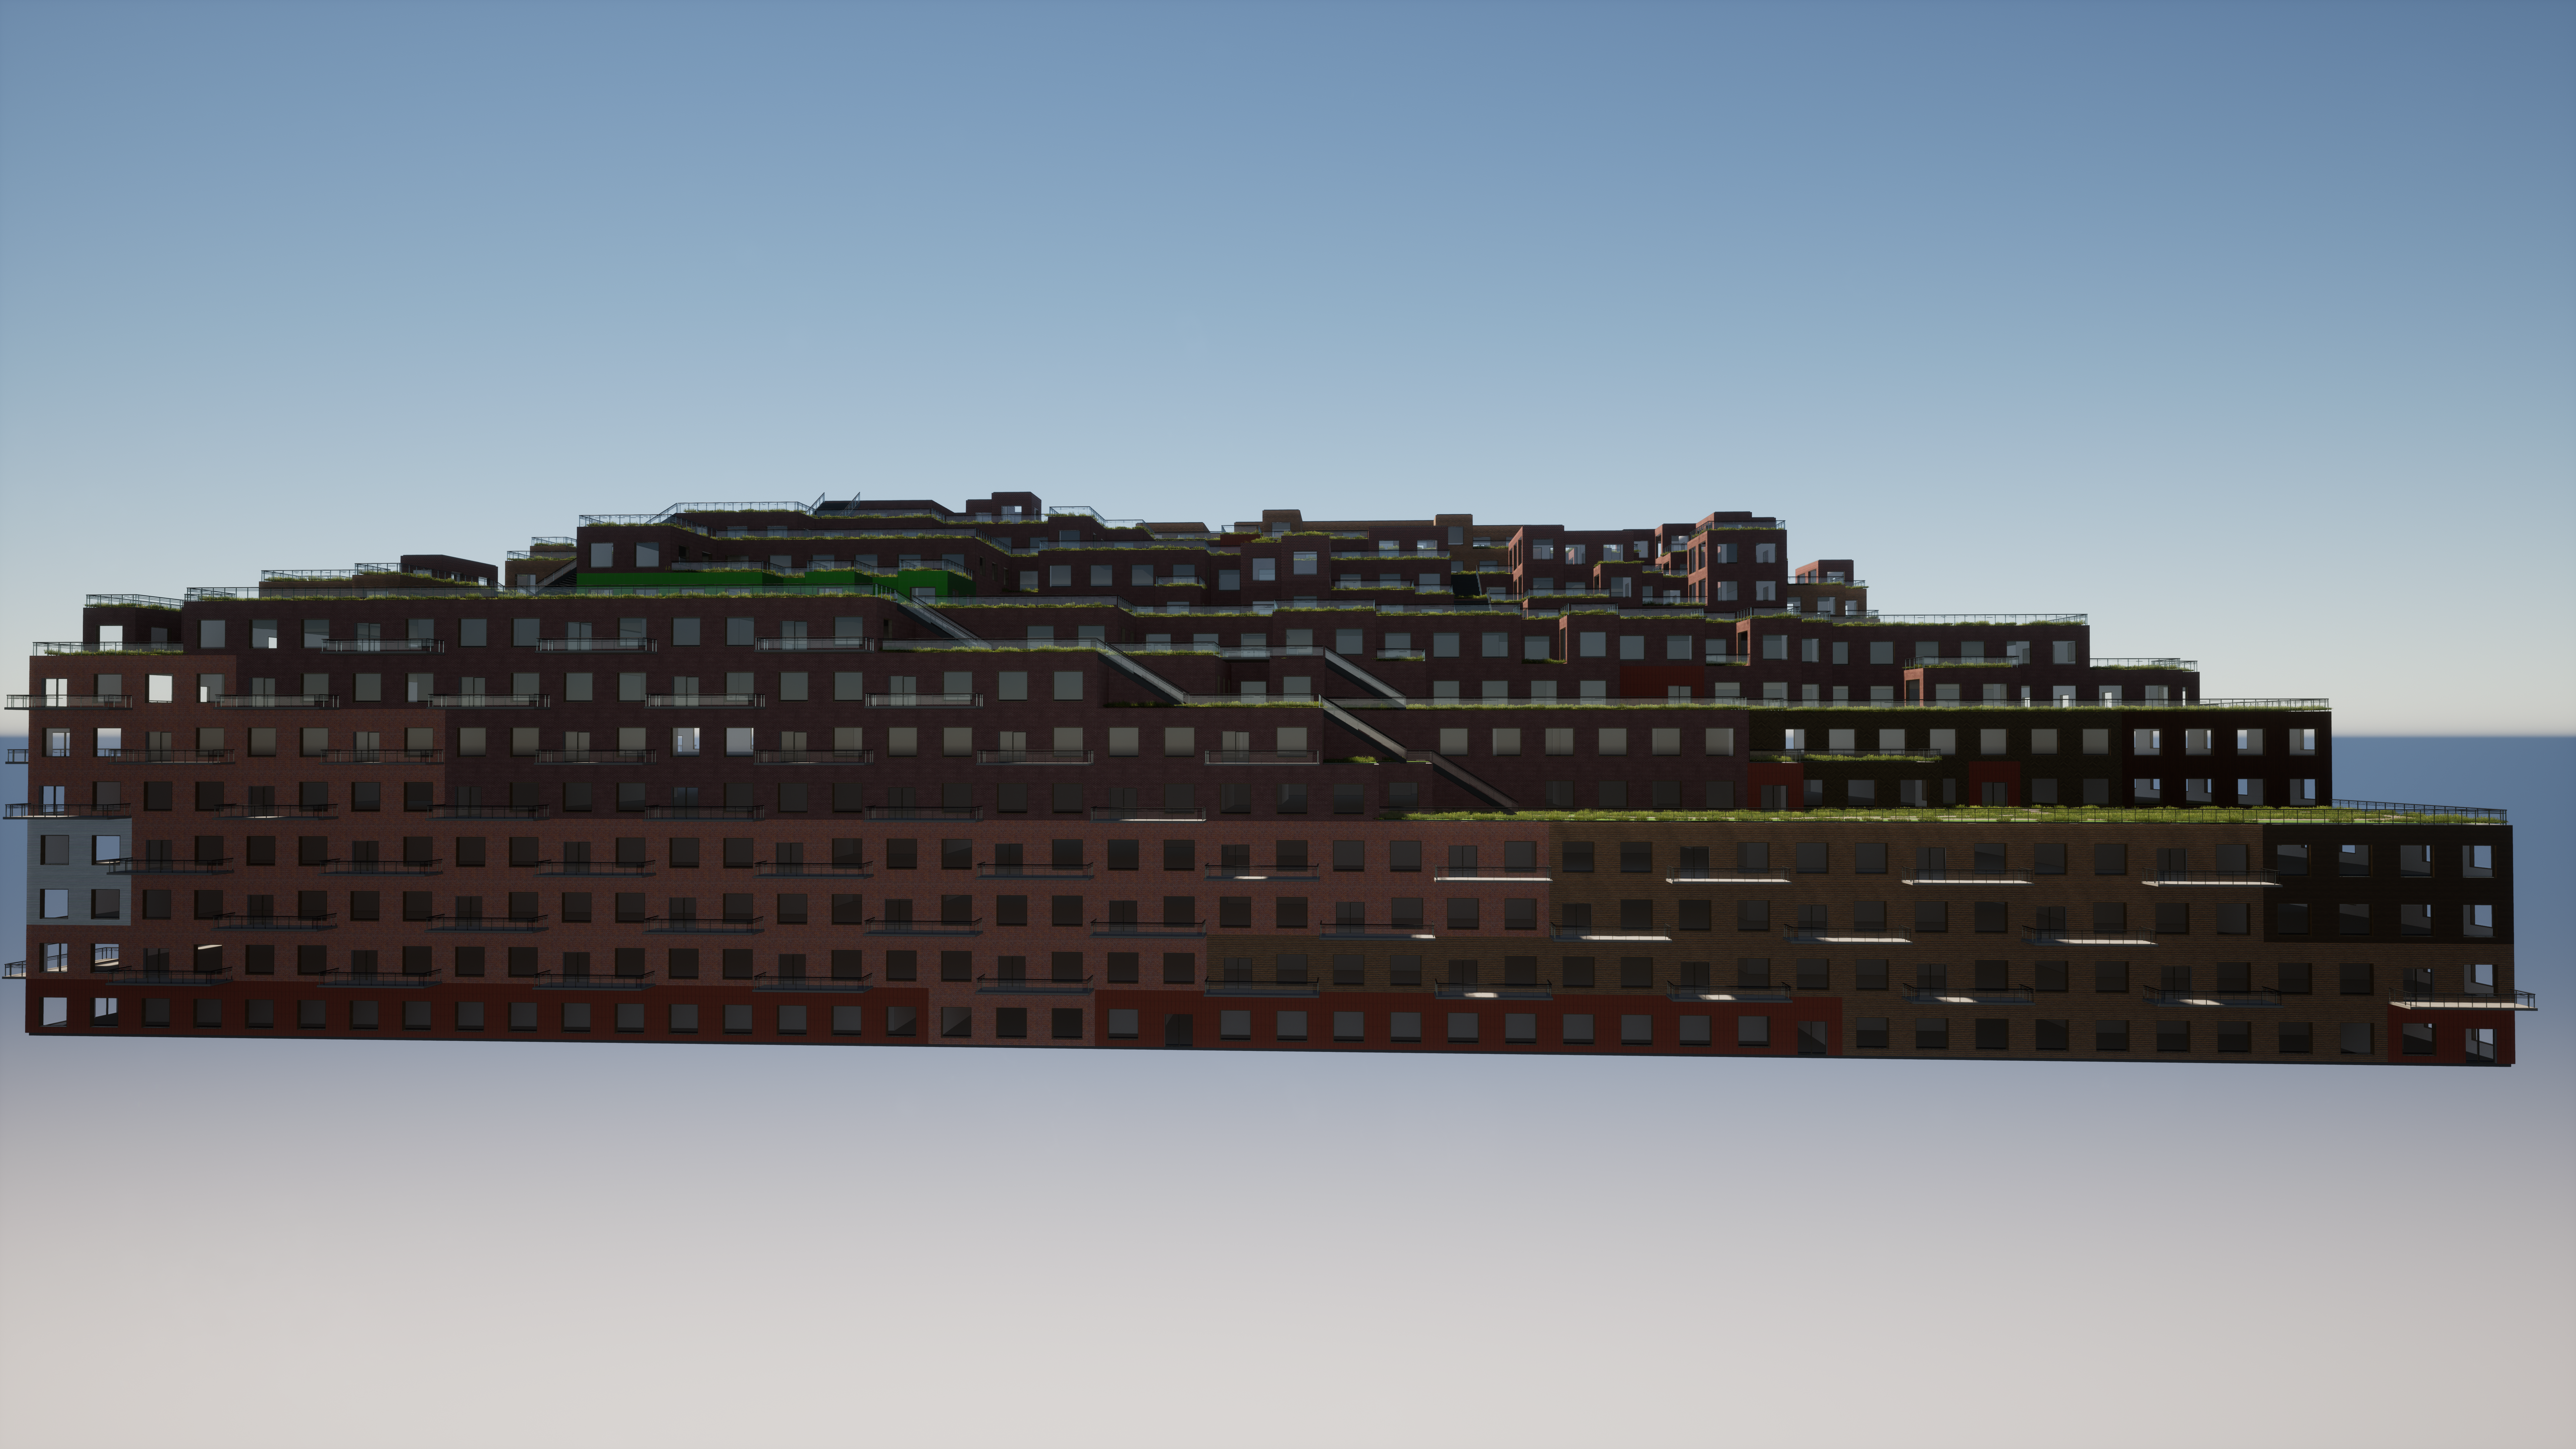
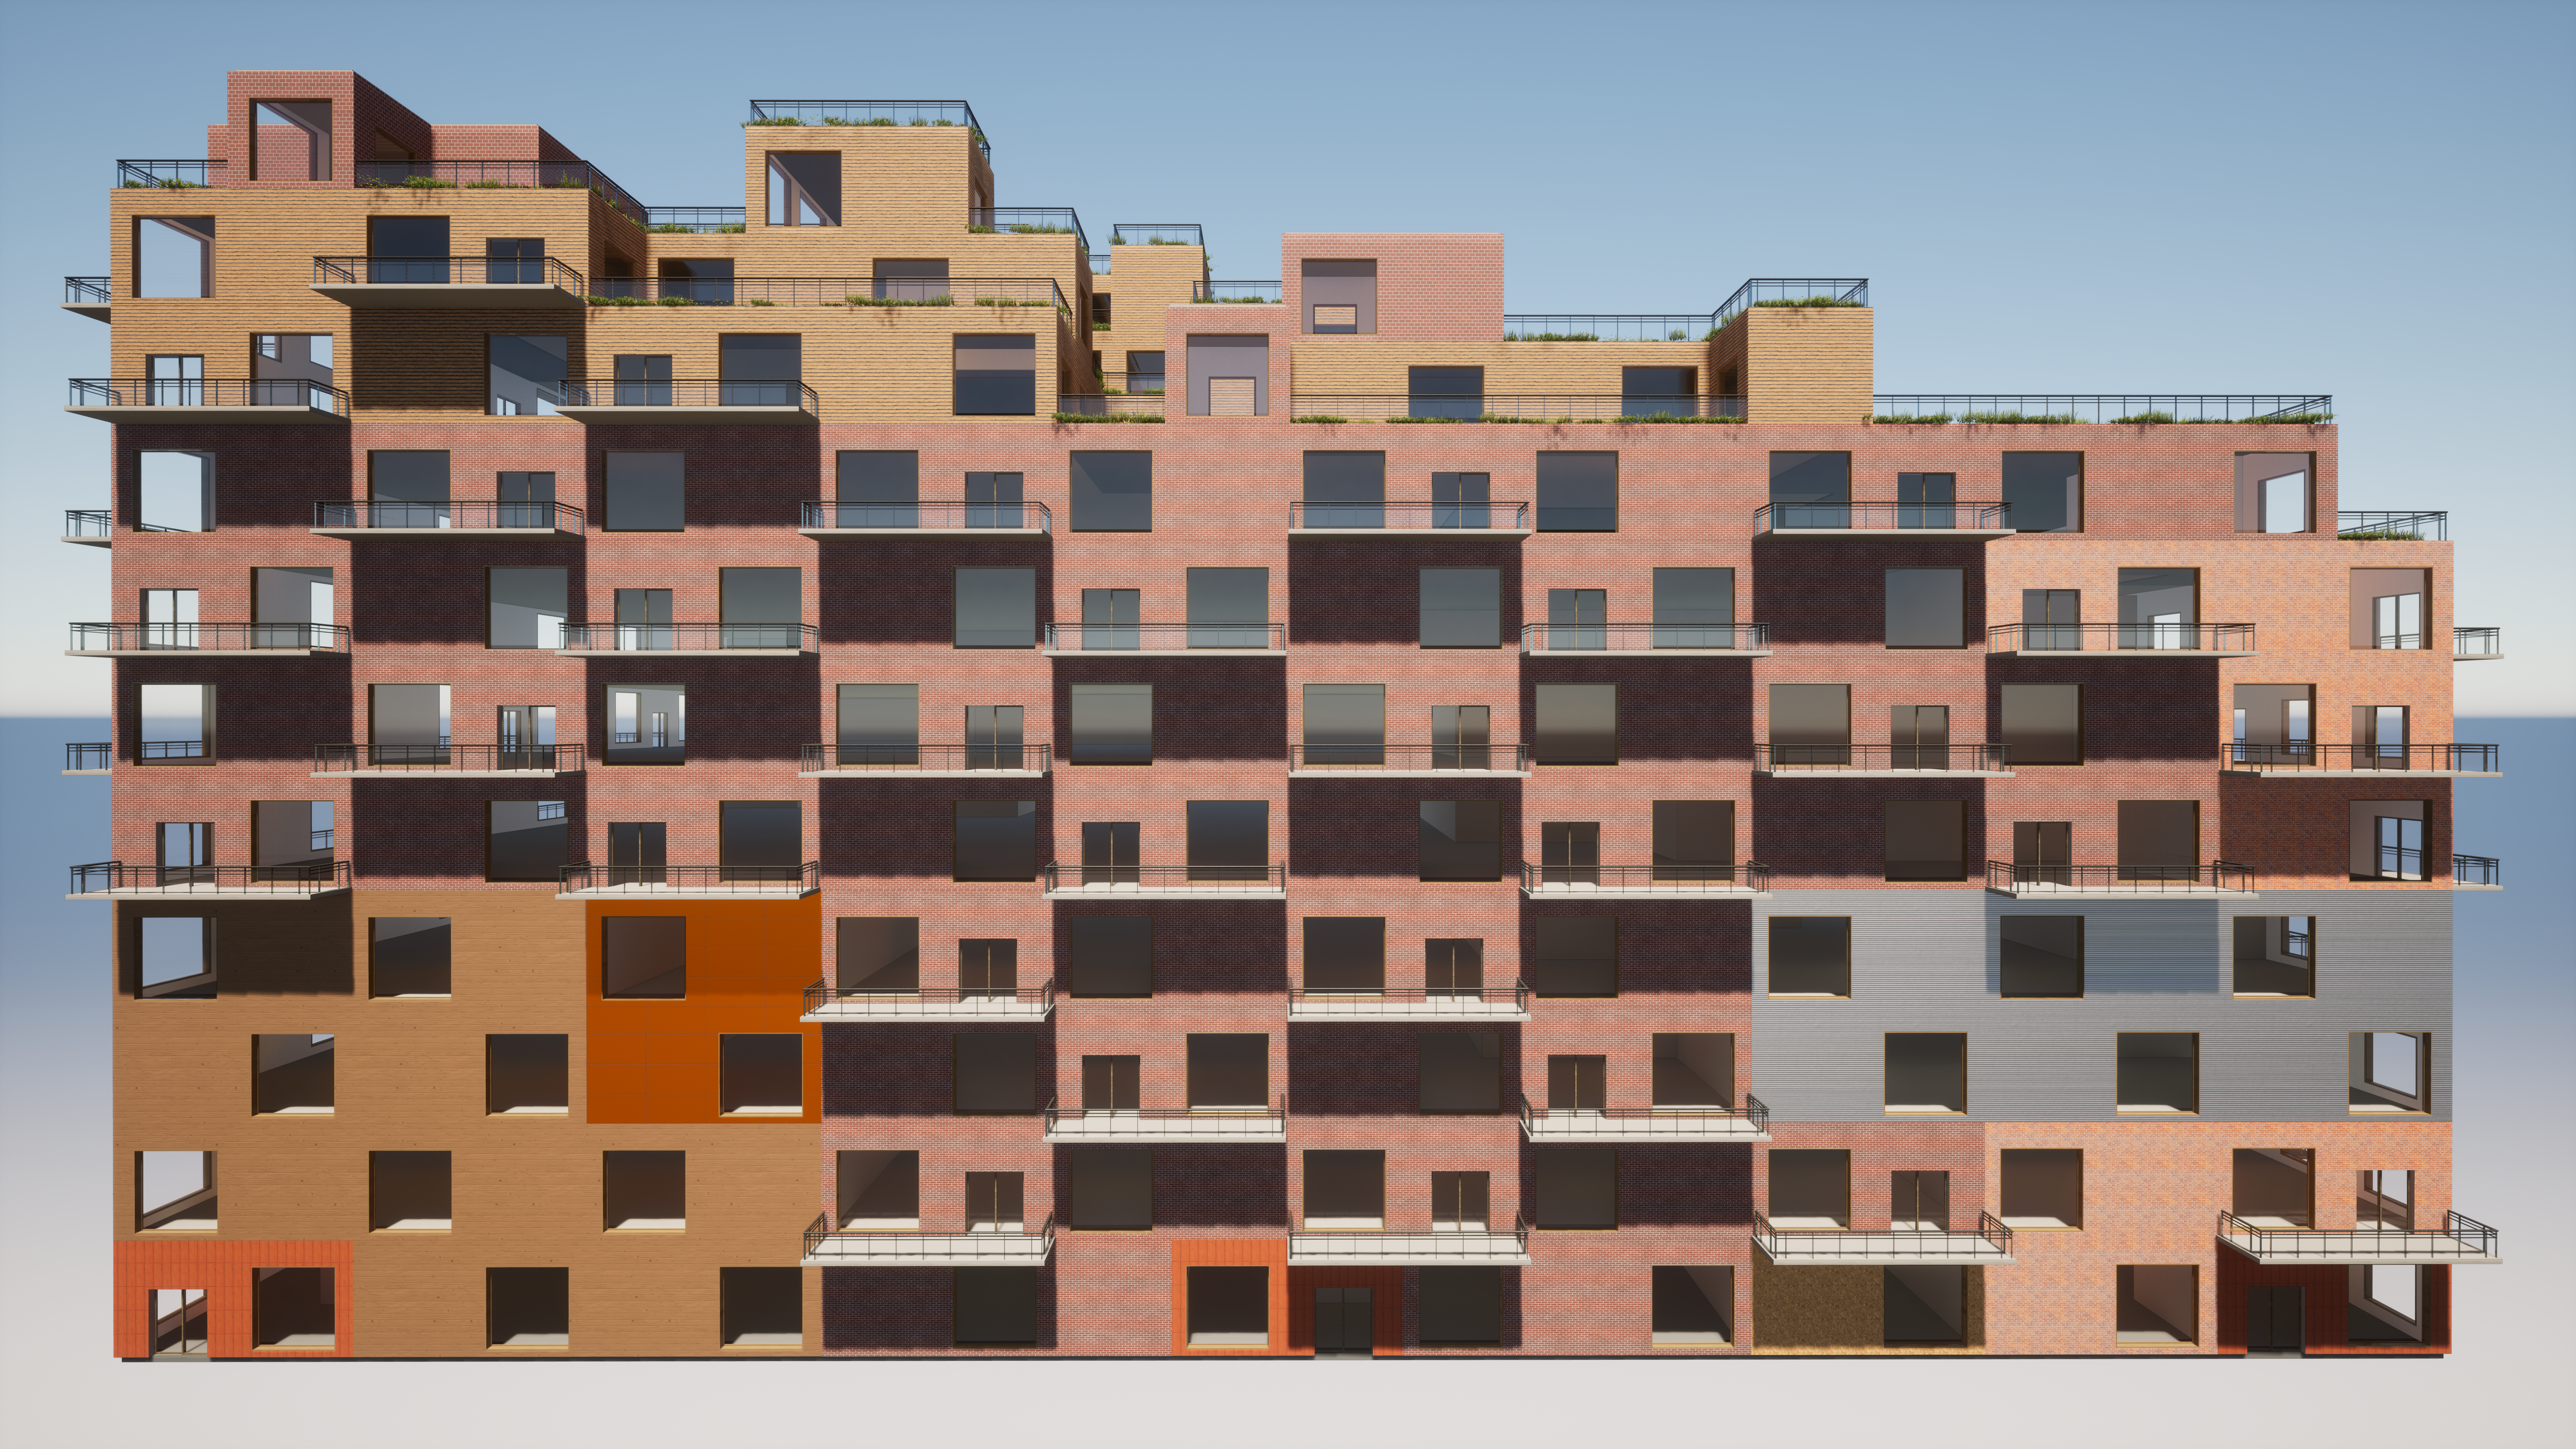
As you can see in the [urban plan], the rooftop decreases in hight toward the north. On the green roof a path is created to get your daily exercise and the roof of the top floors are provided by solar panels.
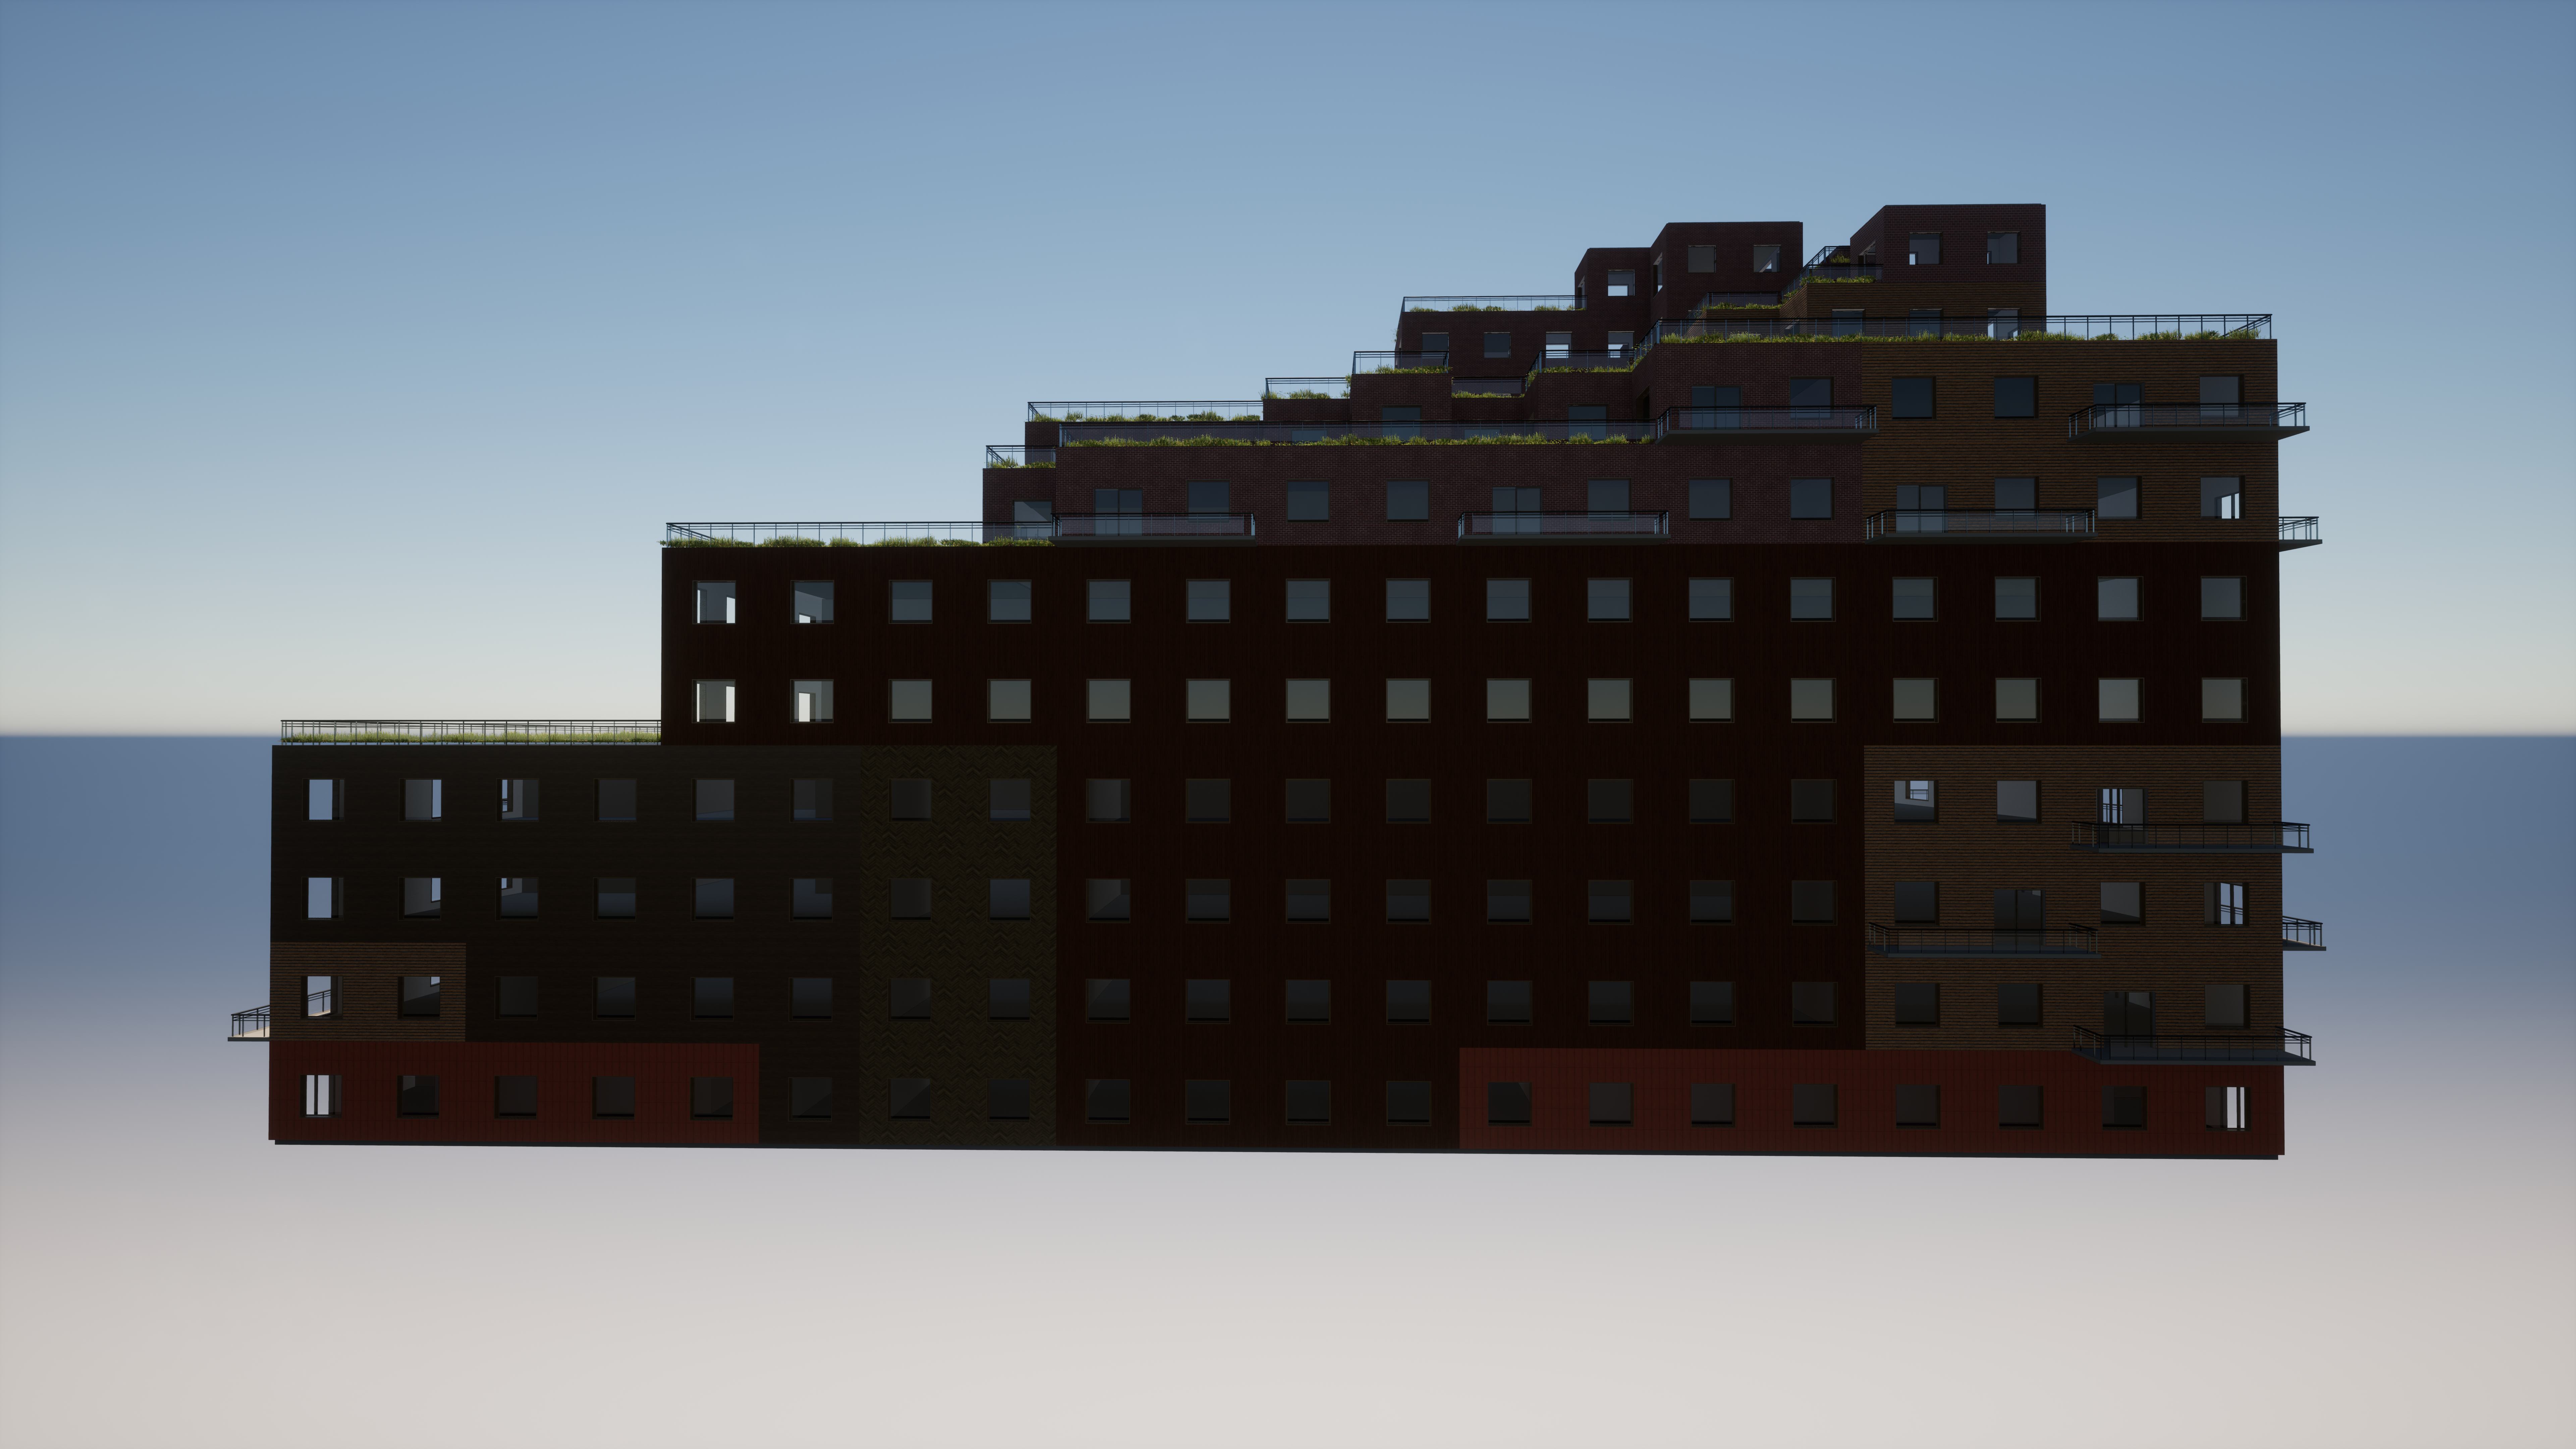
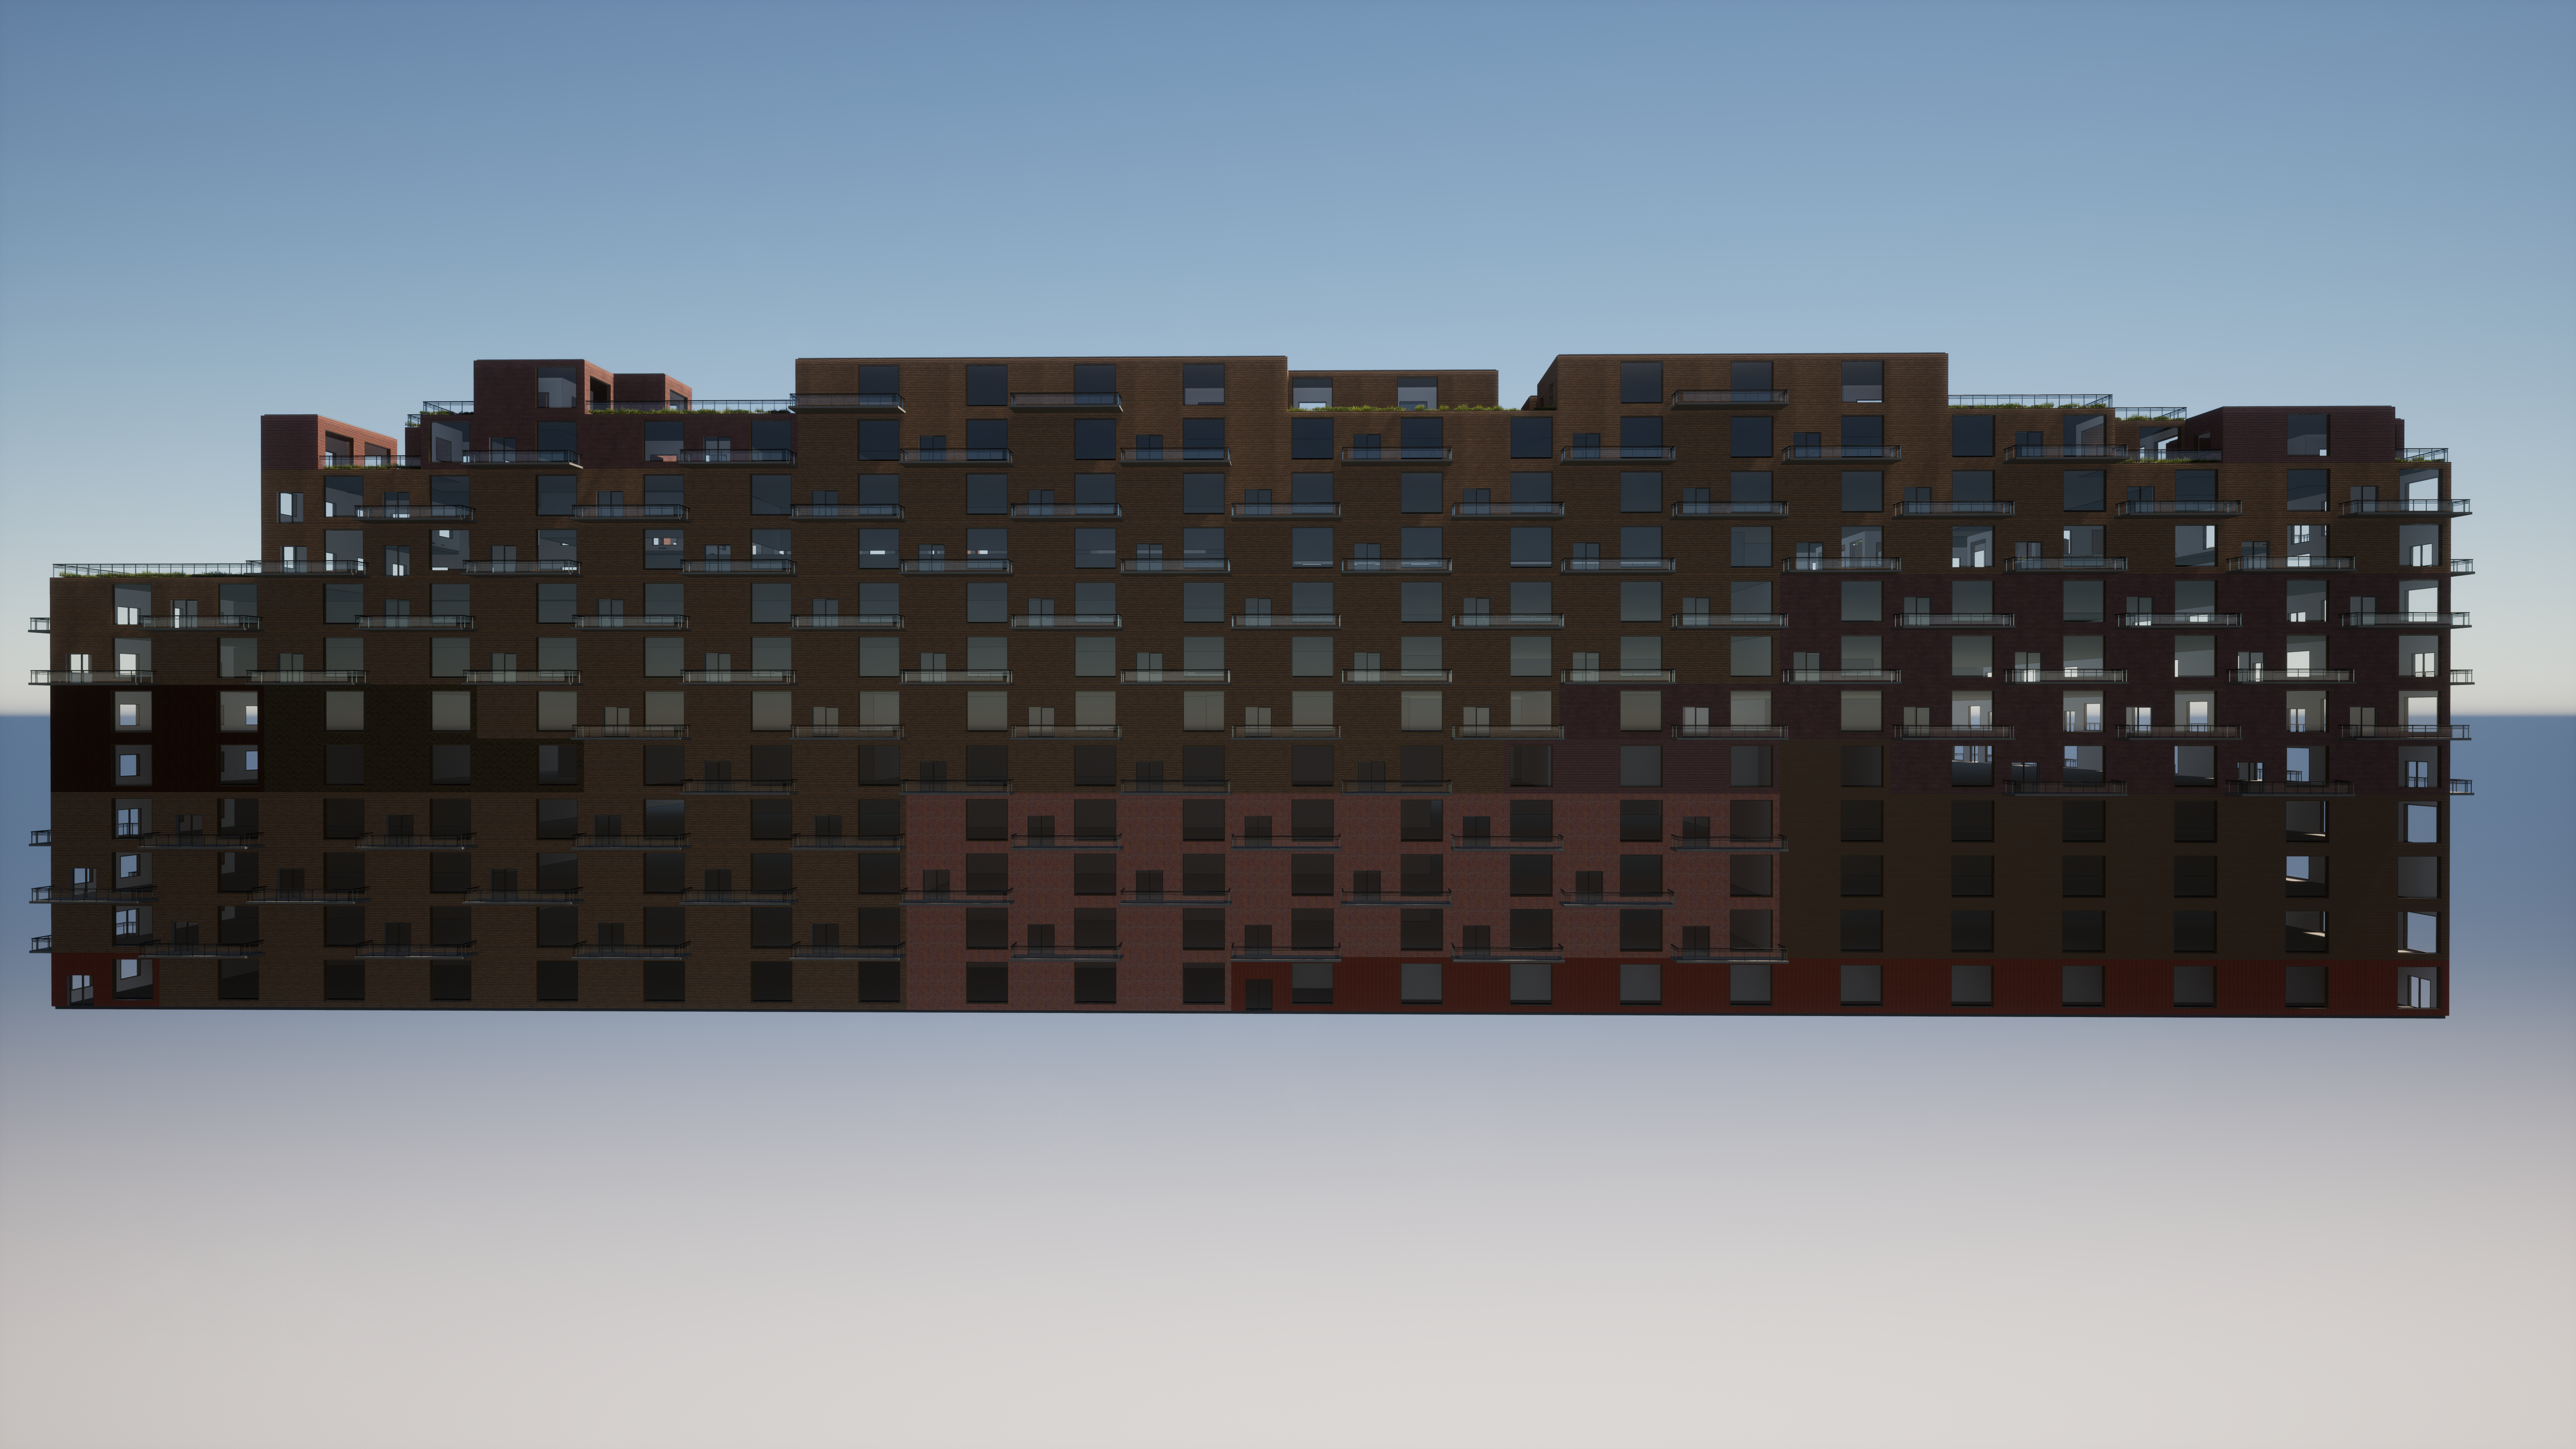
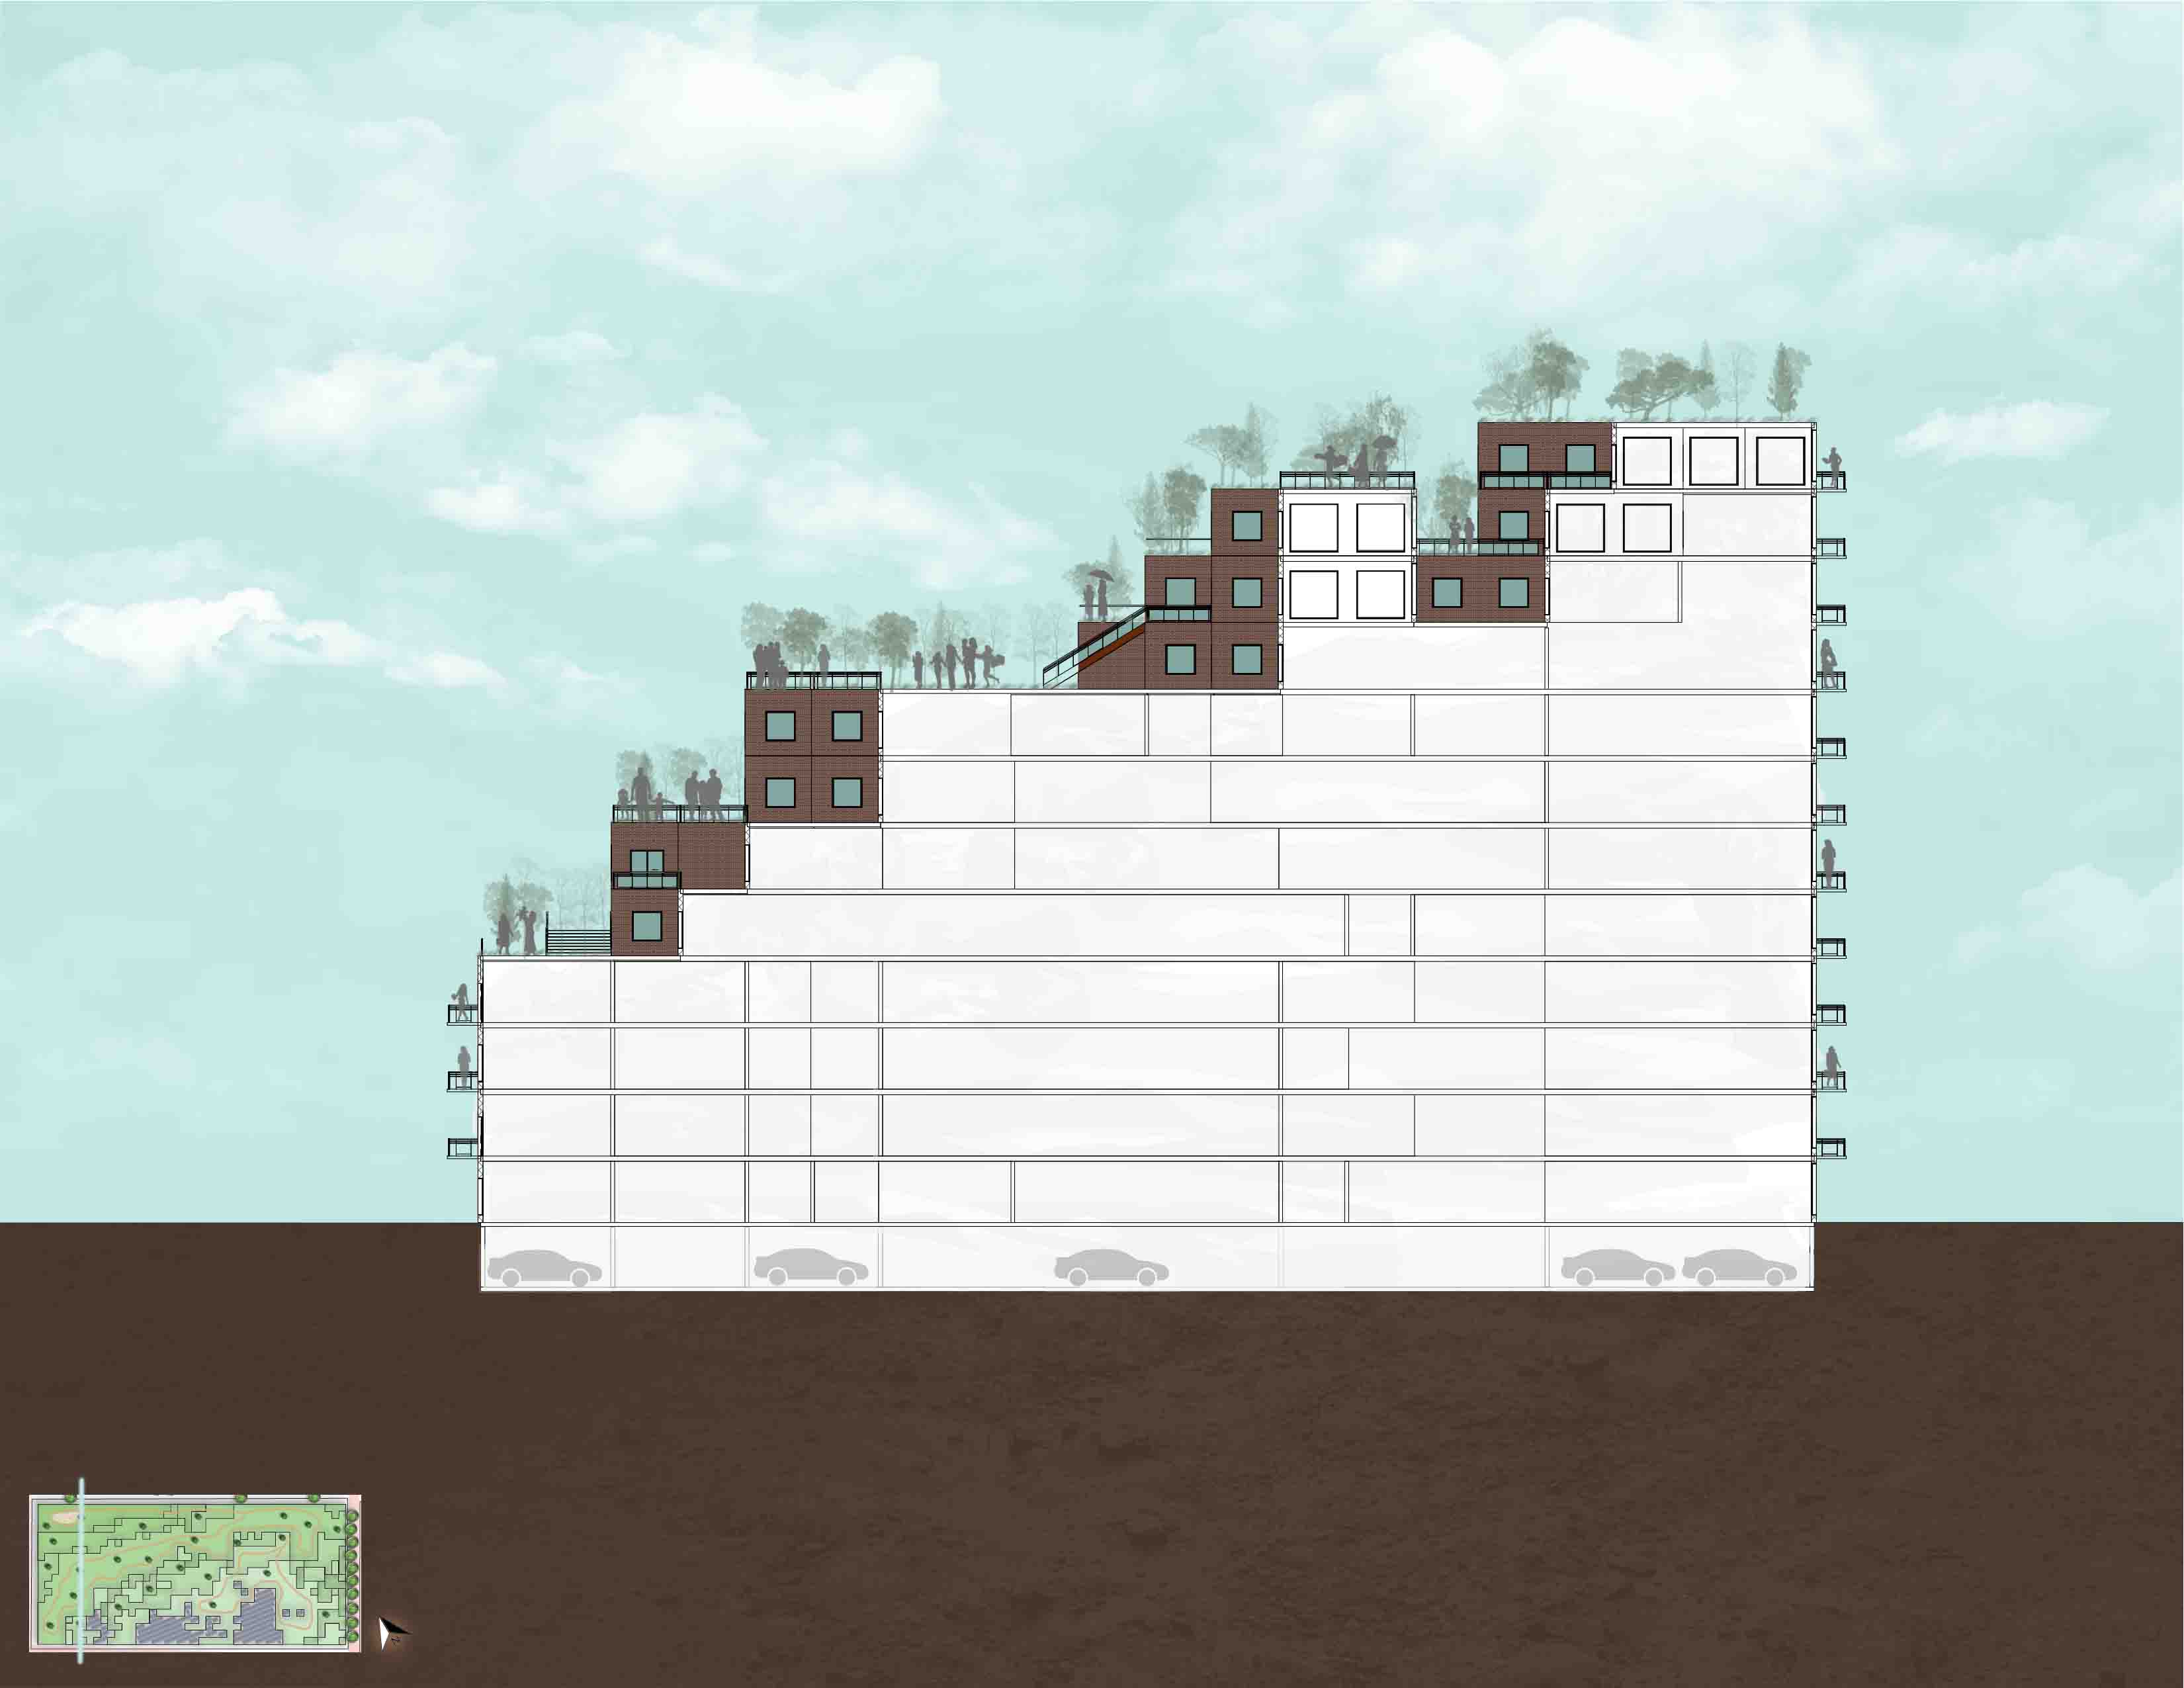
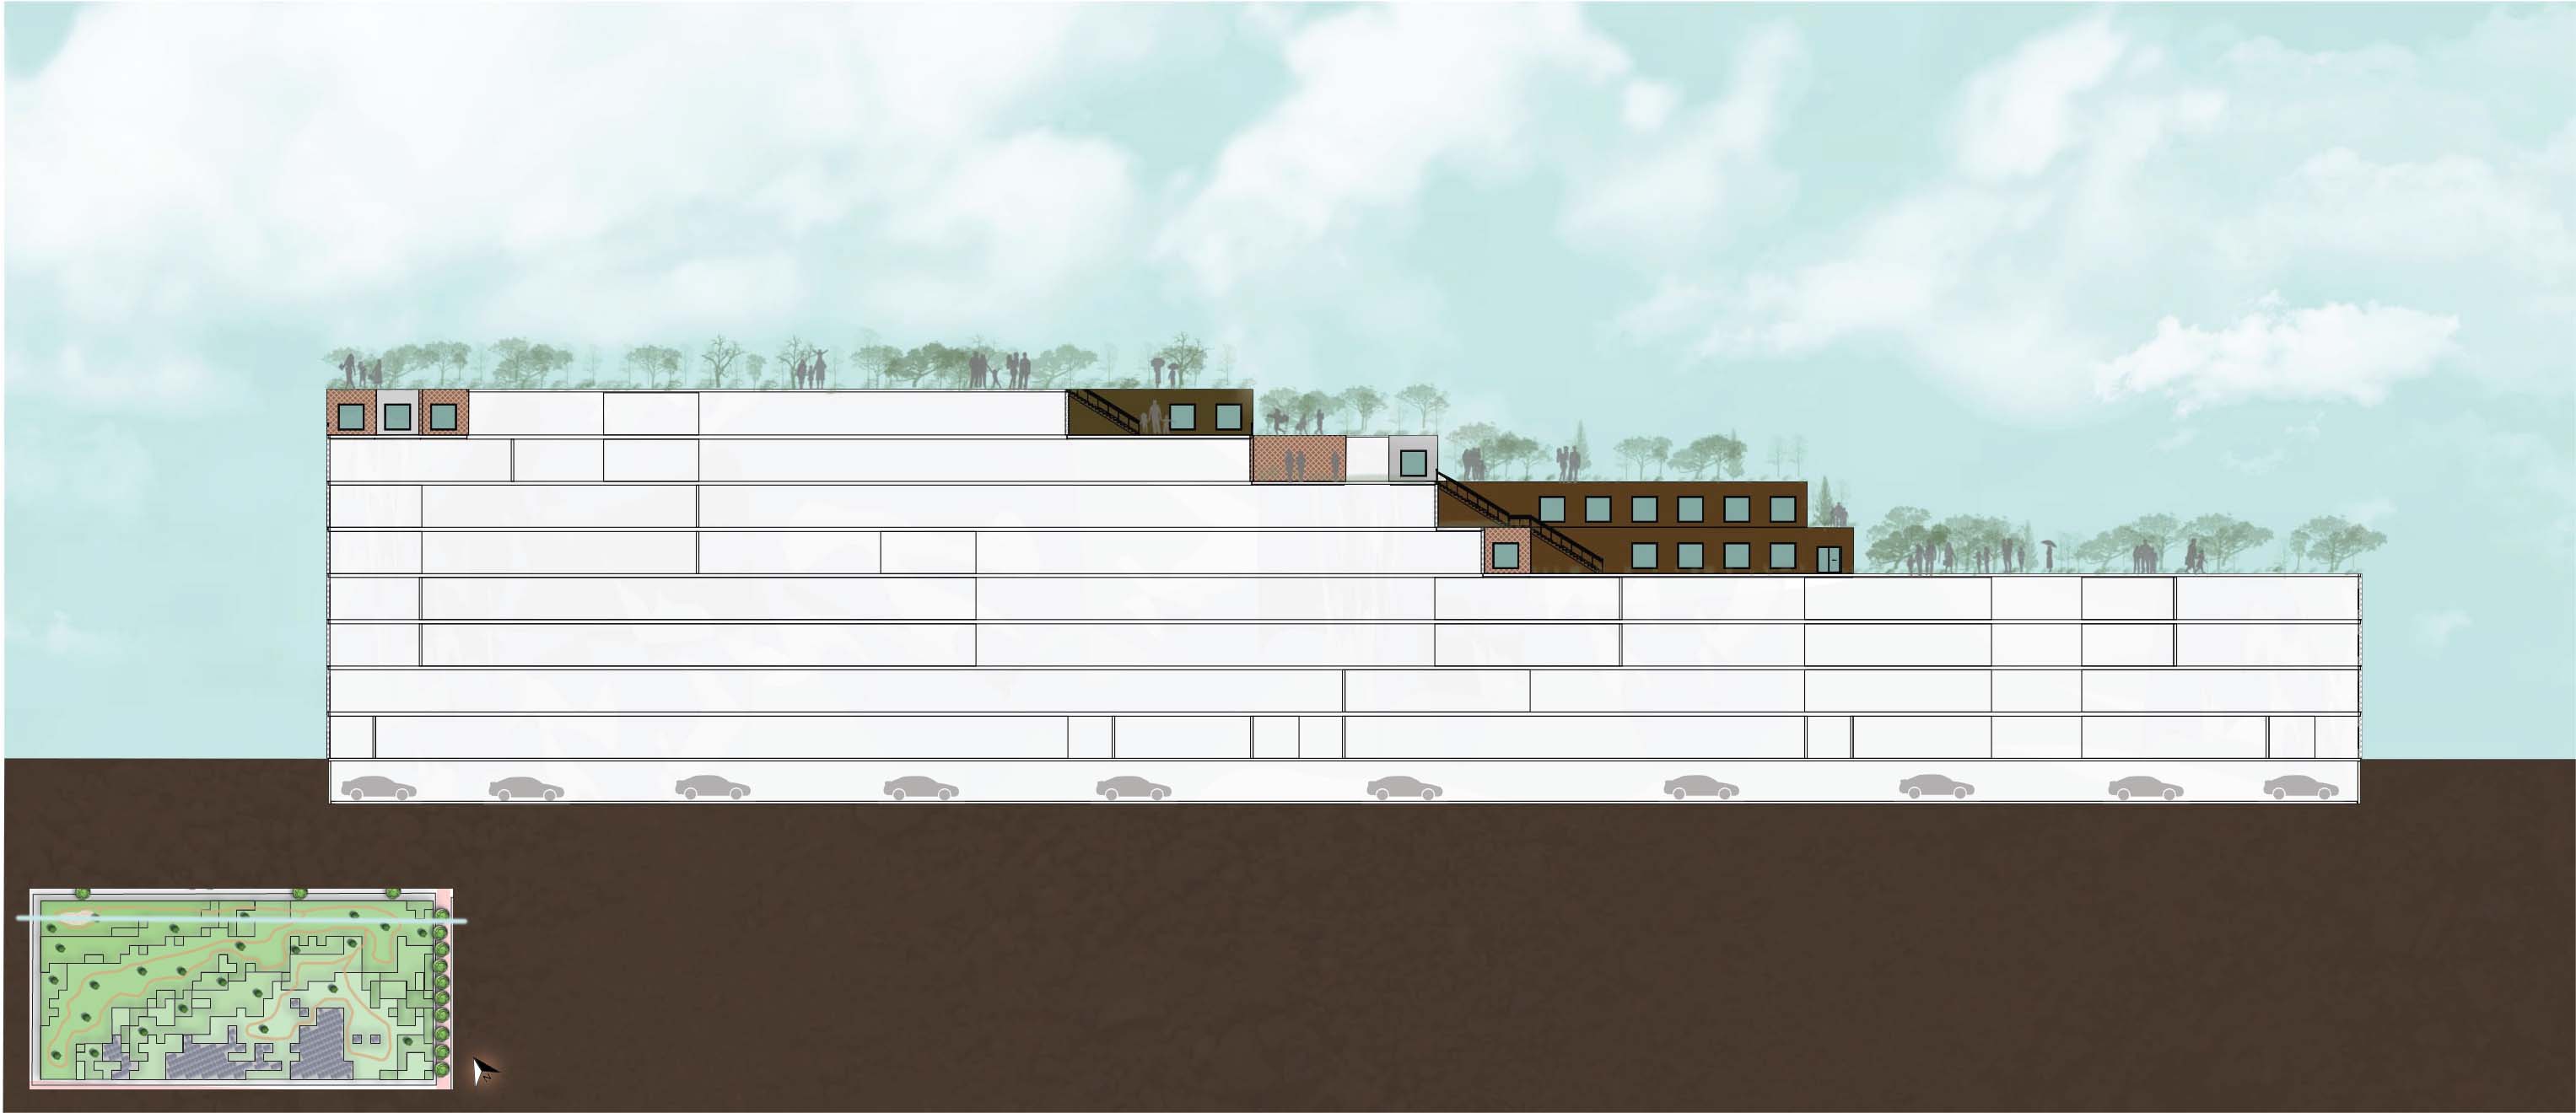
Sections
Facades